Einleitung
You will need to have a replacement propane heating element for your Char-Broil Grill on hand before starting this replacement guide. When the heating element on the Char-Broil Grill begins to rust, the holes on the heating element grow larger as the metal rusts off. This makes the heat inconsistent and can cause other, further damage to the grill, making this replacement necessary.
Was du brauchst
-
-
Remove the lid by pulling straight up on its attached handle.
-
Next remove the top grill grate.
-
Grab one side of the grate.
-
Pull up on that side till you can get your hand under the edge.
-
Using both hands fully remove the grate.
-
-
-
-
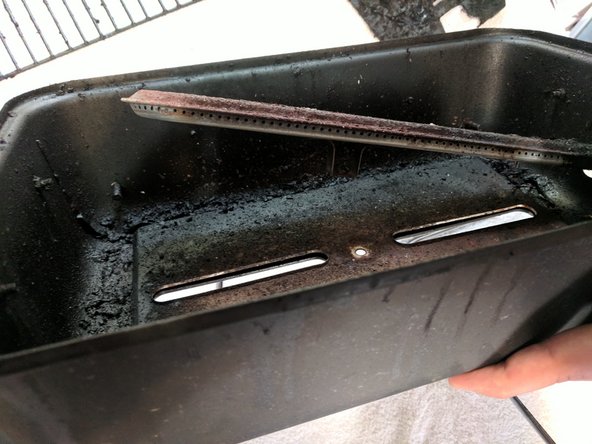
Remove the heat distribution plate.
-
Place a hand on either side of the heat distribution plate and pull up.
-
-
-
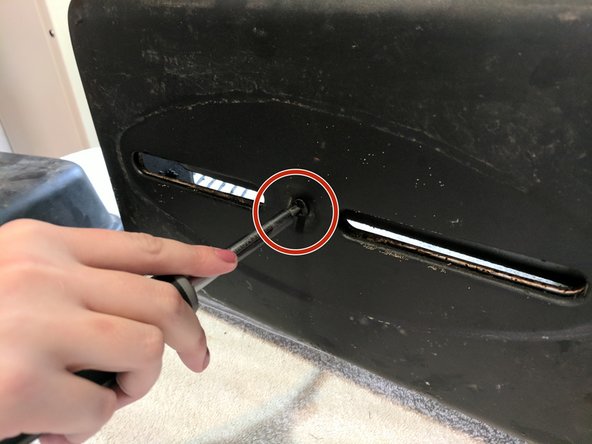
Turn the stove on its side so that the bottom is easily accessible.
-
There is a single Phillips Head screw to remove in the center of the stove's bottom.
-
-
-
Before you can remove the heating element full you need to unscrew the propane vale on the exterior of the stove.
-
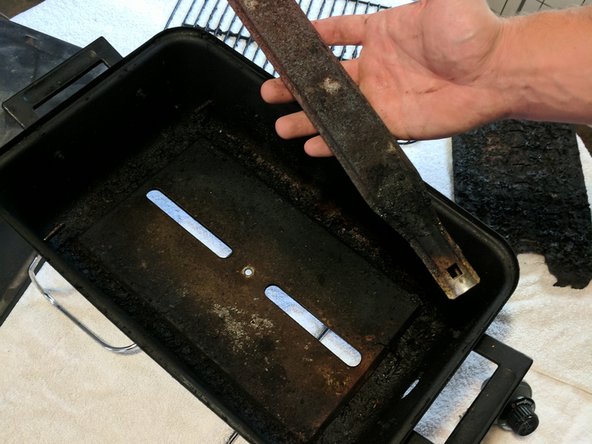
Pull up on the heating element, it should be free floating.
-
After the propane valve is unscrewed lift the old heating element out of the stove and replace it with the new part.
-


To reassemble your device, follow these instructions in reverse order.
To reassemble your device, follow these instructions in reverse order.
Rückgängig: Ich habe diese Anleitung nicht absolviert.
2 weitere Nutzer:innen haben diese Anleitung absolviert.
Team

Michigan Tech, Team S5-G1, Galliah Fall 2017 Mitglied von Michigan Tech, Team S5-G1, Galliah Fall 2017
MTU-GALLIAH-F17S5G1
3 Mitglieder
2 Anleitungen geschrieben