Was du brauchst
-
-
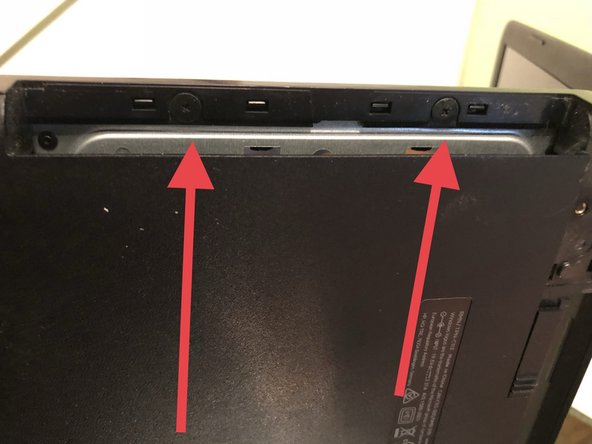
rimuovere batteria muovendo verso interno i punti segnati con la freccia
-
-
-
Rimuovere i piedi di gomma posteriori che sono incollati,eventualmente usare una fonte di calore come un phon
-
Con un cacciavite a croce rimuovere le 2 viti sottostanti ai tappo di gomma
-
-
-
-
Con uno strumento sottile aiutarsi per rimuovere la tastiera
-
Fare attenzione perché è collegata al cavo,quindi sganciare il connettore
-
-
-
Con aiuto di strumenti sottili è possibile togliere la cover superiore che adesso è totalmente libera da viti e soltanto agganciata attraverso incastro
-
-
-
Rimuove 2 viti di fissaggio hardisck
-
Estrarre il disco lateralmente
-
Rimuovere il supporto togliendo le 2 viti per metterlo sul nuovo hardisck
-


Per rimontare il dispositivo, segui queste istruzioni in ordine inverso.
Per rimontare il dispositivo, segui queste istruzioni in ordine inverso.
Rückgängig: Ich habe diese Anleitung nicht absolviert.
8 weitere Nutzer:innen haben diese Anleitung absolviert.

2 Kommentare
I did a similar clone hd to ssd replacement on Hewlett Packard 15-bs058ca Laptop. It was a full bottom removal with the components attached to the bottom of the keyboard and screen combo. There were hidden screws under the rubber feet. A lot of finicky spludger work all around the outer shell was needed to pry the bottom from the top. The good thing was there are no cables between the bottom shell and the rest of the laptop.
After that the hard-disk change was similar to the one above.
HP does have a manual (http://h10032.www1.hp.com/ctg/Manual/c05...) but it does not mention the care needed to pry apart the shell.
Next time I do this I will take photos and up load them.