Einleitung
The RAM is a small memory chip located within the device. This guide will show the user how to properly remove the Sony Vaio Fit SVF15N26CXB RAM memory chip. Use the project mat to keep the screws organized.
Was du brauchst
-
-
Remove the following ten screws from the bottom case of the laptop:
-
Two 6.5mm Phillips #00 Phillips screws.
-
Four 8.95mm Phillips #00 screws.
-
Four 6.25mm Phillips #00 screws.
-
-
-
Use a plastic opening tool to separate the bottom cover from the laptop.
-
Lift the lower cover and pull away from the laptop.
-
-
-
-
Remove the eight Phillips #00 screws from the battery:
-
Six 4.65mm screws.
-
Two 4.65mm screws.
-
-
-
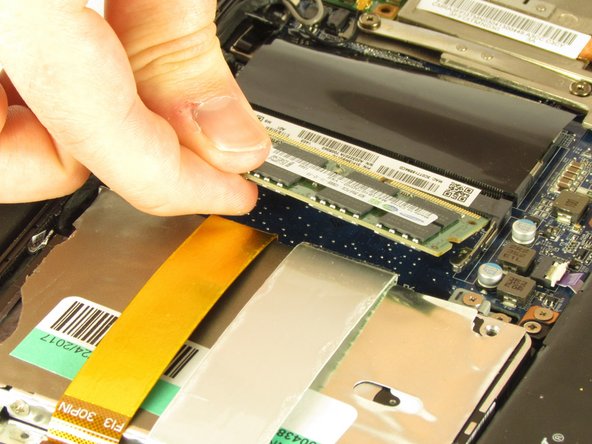
Gently push the silver heads outwards on either side of the RAM chip to release it from the slot.
-
Pull the RAM chip gently out of the slot.
-


To reassemble your device, follow these instructions in reverse order.
To reassemble your device, follow these instructions in reverse order.
Rückgängig: Ich habe diese Anleitung nicht absolviert.
Ein:e weitere:r Nutzer:in hat diese Anleitung absolviert.
Team

USF Tampa, Team S2-G4, Nance Spring 2018 Mitglied von USF Tampa, Team S2-G4, Nance Spring 2018
USFT-NANCE-S18S2G4
4 Mitglieder
12 Anleitungen geschrieben