Zum Hauptinhalt wechseln

Dell Inspiron 15R SE 7520 Hard Drive Replacement

Was du brauchst

  1. Dell Inspiron 15R SE 7520 Hard Drive Replacement, Remove the Screws: Schritt 1, Bild 1 von 1
    • WARNING: Before working inside your computer, read the safety information that shipped with your computer and follow the steps in "Before You Begin".

    • Remove the screws that secure the hard-drive assembly to the computer base.

  2. Dell Inspiron 15R SE 7520 Hard Drive Replacement, Sliding the Hard Drive: Schritt 2, Bild 1 von 1
    • Using the pull-tab, slide the hard-drive assembly toward the back of the computer to disconnect the hard-drive assembly from the connector on the system board.

  3. Dell Inspiron 15R SE 7520 Hard Drive Replacement, Lifting the Hard-Drive Assembly: Schritt 3, Bild 1 von 1
    • Lift the hard-drive assembly out of the computer base.

  4. Dell Inspiron 15R SE 7520 Hard Drive Replacement, Remove the Screws: Schritt 4, Bild 1 von 1
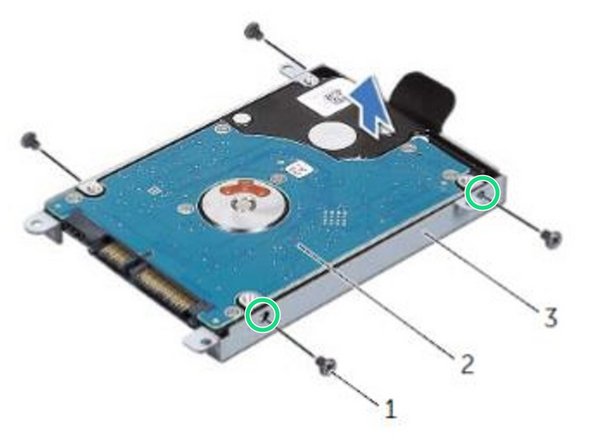
    • Remove the screws that secure the hard-drive bracket to the hard drive.

  5. Dell Inspiron 15R SE 7520 Hard Drive Replacement, Lifting the Hard Drive: Schritt 5, Bild 1 von 2 Dell Inspiron 15R SE 7520 Hard Drive Replacement, Lifting the Hard Drive: Schritt 5, Bild 2 von 2
    • Lift the hard drive off the hard-drive bracket.

  6. Dell Inspiron 15R SE 7520 Hard Drive Replacement, Align the Screw Holes: Schritt 6, Bild 1 von 1
    • Align the screw holes on the hard drive-bracket with the screw holes on the NEW hard drive.

  7. Dell Inspiron 15R SE 7520 Hard Drive Replacement, Replace the Screws: Schritt 7, Bild 1 von 1
    • Replace the screws that secure the hard-drive bracket to the hard drive.

  8. Dell Inspiron 15R SE 7520 Hard Drive Replacement, Place the Hard-Drive Assembly: Schritt 8, Bild 1 von 1
    • Place the hard-drive assembly on the computer base.

  9. Dell Inspiron 15R SE 7520 Hard Drive Replacement, Sliding the Hard Drive Assembly: Schritt 9, Bild 1 von 1
    • Using the pull-tab, slide the hard-drive assembly toward the front of the computer, to connect the hard-drive assembly to the connector on the system board.

  10. Dell Inspiron 15R SE 7520 Hard Drive Replacement, Replace the Screws: Schritt 10, Bild 1 von 1
    • Replace the screws that secure the hard-drive assembly to the computer base.

Ziellinie

Ein:e weitere:r Nutzer:in hat diese Anleitung absolviert.

Terrence15

Mitglied seit: 12/18/17

79.091 Reputation

441 Anleitungen geschrieben

Team

RampUP America, Inc. Mitglied von RampUP America, Inc.

Community

42 Mitglieder

1.985 Anleitungen geschrieben

0 Kommentare

Kommentar hinzufügen

Seitenaufrufe:

Letzte 24 Stunden: 0

Letzte 7 Tage: 0

Letzte 30 Tage: 1

Insgesamt: 1,003