Einleitung
Diese Anleitung ist mit allen Varianten des TI-84 Plus CE und TI-83 Premium CE kompatibel.
Die meisten Probleme lassen sich mit mindestens einem dieser Schritte beheben, allerdings können dabei Daten im RAM oder ROM (Archiv) Ihres Rechners gelöscht werden. Um Datenverluste zu vermeiden, sollten Sie eine Sicherungskopie Ihres Taschenrechners auf Ihrem Computer erstellen oder alle wichtigen Informationen archivieren.
Bitte beachten Sie, dass jeder Schritt eine eigene Lösung darstellt. Sie müssen nicht jeden Schritt ausführen, wenn Ihr Rechner wieder funktioniert.
Was du brauchst
Einführungsvideo
-
-
Einige Probleme können einfach durch einen Neustart behoben werden.
-
Drücken Sie [2nd].
-
Drücken Sie [on].
-
Der Taschenrechner sollte jetzt ausgeschaltet sein.
-
Drücken Sie [on], um ihn wieder einzuschalten.
-
-
-
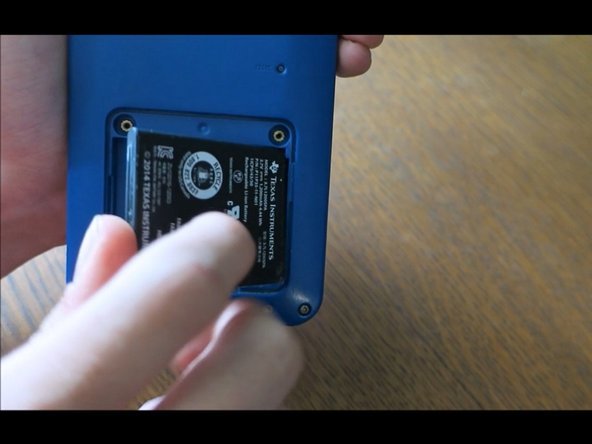
Nehmen Sie die Schiebehülle ab und drehen Sie den Rechner auf die Rückseite.
-
Nehmen Sie einen Bleistift oder einen dünnen Gegenstand und halten Sie die Reset-Taste auf der Rückseite des Rechners mindestens 2 Sekunden lang gedrückt, bevor Sie sie loslassen.
-
Nach ein oder zwei Sekunden sollte Ihr Taschenrechner "RAM Cleared" anzeigen.
-
-
-
Siehe diese Anleitung für Anweisungen zum Entfernen der Batterie.
-
Legen Sie die Batterie nach ein paar Sekunden wieder ein.
-
Ihr Rechner sollte sich automatisch einschalten und den Bildschirm "RAM Cleared" anzeigen.
-
-
-
-
Install TI Connect CE. (If you already have it installed, you can skip this step)
-
If you are running either MacOS or Windows, go to TI's website and download TI Connect CE.
-
If you are running Linux, install TiLP.
-
Open TI Connect CE.
-
Connect your calculator to your computer via a USB to mini USB adapter.
-
-
-
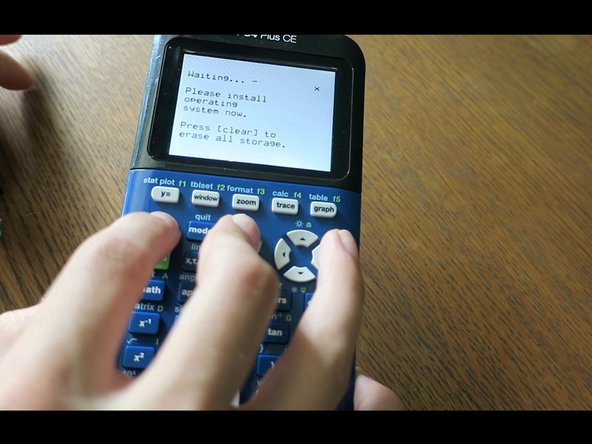
Press and hold [2nd] and [del].
-
Turn the calculator over; press and release the 'reset' button.
-
If you did it correctly, you will see a 'Install OS now' screen. If you do not see this screen, try again.
-
-
-
If you know what OS your calculator was using, then you can go ahead and search for it on TI-Planet. Otherwise, attempt to install OS 5.4.0 first. If it fails, then you should install the latest OS from TI's website.
-
Download and install OS 5.4.0: TI-84 Plus CE | TI-83 Premium CE.
-
If OS 5.4.0 is not supported, then download the latest OS: TI-84 Plus CE | TI-83 Premium CE
-
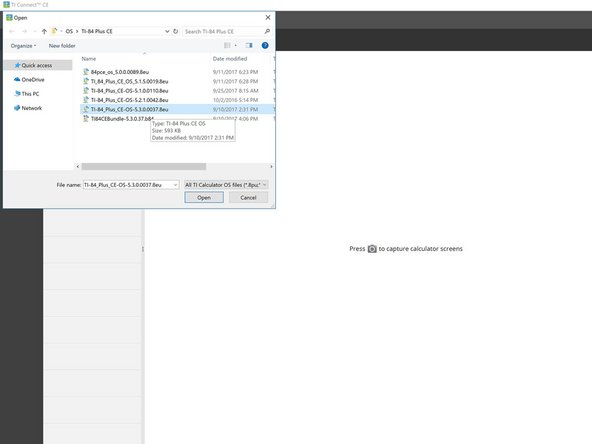
In TI Connect CE, click on 'Actions', then 'send OS/Bundle to calculators...'
-
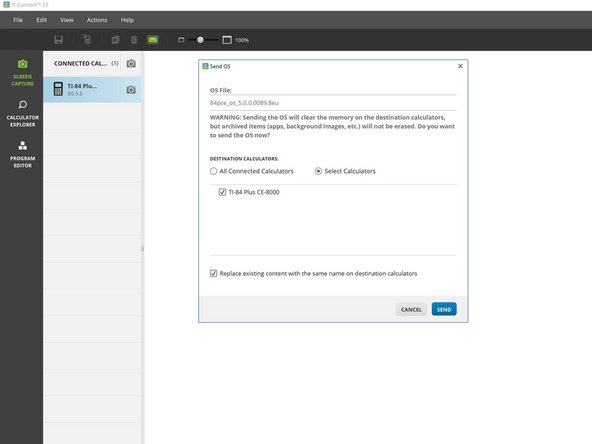
Navigate to where you saved the OS and select it. It will take a second for TI-Connect CE to load. Once the popup appears, click 'send'.
-
-
-
Wait for the OS to send and verify.
-
Once finished, you should see a 'RAM cleared' screen. Your calculator is now finished installing the OS.
-


Ihr Taschenrechner sollte jetzt funktionieren.
Wenn weiterhin Probleme auftreten, wenden Sie sich an den Texas Instruments-Support:
- Website: https://education.ti.com/en/customer-sup...
- Email: ti-cares@ti.com
- Call: 1-800-TI-CARES (gebührenfrei)
Ihr Taschenrechner sollte jetzt funktionieren.
Wenn weiterhin Probleme auftreten, wenden Sie sich an den Texas Instruments-Support:
- Website: https://education.ti.com/en/customer-sup...
- Email: ti-cares@ti.com
- Call: 1-800-TI-CARES (gebührenfrei)
Rückgängig: Ich habe diese Anleitung nicht absolviert.
9 weitere Nutzer:innen haben diese Anleitung absolviert.
Besonderer Dank geht an diese Übersetzer:innen:
100%

shingle hilft uns, die Welt in Ordnung zu bringen! Wie kann ich mithelfen?
Hier starten ›

18 Kommentare
My calculator has not turned on for the past week. I have tried multiple USB cables and power sources, a (charged, working) battery, the On+Ac+Reset trick, and all of the techniques mentioned in this guide. The calculator still displays nothing on the screen, and windows, Ubuntu Linux, and MacOS all refuse to recognize the calculator. Drivers can’t be installed, and I even attempted a jerry-rigged USB connection using a few alligator clips (bypassing the usb connector in the calculator). Any advice? I’ll take any at this point.
@the_pimaster Ok, just checking, you do have a TI-84 Plus CE? There are similar calculators out there that have different key combos. Also, what do you mean by On+Ac+Reset? The correct combination is [2nd]+[del]+Reset. I’m surprised the computer doesn’t even recognize the calculator is connected, does the LED by the USB port turn on when you connect it to power? If so, what color?
What were you doing when the calculator was last working? Did you accidentally spill something on it, drop it, or crush it?
@thelastmill Thanks for the quick response! Yes, it is definitely a TI-84 Plus CE. I just tried the 2nd+Del+Reset combo you mentioned, but still no response. Something interesting— The calculator is not showing up in Windows’ device manager nor in driver installation menus (“Unknown USB Device”) but unplugging/re-plugging or hitting the reset button triggers the “new device” sound in Windows 10. When I first plugged in the Calc, the Light by the charging port lit up red. After 2-ish hours charging, it is now green— I am aware that the battery/charging circuit is seperate from the calculator itself, which may be the source of this issue. The calculator was working last week during a math test, during which the screen turned black. The battery was charged to ~80% at the time, and the device was sitting on a desk— no physical damage occurred, and the calculator is only around a year old.
@the_pimaster Sorry it took a lot longer for this one. I’ve been asking some of my friends about this and unfortunately I think your best bet is to contact TI. I’ve never seen a calculator just… die like that before and it’s quite confused me; if I find a solution I’ll be sure to notify you. For now though you can email them at: ti-cares@ti.com or call 1-800-TI-CARES (toll free). I apologize I wasn’t able to help you with this, if TI somehow gets it working again, please inform me how they did it!
So I have an issue, my calculator has had its battery light charger indicator on forever until it dies, that was 4 months ago. Since then I have been constantly having to charge it when I use it since the battery lasts for 2.5 hours off a single charge, but unfortunately, the darn thing would not turn on last night. I have tried every cable, nothing works.
Now for my what I think happened was that I used the wrong wall plug which destroyed the capacitor. Any advice?