Einleitung
Das Moto G7 ist mit einem 3000 mAh Lithium-Ionen-Akku ausgestattet. Wenn der Akku altersschwach geworden ist und seine Ladung rasch verliert, muss er eventuell ausgetauscht werden. Diese Anleitung zeigt, wie das geht.
Hole dir vor Reparaturbeginn Motorolas Rescue and Smart Assistant App. Sie hilft dir beim Backup deines Gerätes und der Diagnose, ob ein Hard- oder Softwarefehler vorliegt.
Das gezeigte Modell ist ein XT1962-1, es sollte aber auch für die Modelle XT1962-4 und XT1962-5 funktionieren.
Vor der Reparatur muss das Gerät ausgeschaltet sein, Ladegerät, Kopfhörer usw. müssen abgetrennt sein. Halte die nötigen Werkzeuge und einen neuen Akku bereit.
Was du brauchst
-
-
Benutze iFixit Öffnungswerkzeuge, um das Display sorgfältig vom Rest des Geräts zu lösen.
-
-
-
Benutze einen Spudger, um vorsichtig die Metallblende zu entfernen, die mit den Schrauben befestigt war.
-
Eine weitere Metallblende ist unter der ersten versteckt. Entferne auch diese vorsichtig mit dem Spudger.
-
-
-
-
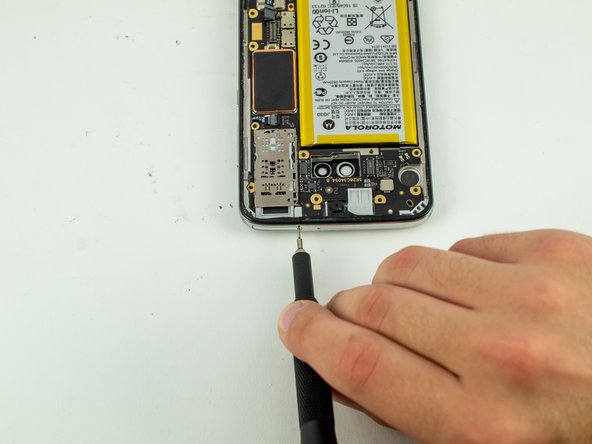
Entferne die sechs 2,7 mm Torx T3 Schrauben vob der Metallplatte oberhalb des Akkus.
-
Zwänge einen Spudger zwischen den SD-Einschub und die Platte. Heble die Platte dann mit sanfter Gewalt hoch.
-
-
-
Trenne die beiden schwarzen und weißen Stecker links und rechts von der Kamera mit einem Spudger ab.
-
Entferne die Kamera vom Smartphone.
-
-
-
Heble den Stecker des Fingerabdrucksensors mit dem Spudger hoch und löse ihn von der Hauptplatine ab.
-
-
-
Entferne die vier 2,3 mm Torx T3 Schrauben an der unteren und rechten Seite des Smartphones.
-
-
-
Setze den Spudger oberhalb des Akkus unter den Akku ein.
-
Heble die Hauptplatine behutsam aus dem Smartphone heraus.
-
-
-
Setze einen Spudger unter die Oberkante des Akkus ein und heble ihn vorsichtig hoch.
-


Um dein Gerät wieder zusammenbauen, folge den Schritten in umgekehrter Reihenfolge.
Um dein Gerät wieder zusammenbauen, folge den Schritten in umgekehrter Reihenfolge.
Rückgängig: Ich habe diese Anleitung nicht absolviert.
6 weitere Nutzer:innen haben diese Anleitung absolviert.
Besonderer Dank geht an diese Übersetzer:innen:
100%
VauWeh hilft uns, die Welt in Ordnung zu bringen! Wie kann ich mithelfen?
Hier starten ›
Team

Cal Poly, Team S19-G6, White Winter 2020 Mitglied von Cal Poly, Team S19-G6, White Winter 2020
CPSU-WHITE-W20S19G6
4 Mitglieder
20 Anleitungen geschrieben
16 Kommentare
I don’t know what phone you are replacing a battery on here, but it looks nothing like my Motorola G7, which has a JK50 battery in it. The JK50 is NOT interchangeable with the JG30 you have pictured here and available to order.
The Moto G7 has many variations, including the G7 Play and the G7 Power, which is the model that takes the JK50. These instructions are for the plain vanilla G7.
This is a careless incomplete guide. It skips crucial steps, like removing the speaker subassembly (which the photos clearly show was done but not even mentioned), the buttons connector, and last but not least the battery connector itself. I also have wound up with two mystery rubberized parts which fell out at two separate points in disassembly, which are also never mentioned and which I will now have to black-box to figure out where they came from.
It also glosses over the reassembly, omitting it entirely in fact, thus failing to remind the reader, for instance, not to overlook the fingerprint reader’s connector when reinserting the motherboard and paying heed of the several tabs - and rubber parts which must be considered when reattaching that metal shield over the camera.
Also not mentioned is any suggestion how to replace the original rubberized adhesive “gasket” that attaches the front glass, which is supposed to provide some waterproofness as well as adhesion. In my instance that was compromised before I even started: the battery inflated with gas and bowed the glass front outward. Thank goodness Corning has chosen to evolve Gorilla Glass to be more flexible rather than more scratch-resistant and more brittle, otherwise I’d have had a cracked front. (That battery inflation is now the second occurrence in a second Motorola phone; I am officially spooked of Motorola phones now.)