Einleitung
If you have a compatible motherboard, a USB 3.0 port will greatly increase read and write speeds when using a USB stick to access saved files. This guide will show you how to remove your old USB 2.0 cable to make room for your new USB 3.0 cable.
Was du brauchst
-
-
Locate the two sliding locks indicated in the photo.
-
Slide the right lock (labeled "1") to the right. It will remain in the unlocked position.
-
Slide the left lock (labeled "2") to the left and hold it in place.
-
-
-
While holding the left lock, place your finger in the indentation next to the battery and lift the battery out.
-
-
-
Remove the four screws indicated in the photos using a Phillips 00 Screwdriver. Left to right: 6mm button-head, 3mm flat-head, 6mm button-head, 6mm button-head.
-
-
-
-
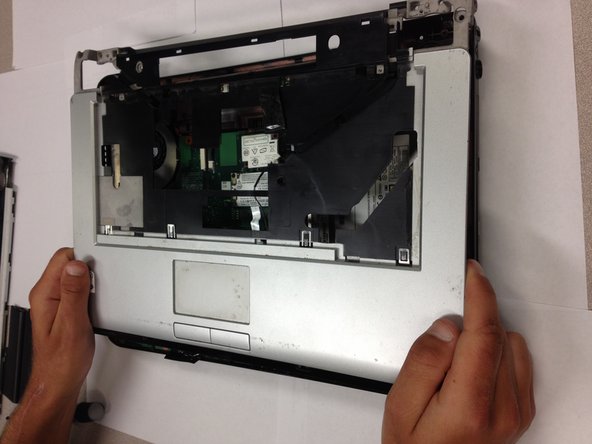
With your hands, grasp the speaker cover on the edge nearest to the screen.
-
Pry the speaker cover upward.
-
-
-
Remove the speaker cover. Your laptop will look like this photo when the speaker cover has been removed.
-
-
-
Locate the screws that are shown in the image.
-
Remove the fourteen 6mm button-head screws with a Phillips 00 Screwdriver.
-
-
-
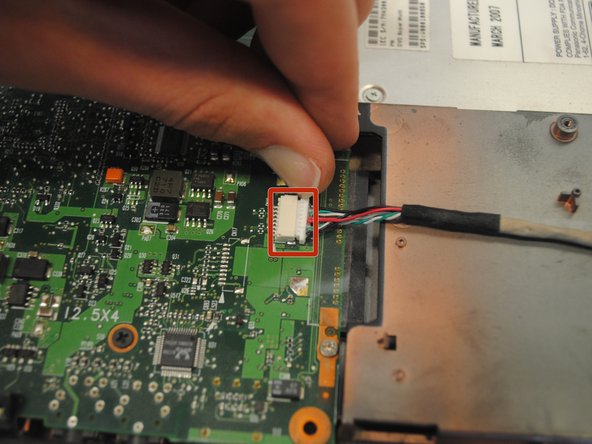
Locate the USB 2.0 cable on the bottom right corner of the laptop.
-
-
-
Locate the white slot on the left side of the USB 2.0 wire.
-
Carefully detach the wire by pulling the cable to the right of the slot.
-


To reassemble your device, follow these instructions in reverse order.
To reassemble your device, follow these instructions in reverse order.
Team

Cal Poly, Team 17-6, Regan Spring 2013 Mitglied von Cal Poly, Team 17-6, Regan Spring 2013
CPSU-REGAN-S13S17G6
5 Mitglieder
33 Anleitungen geschrieben