Einleitung
This guide will show the teardown and repair of a Foth Flex twin lens reflex camera for roll film 120 from about 1930-1940. It is a quite rare camera with a somewhat unusual design as it is one of very few TLR cameras with a focal plane shutter. Due to its modular construction it is relatively simple to work on it. However, if you have no experience in camera repair yet, I would advise to start with a Foth Derby (127 film) which sports the same shutter design but is otherwise simpler due to the lack of a focusing lens.
By the way, the version shown here sports the f/2.5 Anastigmat lens (apparently 4 elements in 4 groups) which makes it the medium format TLR with the fastest lens I am aware of, although this is somewhat academical as the transmission of the lens is similar to that of an f/2.8 post-WW2 Rolleiflex due to the lack of coatings before the war. The Foth flex was also available with a simple f/3.5 Anastigmat triplet lens.
Was du brauchst
-
-
I started by removing the lenses because they needed to be cleaned to check their condition. A camera with broken lenses is more or less worthless and therefore not worth the effort repairing it.
-
Set the distance wheel to infinity. The front plate comes off easily by loosening the four screws (two above the lenses, two below the badge). Newer versions may need to have removed their focus lever first.
-
Reveal the focusing gear rack by removing the black bar on the right side (4 screws). The rack is loose now and can be taken off. At infinity, it is located at the low end of the travel way. position it back there with the wheel at infinity when putting the camera back together.
-
-
-
Release the gear that couples both lenses' focusing mechanisms (1 screw). Release the lenses (3 screws each). That's it, the front is disassembled. The Ring around the viewing lens that fell off when releasing the front plate is obviously only for holding the lens cap and not attached anywhere.
-
Now it's time to clean the lenses. That's a standard procedure, I won't cover it here. There are enough guides how to clean a lens without destroying it in the web.
-
-
-
With the lenses removed, it's clearly visible that a new surface mirror is needed. To get the old mirror out, the waist-level finder needs to be removed. This is necessary anyway as the ground glass is dirty and needs cleaning. And one piece of felt fell out of it when I opened it for the first time (there are four pieces around the ground glass).
-
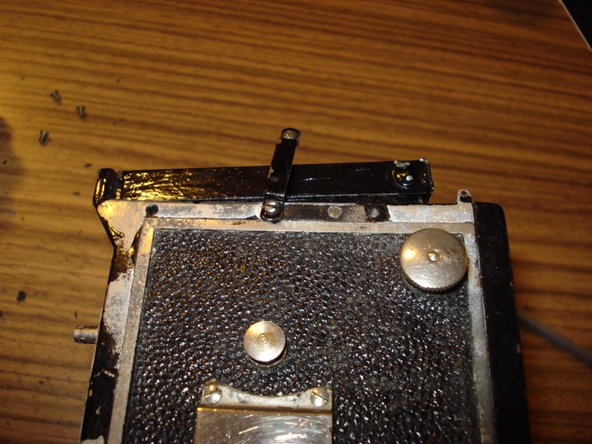
The finder is attached to the body with 6 screws. Two on the top behind the finder and two on each side. On both sides, one screw is at the front end of the camera and one is hidden behind the camera strap holder which thus has to be removed at least halfway.
-
-
-
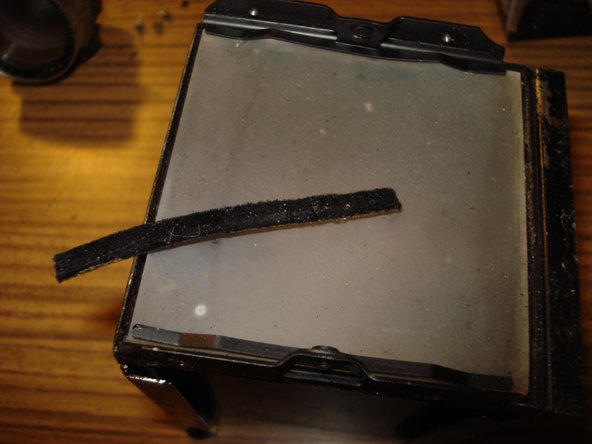
Here's the removed finder and the piece of felt that fell out of it. To glue it back in place, remove the ground glass by screwing loose the two springs that hold it in place.
-
Now you can clean the ground glass with whatever you want, it's real glass. Use water with dish washing agent, acetone, ethanol, isopropyl alcohol, whatever you have at hand whatever is needed to remove the dirt.
-
-
-
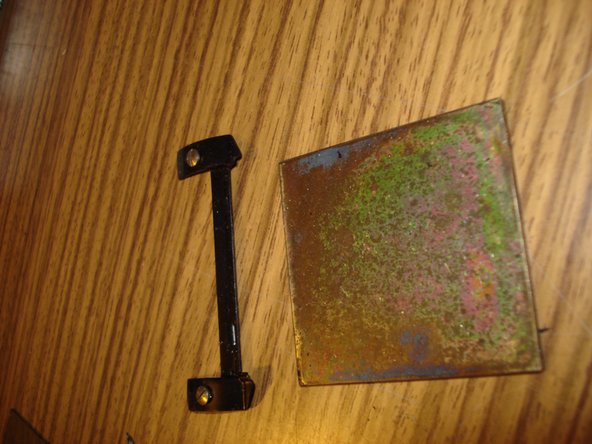
To remove the mirror, remove the bracket on top of it (2 screws), that's it. Get a new surface mirror (a normal mirror will produce douple images), 48mm x 45.5mm, thickness 1.2mm. While you wait for your new mirror, clean the housing and repair the shutter.
-
As a source for a new mirror, I used weidner-glas.de but I don't know if they ship internationally. It doesn't need to be a high-tech surface mirror with a reflectance of 99.995%. Anything over about 90% will do. I don't even know the reflectance of my new mirror, let alone the original reflectance of the original mirror.
-
-
-
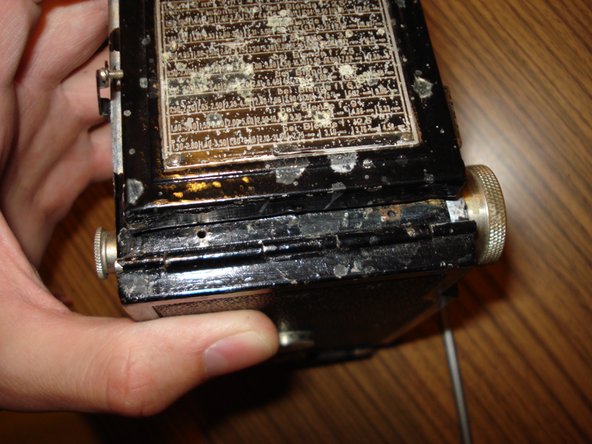
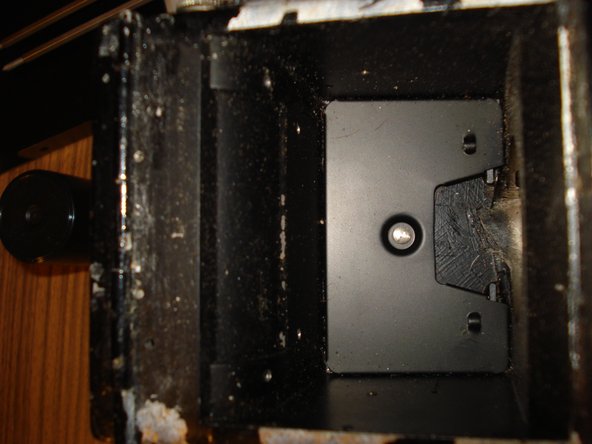
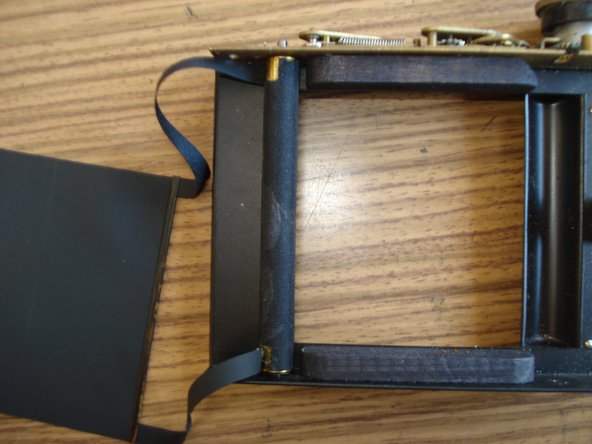
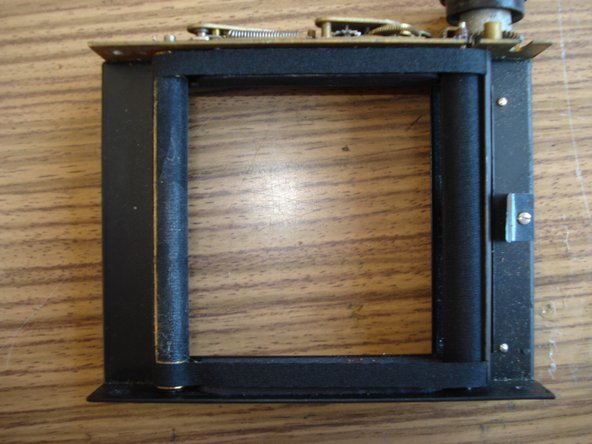
To repair/maintenance the shutter, it has to be released from the camera. It comes off as a complete unit. Open the camera remove the metal cover (the one which holds the two film rollers). Two srews on top, two screws on the bottom.
-
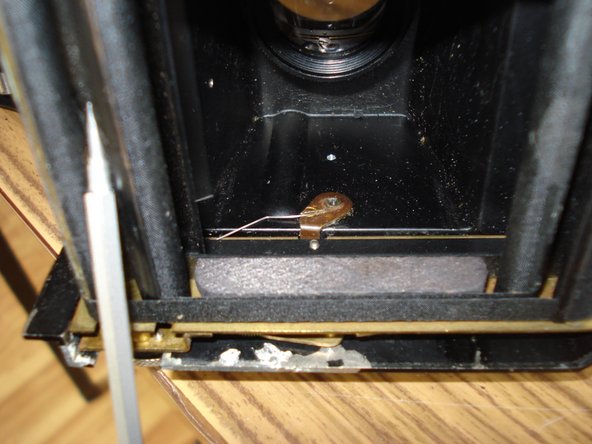
Inside the camera, there's a spring to push back the shutter release lever. It will fall out when removing the shutter so open the shutter and memorize its exact position. I didn't know this. Took me a long time to figure out the original position.
-
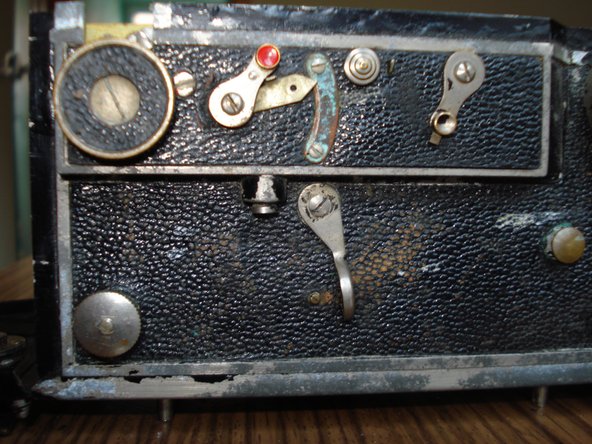
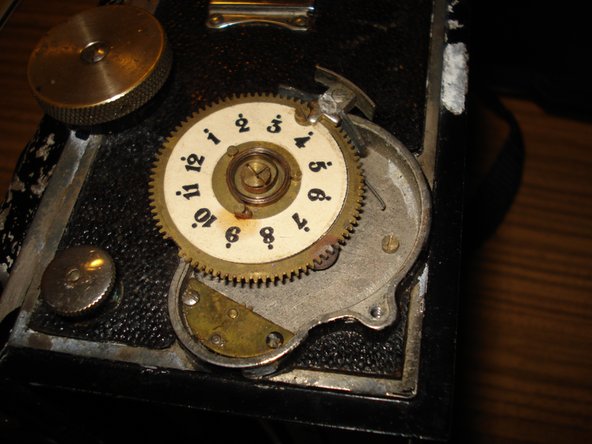
Remove the shutter controls which are located on the box except the cocking/high speed wheel, the slow speed scale and the index screw near the cocking/high speed wheel.
-
-
-
-
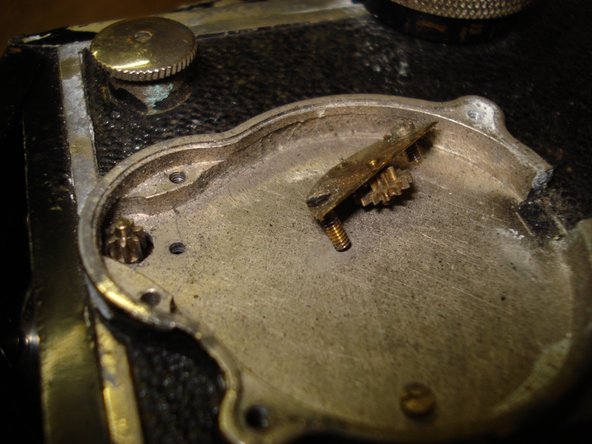
Here's the shutter control area with removed controls. Remember, the screw nearest to the cocking wheel is not necessary to remove.
-
Remove the two screws at the bottom of the shutter. The complete unit should come off now easily. In my case, it didn't, because one of the top screws of the slow speed escapement was loose and blocking slightly. A thin screwdriver helped to press it against the rest of the shutter while removing the unit.
-
-
-
If your shutter curtains are still good (almost certainly they're not), apply a small amount of oil to any moving parts. Use a wooden toothpick or something similar to apply the oil, otherwise you will use too much. If your shutter curtains need to replaced, lubricate the shutter mechanism later to keep your hands cleaner.
-
To remove the shutter curtains, remove the two brackets which are over the four drums. The drums near the cocking wheel with their gears are removed easily now. To remove the two spring loaded drums, pull the tension holding spring out of the slits on top of the drums. The tension will be released instantly.
-
I counted the original (?) tensioning turns by releasing the tension slowly with a screwdriver and counted 20 whole (40 half) turns in the non-cocked state. However, I found the repaired and lubed shutter to operate reliably and more smoothly with only 4 whole (8 half) turns.
-
To get the now relaxed drums out of the shutter unit, pull the top of the inner part (the one with the slit) up and lift the bottom out of the unit.
-
-
-
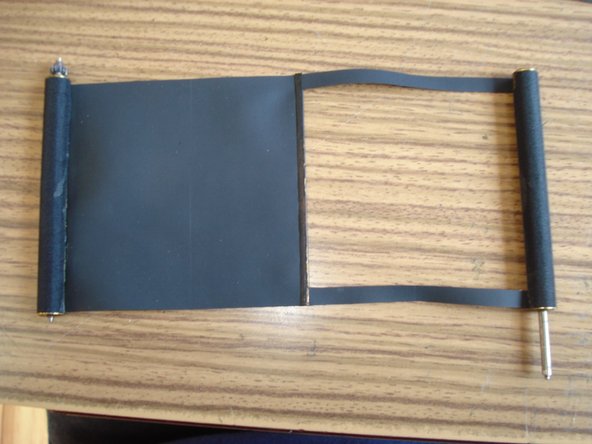
Here are the removed shutter curtains with their drums. Remove the old curtains from the drums by simply unrolling the curtains too far.
-
On the last picture here, you see the dimensions of the shutter curtains. The small, thin strip for the second curtain is not needed. I made it and didn't use it.
-
-
-
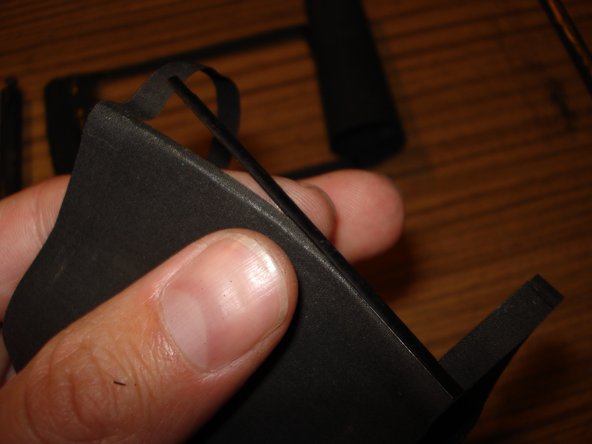
Open the folded sheets on the curtains carefully with a knife. You will need them on the new curtains.
-
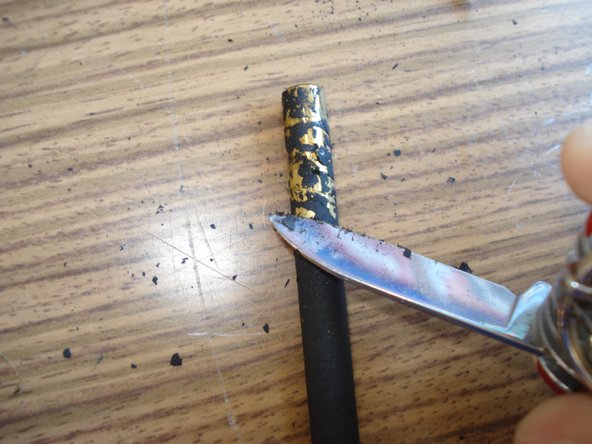
Clean the drums from the rests of shutter curtain cloth. The residues were pretty hard on my camera, rolling the drum with a knife and some pressure made most of it pop off.
-
-
-
Get a sheet of new shutter curtain cloth. Shutter curtain cloth is e.g. available at micro-tools.com (they have offices in California and in Germany and ship worldwide).
-
Insert the folded metal sheets into the new curtains. Close them with a small hammer. Be careful and hammer from both sides as you will bend it slightly in the direction where the hammer comes from.
-
Sadly, this way the ends of the sheets will have no pressure and don't hold the strips on the curtain as good as they did originally. A drop of glue might solve this problem. It is not as bad if you use a lowered spring tension when putting the shutter back together as I did (see step 8).
-
-
-
Glue the new shutter curtain onto the drums (rubber side to the metal). Use a glue that can glue rubber and metal together. I used classic Pattex. Apply the glue to the drum and place the drum onto the curtain, otherwise the curtain will roll itself.
-
When dried, put the new curtains in place, starting with the spring tensioned drums (I found no need and no way to disassemble these).
-
-
-
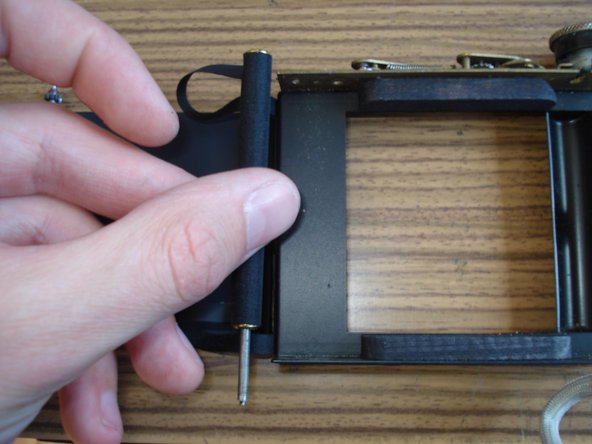
The strings won't roll properly when loose, so roll the closed part of the curtain onto the geared drum to put it in. Make shure the cocking wheel is in the cocked and B position (B is not necessary but may make adjustments easier).
-
The second curtain (which is the first to assemble as shown here) is rolled up slightly too far in this picture. It still has to be slackened 1 or 2 teeth.
-
-
-
press the shutter release bar to roll the second curtain onto its take-up drum. put in the first curtain as shown here. Both curtains are now in the correct position. Close the bracket over the geared drums. Load each spring with four whole turns of tension.
-
Proceed by cocking (the noun is not allowed here) the shutter to see if there is enough overlap between the two curtains that no light shines through the slit. If there is a slit, loosen the springs, loosen the bracket over the geared drums, set those drums correctly and try again.
-
Put the cover over the shutter to see if it clears the whole frame. If the slit starts or ends within the frame, do the last adjustment again, this time turning both curtain's drums the same amount of teeth. When ready, put the bracket over the spring-loaded drums back in place.
-
Now lube the shutter mechanism. Don't forget the bottom side of the geared drums. Clean the inside of the camera and put the shutter back in place. Put the shutter release lever spring back by opening the Shutter on B and blocking it carefully.
-
-
-
My frame counter did not run perfectly. The reason was that the spring pressure from the bottom against the counter roller was not strong enough. Bending it carefully helped. Nonetheless, I disassembled the counter to lube it. Like with the shutter, use a toothpick.
-
-
-
Yay, the new mirror finally arrived! Be careful not to touch it, it doesn't like to be cleaned. Put it in, put everything back together, run a test film.
-
-
-
You made it! Let me reward you with a picture of my workplace with the completely disassembled camera and two wide open shots from the camera (neighbour's cat and other neighbour's flowers)!
-
Of course, it's not a Rolleiflex with a Xenotar or Planar, but it's not bad either, especcially considering this camera dates from 1934.
-


To reassemble your device, follow these instructions in reverse order.
To reassemble your device, follow these instructions in reverse order.
Rückgängig: Ich habe diese Anleitung nicht absolviert.
4 weitere Nutzer:innen haben diese Anleitung absolviert.
16 Kommentare
Very cool. I have one of these and it needs some work. Any idea where I cn find replacement screws?
Sorry for replying late. You’ll find some M1.4mm, M1.6mm and M1.7mm (and bigger) screws e.g. at micro-tools, probably also at some watchmaker supply or even ebay. Remember that at this tiny size, determining the correct size can be difficult, even with calipers or micrometer screws. Screws always have an outer diameter slightly smaller than the nominal size (and nuts’ inner diameter is even smaller), so it’s easy to mistake e.g. an M1.7 screw for an M1.7 one.
Hein -