Einleitung
You will take the camera apart in order to replace the damaged LCD screen and restore functionality.
Was du brauchst
-
-
Remove all screws along the edges of the camera, using a #00 Phillips screwdriver.
-
-
-
Slide open the battery compartment cover before removing the exterior covers of the camera.
-
-
-
-
Carefully pull the back case (the side showing the LCD screen) away from the front half.
-
There are clips securing the top of the back case. Do not be afraid to use the proper amount of force to remove the back case.
-
Turn the camera around to the front (the lens side). Carefully remove the front case.
-
There are also clips on the lens' side as well, so do not be afraid to use force.
-
-
-
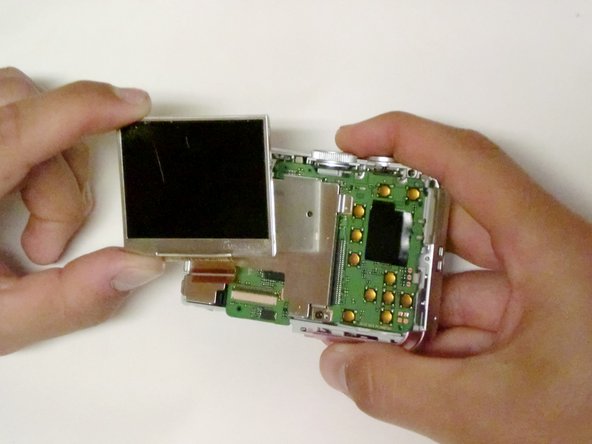
Position the camera so the LCD screen is facing you.
-
Remove the LCD screen from the screen plate.
-
Replace the broken LCD screen with the functioning LCD screen.
-


To reassemble your device, follow these instructions in reverse order.
To reassemble your device, follow these instructions in reverse order.
Rückgängig: Ich habe diese Anleitung nicht absolviert.
3 weitere Nutzer:innen haben diese Anleitung absolviert.
Team

Cal Poly, Team 33-72, Johann Spring 2010 Mitglied von Cal Poly, Team 33-72, Johann Spring 2010
CPSU-JOHANN-S10S33G72
4 Mitglieder
6 Anleitungen geschrieben