Einleitung
Is your toilet seat getting old or broken? Use this guide to learn how to replace your old toilet seat with a new one.
Was du brauchst
-
-
Measure the size of your toilet bowl to know what size seat to purchase.
-
-
-
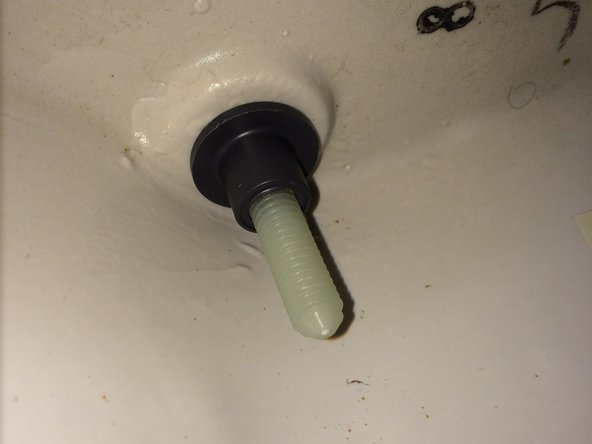
Twist the tops of the hinges of the currently installed toilet seat and pull toilet seat off to expose the screws.
-
-
-
-
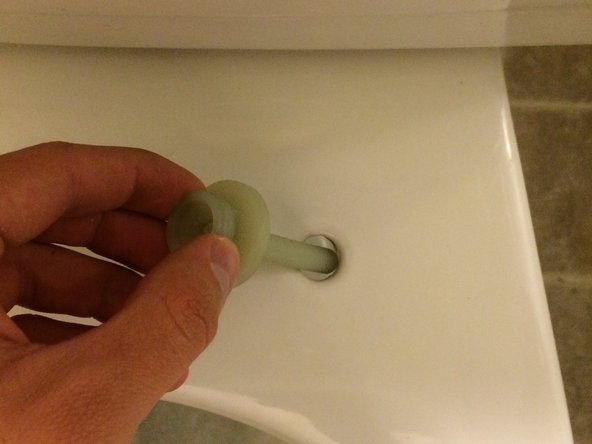
Insert new special 20mm screws that are provided with the purchase of the toilet seat in the holes and tighten them.
-
-
-
Then re install the toilet seat by fitting the heads of the screws in the holes on the hinges of the seat.
-
-
-
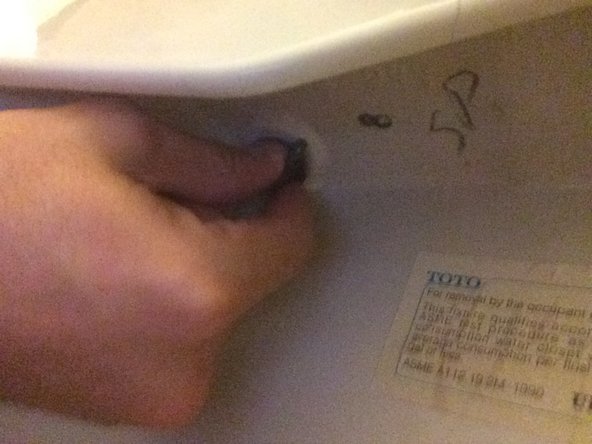
Close caps by twisting them in the opposite direction that you did to take off the seat.
-


To re-install your previous seat, follow these instructions in reverse order.
To re-install your previous seat, follow these instructions in reverse order.
Rückgängig: Ich habe diese Anleitung nicht absolviert.
2 weitere Nutzer:innen haben diese Anleitung absolviert.
Team

Cal Poly, Team 24-5, Green Winter 2015 Mitglied von Cal Poly, Team 24-5, Green Winter 2015
CPSU-GREEN-W15S24G5
3 Mitglieder
4 Anleitungen geschrieben