Zum Hauptinhalt wechseln

Was du brauchst

Dieser Teardown ist keine Reparaturanleitung. Um dein Samsung GT-E2120 zu reparieren, verwende unsere Fehlerbehebungsseite.

  1. Samsung GT-E2120 Teardown, Samsung GT-E2120 Teardown: Schritt 1, Bild 1 von 1
    • Before you begin it's always good to ground yourself to eliminate the risk for shock.

  2. Samsung GT-E2120 Teardown: Schritt 2, Bild 1 von 2 Samsung GT-E2120 Teardown: Schritt 2, Bild 2 von 2
    • Using your thumb, press down on the back of the device in a downward motion to open the back cover.

    • Remove the battery along with the sim card and Micro-SD card.

    • This phone can take up to a 2GB Micro-SD card and is great for storing music. It even has a FM radio!

  3. Samsung GT-E2120 Teardown: Schritt 3, Bild 1 von 2 Samsung GT-E2120 Teardown: Schritt 3, Bild 2 von 2
    • Next, using a Philips screwdriver, remove the five screws from the back of the device.

  4. Samsung GT-E2120 Teardown: Schritt 4, Bild 1 von 3 Samsung GT-E2120 Teardown: Schritt 4, Bild 2 von 3 Samsung GT-E2120 Teardown: Schritt 4, Bild 3 von 3
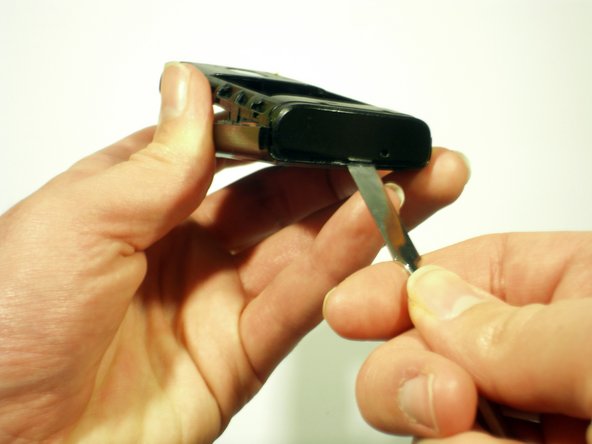
    • For this step a matal spudger is used to release the clips along the bottom, top, and sides of the phone.

    • These clips can be found at the points marked in red.

    • Working from the top down, gently prying at the case the clips are easily dislodged.

  5. Samsung GT-E2120 Teardown: Schritt 5, Bild 1 von 2 Samsung GT-E2120 Teardown: Schritt 5, Bild 2 von 2
    • When the bottom of the phone is reached it is a bit harder to pull the bottom clips off.

    • This can be made a tad easier by using the pointed end of the spudger to get in and under the case.

    • Once the case is lifted up slightly, you can get enough purchase under the clip and lift it off.

    • Be careful so you dont damage the motherboard!

  6. Samsung GT-E2120 Teardown: Schritt 6, Bild 1 von 1
    • This images shows the two halves separated.

    • The camera located in the blue square is a VGA 640X480 resolution color camera.

  7. Samsung GT-E2120 Teardown: Schritt 7, Bild 1 von 2 Samsung GT-E2120 Teardown: Schritt 7, Bild 2 von 2
    • The microphone is carefully lifted from its bracket, and the motherboard is carefully removed.

  8. Samsung GT-E2120 Teardown: Schritt 8, Bild 1 von 1
    • Then the keyboard is simply pushed out.

    • The Phone includes a 65K CSTN color screen with a 128X128 resolution.

Michael C

Mitglied seit: 01/09/11

410 Reputation

1 Anleitung geschrieben

Team

OPEN Mitglied von OPEN

Community

82 Mitglieder

25 Anleitungen geschrieben

0 Kommentare

Kommentar hinzufügen

Seitenaufrufe:

Letzte 24 Stunden: 1

Letzte 7 Tage: 5

Letzte 30 Tage: 10

Insgesamt: 14,020