Zum Hauptinhalt wechseln

Palm Zire 71 Battery Replacement

Was du brauchst

  1. Palm Zire 71 Battery Replacement, Preparation: Schritt 1, Bild 1 von 1
    • Flip the phone so it's facing screen-side down.

    • Slide the back cover upward to open.

  2. Palm Zire 71 Battery Replacement, Top Screws (2) Removal: Schritt 2, Bild 1 von 1
    • Use a Torx T5 screwdriver to remove the top two screws.

  3. Palm Zire 71 Battery Replacement, Bottom Screws (3) Removal: Schritt 3, Bild 1 von 1
    • Remove the back sticker.

    • Remove the three bottom Phillips #00 screws.

  4. Palm Zire 71 Battery Replacement, Front Panel Removal: Schritt 4, Bild 1 von 2 Palm Zire 71 Battery Replacement, Front Panel Removal: Schritt 4, Bild 2 von 2
    • Flip the phone over so it's facing screen-side up.

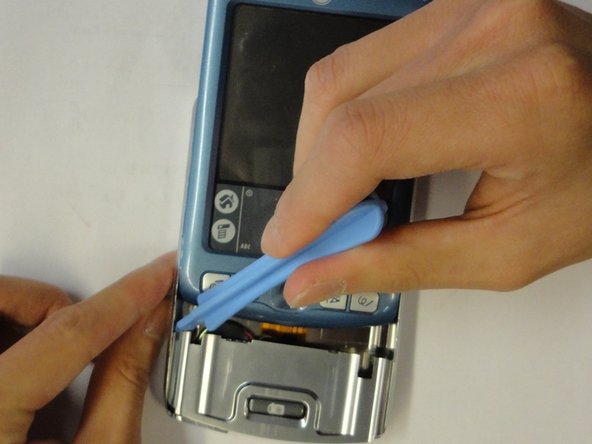
    • Slide the screen upward by a few millimeters without detaching the screen.

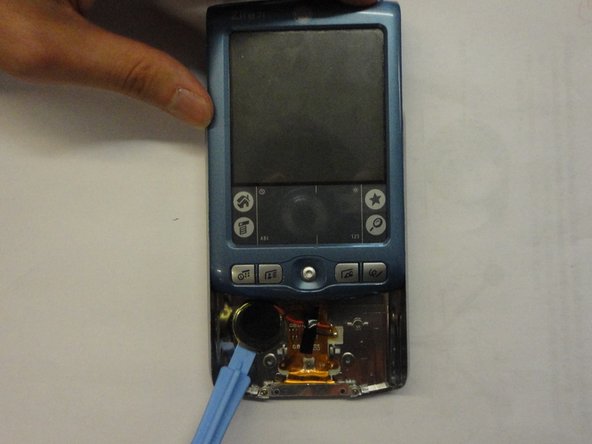
    • Use the plastic opening tool to pry off the front panel.

  5. Palm Zire 71 Battery Replacement, Bracket and Speaker Removal: Schritt 5, Bild 1 von 2 Palm Zire 71 Battery Replacement, Bracket and Speaker Removal: Schritt 5, Bild 2 von 2
    • Remove the bottom two Phillips #00 screws.

    • Remove the bracket.

    • Use the plastic opening tool to pry off the speaker.

  6. Palm Zire 71 Battery Replacement, Back Cover: Schritt 6, Bild 1 von 2 Palm Zire 71 Battery Replacement, Back Cover: Schritt 6, Bild 2 von 2
    • Slide the back cover off.

  7. Palm Zire 71 Battery Replacement, Battery: Schritt 7, Bild 1 von 1
    • Remove the Philips #00 screw

    • Remove the sliver metal piece

  8. Palm Zire 71 Battery Replacement: Schritt 8, Bild 1 von 2 Palm Zire 71 Battery Replacement: Schritt 8, Bild 2 von 2
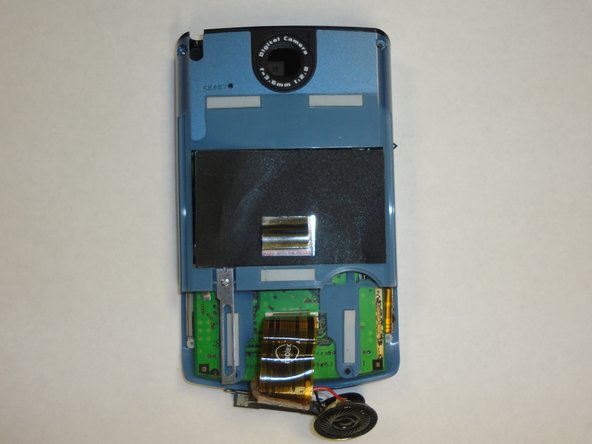
    • Remove the Philips screws #00

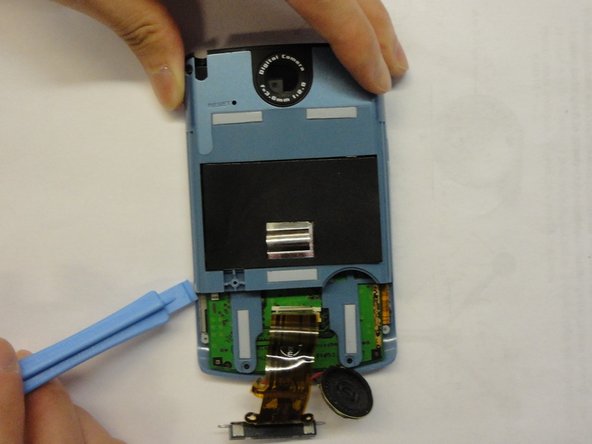
    • Remove the rear blue panel by prying both sides using the plastic opening tool

  9. Palm Zire 71 Battery Replacement: Schritt 9, Bild 1 von 3 Palm Zire 71 Battery Replacement: Schritt 9, Bild 2 von 3 Palm Zire 71 Battery Replacement: Schritt 9, Bild 3 von 3
    • Remove the black plastic sticker

    • Pull the tap up to remove the metal cap

  10. Palm Zire 71 Battery Replacement: Schritt 10, Bild 1 von 3 Palm Zire 71 Battery Replacement: Schritt 10, Bild 2 von 3 Palm Zire 71 Battery Replacement: Schritt 10, Bild 3 von 3
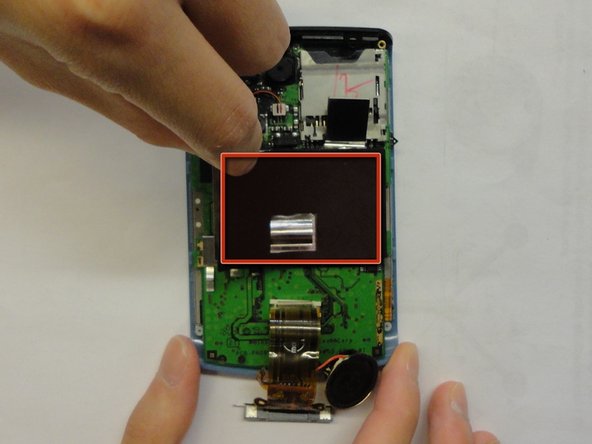
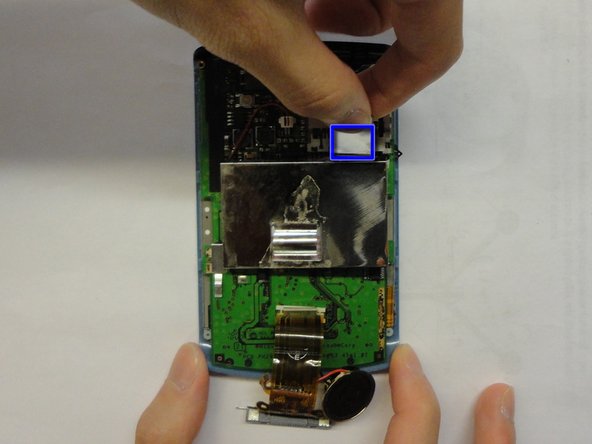
    • Remove the cable by pinching the sides and pulling

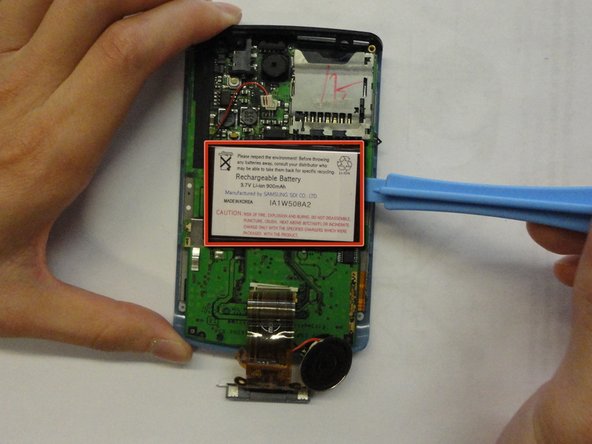
    • Pry off the battery with the plastic opening tool

    • Insert the new battery

Abschluss

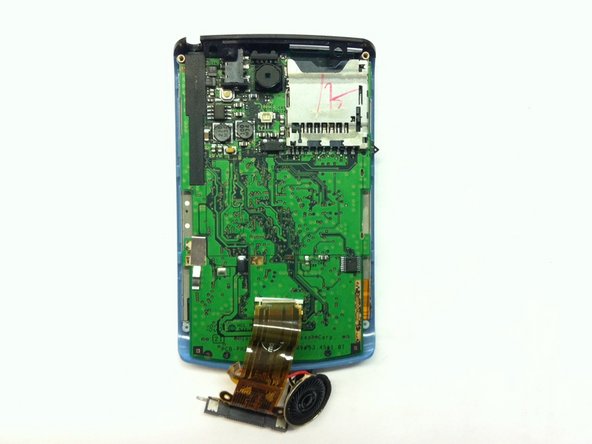
To reassemble your device, follow these instructions in reverse order.

7 weitere Nutzer:innen haben diese Anleitung absolviert.

Jinxian Jiang

Mitglied seit: 04/28/11

245 Reputation

3 Anleitungen geschrieben

Team

CSU Los Angeles, Team 1-5, Nelson Spring 2011 Mitglied von CSU Los Angeles, Team 1-5, Nelson Spring 2011

CSULA-NELSON-S11S1G5

3 Mitglieder

6 Anleitungen geschrieben

Ein Kommentar

It's clear they just want you to throw it away when the battery dies. That was quite a chore getting the parts off and such without destroying the circuit board and that fine ribbon cable. Got it done though. No wifi I see. Too bad.

dnphoton - Antwort

Kommentar hinzufügen

Seitenaufrufe:

Letzte 24 Stunden: 2

Letzte 7 Tage: 13

Letzte 30 Tage: 61

Insgesamt: 9,043