Zum Hauptinhalt wechseln

Motorola Cliq Motherboard Replacement

Was du brauchst

  1. Motorola Cliq Motherboard Replacement, Battery: Schritt 1, Bild 1 von 2 Motorola Cliq Motherboard Replacement, Battery: Schritt 1, Bild 2 von 2
    • Turning over your phone, place two fingers on the back cover and apply pressure away from the camera to slide the back cover off.

  2. Motorola Cliq Motherboard Replacement: Schritt 2, Bild 1 von 2 Motorola Cliq Motherboard Replacement: Schritt 2, Bild 2 von 2
    • Pinch the battery pull tab located below the camera, pull it upwards, and remove the battery.

    • The pull tab may be tucked under the battery.

  3. Motorola Cliq Motherboard Replacement, Rear Casing: Schritt 3, Bild 1 von 3 Motorola Cliq Motherboard Replacement, Rear Casing: Schritt 3, Bild 2 von 3 Motorola Cliq Motherboard Replacement, Rear Casing: Schritt 3, Bild 3 von 3
    • Wedge a plastic opening tool behind the panel covering the camera, pry it up, and remove it using your fingers.

    • The panel is held down by adhesive and may require you to wedge and pry the right side of the panel before it can be easily removed.

  4. Motorola Cliq Motherboard Replacement: Schritt 4, Bild 1 von 1
    • Remove the six 4.0 mm T4 Torx screws which line the edge of the back of the phone.

  5. Motorola Cliq Motherboard Replacement: Schritt 5, Bild 1 von 3 Motorola Cliq Motherboard Replacement: Schritt 5, Bild 2 von 3 Motorola Cliq Motherboard Replacement: Schritt 5, Bild 3 von 3
    • Turn the phone over and slide out the keyboard.

    • Wedge a plastic opening tool where the keyboard meets the back casing of the phone next to the headphone jack.

    • Carefully pry open the back casing along the keyboard's edge until at least two corners of the back casing are separated from the keyboard.

    • Do not fully separate the rear panel from the phone. A cable is connecting the two parts together.

  6. Motorola Cliq Motherboard Replacement: Schritt 6, Bild 1 von 1
    • Carefully separate the back casing from the rest of the phone.

  7. Motorola Cliq Motherboard Replacement: Schritt 7, Bild 1 von 2 Motorola Cliq Motherboard Replacement: Schritt 7, Bild 2 von 2
    • Gently pry ZIF connector upwards using the flat end of a spudger tool.

    • The ZIF connector is glued down. Be gentle! Ripping it off or breaking it will make your phone inoperable.

    • You may need adhesive to keep your power cable in place when reassembling your phone.

  8. Motorola Cliq Motherboard Replacement: Schritt 8, Bild 1 von 3 Motorola Cliq Motherboard Replacement: Schritt 8, Bild 2 von 3 Motorola Cliq Motherboard Replacement: Schritt 8, Bild 3 von 3
    • Press your thumb against the orange power cable and pull it down slowly to disconnect the power cable from the bottom of the keyboard.

    • The rear casing and the rest of the phone should now be completely separated.

  9. Motorola Cliq Motherboard Replacement, Motherboard: Schritt 9, Bild 1 von 2 Motorola Cliq Motherboard Replacement, Motherboard: Schritt 9, Bild 2 von 2
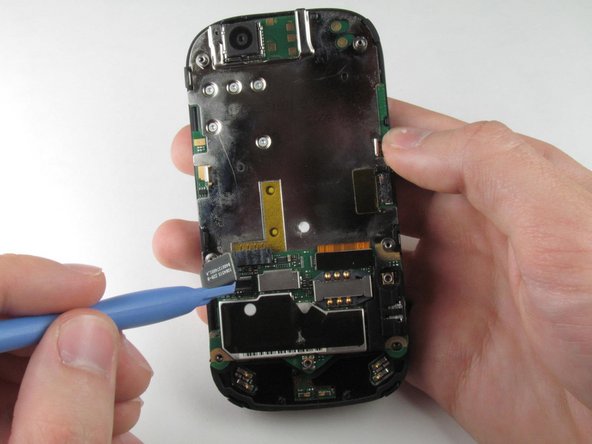
    • Wedge the plastic opening tool underneath the black display connector and pry it off its socket on the motherboard.

  10. Motorola Cliq Motherboard Replacement: Schritt 10, Bild 1 von 2 Motorola Cliq Motherboard Replacement: Schritt 10, Bild 2 von 2
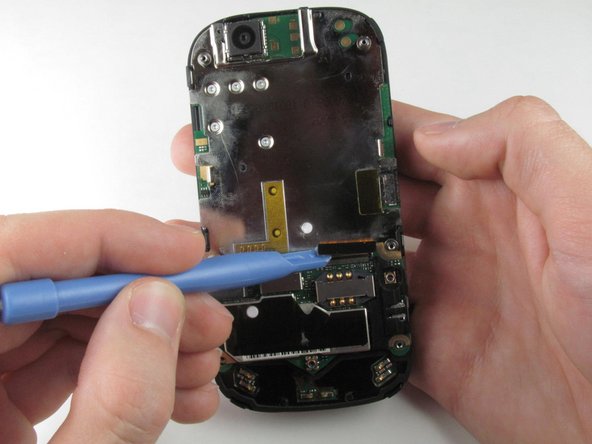
    • Pry the orange keyboard connector from its socket on the motherboard using the edge of the plastic opening tool.

  11. Motorola Cliq Motherboard Replacement: Schritt 11, Bild 1 von 3 Motorola Cliq Motherboard Replacement: Schritt 11, Bild 2 von 3 Motorola Cliq Motherboard Replacement: Schritt 11, Bild 3 von 3
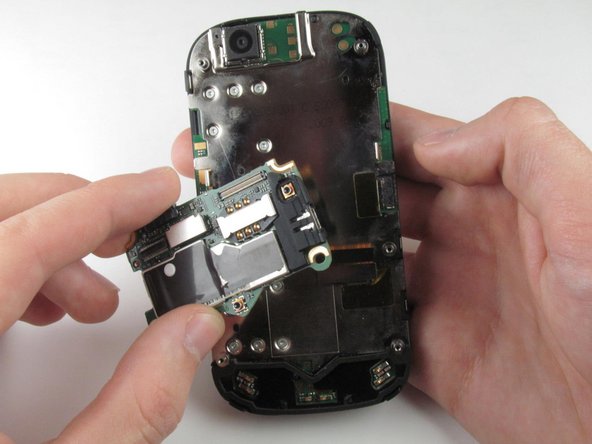
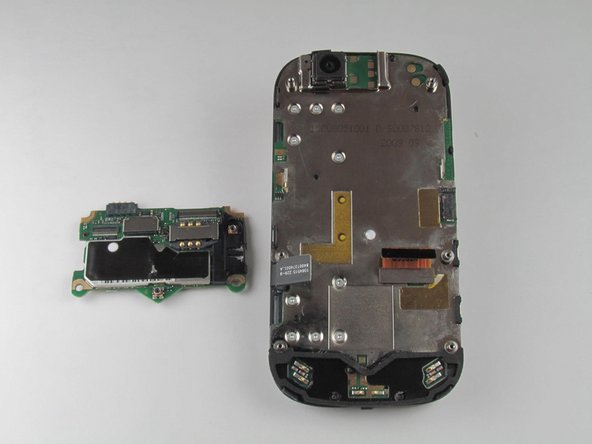
    • Carefully grab the sides of the motherboard with your fingers and remove it from the phone.

Abschluss

To reassemble your device, follow these instructions in reverse order.

3 weitere Nutzer:innen haben diese Anleitung absolviert.

Tony Tran

Mitglied seit: 04/14/13

64 Reputation

8 Anleitungen geschrieben

Team

Cal Poly, Team 10-42, Amido Spring 2013 Mitglied von Cal Poly, Team 10-42, Amido Spring 2013

CPSU-AMIDO-S13S10G42

4 Mitglieder

16 Anleitungen geschrieben

0 Kommentare

Kommentar hinzufügen

Seitenaufrufe:

Letzte 24 Stunden: 0

Letzte 7 Tage: 0

Letzte 30 Tage: 0

Insgesamt: 566