Zum Hauptinhalt wechseln

Playstation 3 Fan Replacement

Archivierte Anleitung
Diese Anleitung wurde ausschließlich für historische Zwecke erhalten. Verwende die aktualisierte Version dieser Anleitung, um deine Reparatur durchzuführen.

Was du brauchst

  1. Playstation 3 Fan Replacement, Top Cover: Schritt 1, Bild 1 von 2 Playstation 3 Fan Replacement, Top Cover: Schritt 1, Bild 2 von 2
    • Remove the rubber screw cover near the hard drive cover with a spudger.

  2. Playstation 3 Fan Replacement: Schritt 2, Bild 1 von 1
    • Remove the screw holding the top cover in place with a Torx T10 screwdriver.

  3. Playstation 3 Fan Replacement: Schritt 3, Bild 1 von 2 Playstation 3 Fan Replacement: Schritt 3, Bild 2 von 2
    • Slide the top cover down about half an inch.

    • Lift the cover off of the PS3.

  4. Playstation 3 Fan Replacement: Schritt 4, Bild 1 von 2 Playstation 3 Fan Replacement: Schritt 4, Bild 2 von 2
    • Remove the seven screws in the top cover with a Phillips #2 screwdriver.

    • One of the screws is shorter than the others. The short screw is marked in yellow.

  5. Playstation 3 Fan Replacement: Schritt 5, Bild 1 von 3 Playstation 3 Fan Replacement: Schritt 5, Bild 2 von 3 Playstation 3 Fan Replacement: Schritt 5, Bild 3 von 3
    • You can now lift off the top cover.

  6. Playstation 3 Fan Replacement, Power Supply: Schritt 6, Bild 1 von 2 Playstation 3 Fan Replacement, Power Supply: Schritt 6, Bild 2 von 2
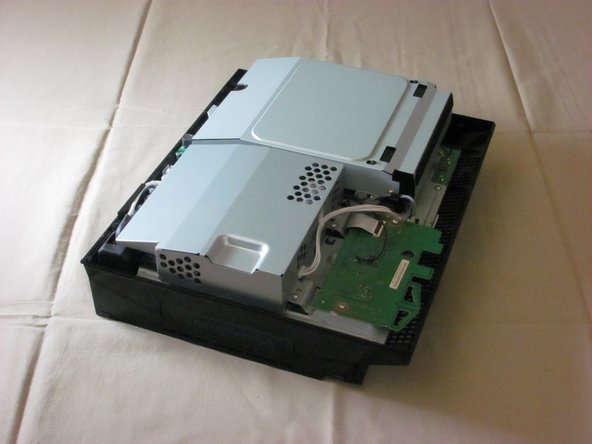
    • Unplug the white wires connected to the wireless board. There are two sets of wires: one set in the front, one in the back.

    • Push down the tab on the connector to disconnect the wires.

    • Remove the two screws on the front of the power supply.

  7. Playstation 3 Fan Replacement: Schritt 7, Bild 1 von 1
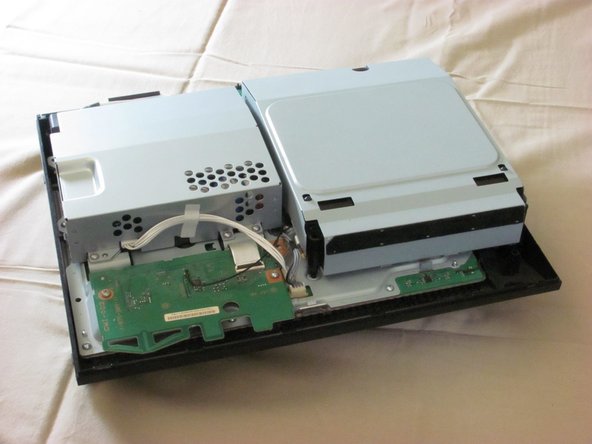
    • Remove the screws on the back of the power supply with a Phillips #2 screwdriver.

  8. Playstation 3 Fan Replacement: Schritt 8, Bild 1 von 2 Playstation 3 Fan Replacement: Schritt 8, Bild 2 von 2
    • Remove the power supply by lifting it straight up.

  9. Playstation 3 Fan Replacement, Motherboard Enclosure: Schritt 9, Bild 1 von 2 Playstation 3 Fan Replacement, Motherboard Enclosure: Schritt 9, Bild 2 von 2
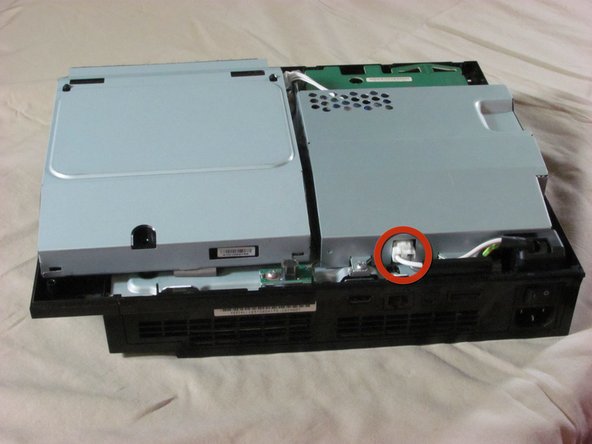
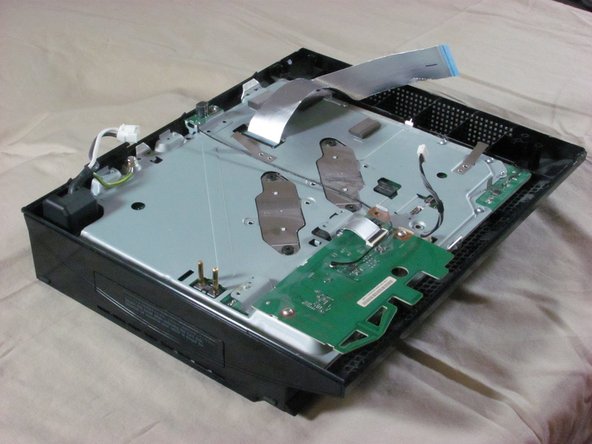
    • Unplug the optical drive power cable.

    • Detach the ribbon cable that connects the optical drive to the motherboard.

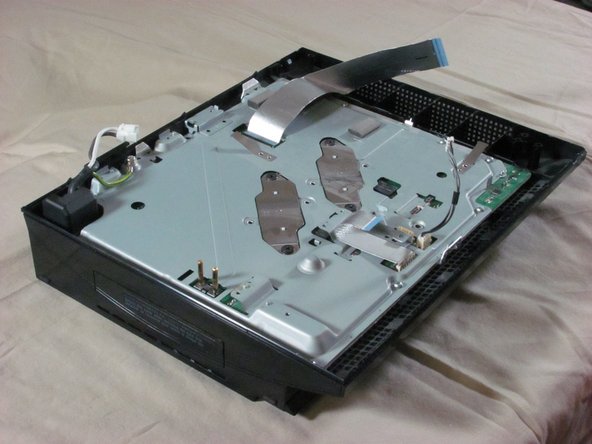
    • Set the optical drive aside.

  10. Playstation 3 Fan Replacement: Schritt 10, Bild 1 von 2 Playstation 3 Fan Replacement: Schritt 10, Bild 2 von 2
    • Remove three screws (Phillips #2) from the wireless board and antenna.

    • Detach the ribbon cable that connects the wireless board to the motherboard.

  11. Playstation 3 Fan Replacement: Schritt 11, Bild 1 von 1
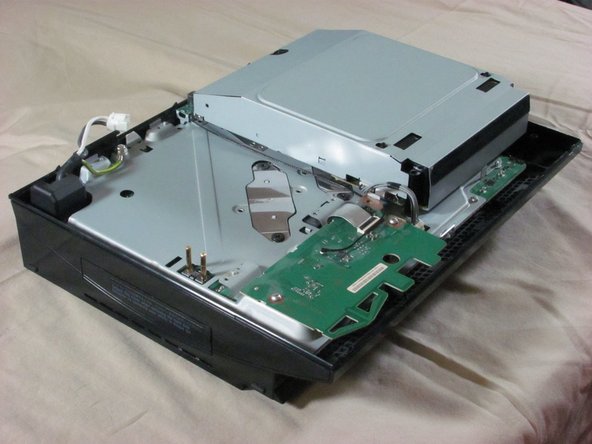
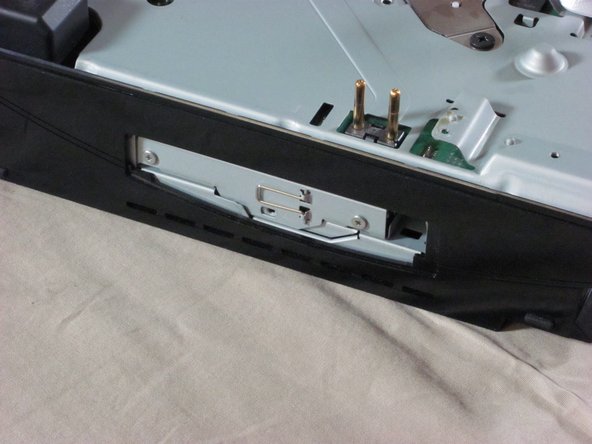
    • Remove nine screws (Phillips #2) from the perimeter of the metal plate covering the motherboard.

  12. Playstation 3 Fan Replacement: Schritt 12, Bild 1 von 3 Playstation 3 Fan Replacement: Schritt 12, Bild 2 von 3 Playstation 3 Fan Replacement: Schritt 12, Bild 3 von 3
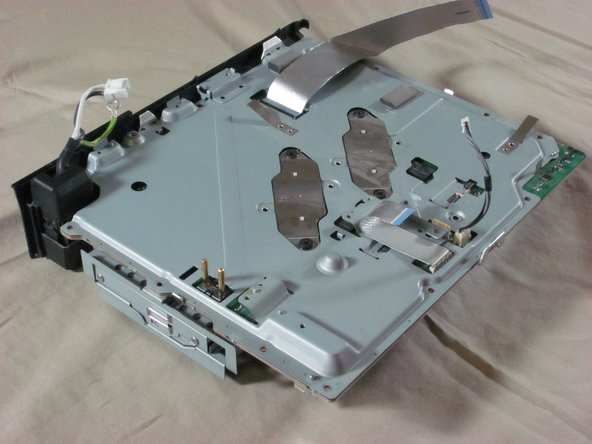
    • Remove the hard drive door with a spudger.

    • Lift the metal enclosure out of the plastic bottom case.

  13. Playstation 3 Fan Replacement, Fan: Schritt 13, Bild 1 von 1
    • Remove the three screws (Phillips #2).

    • Disconnect the fan's power cable.

    • Lift the fan straight up and out.

Abschluss

To reassemble your device, follow these instructions in reverse order.

Ein:e weitere:r Nutzer:in hat diese Anleitung absolviert.

iDeleted

Mitglied seit: 07/07/10

2.101 Reputation

39 Anleitungen geschrieben

0 Kommentare

Kommentar hinzufügen

Seitenaufrufe:

Letzte 24 Stunden: 0

Letzte 7 Tage: 0

Letzte 30 Tage: 0

Insgesamt: 2,790