Zum Hauptinhalt wechseln

LG VX6000 Screen Replacement

Was du brauchst

  1. LG VX6000 Screen Replacement, Battery: Schritt 1, Bild 1 von 1
    • Locate the dark gray tab on the back of the phone towards the top. Push the tab towards the top of the phone to release the battery.

  2. LG VX6000 Screen Replacement: Schritt 2, Bild 1 von 1
    • Remove the battery by lifting up and rotating the battery away from the bottom edge.

  3. LG VX6000 Screen Replacement, Body: Schritt 3, Bild 1 von 1
    • Pull out the two rubber cushions located on the top of the phone using tweezers.

    • Only remove the two cushions that are circled!

  4. LG VX6000 Screen Replacement: Schritt 4, Bild 1 von 1
    • Unscrew the six screws seen on the back using a Phillips 00 Screwdriver.

    • Remove screws and carefully place on an uncluttered surface or in a small container.

  5. LG VX6000 Screen Replacement: Schritt 5, Bild 1 von 1
    • Carefully remove the back of the phone gently using your fingernails or tweezers.

    • There are a pair of red and blue wires that plugs into the motherboard. These wires will snap if you force the pieces apart.

    • To reattach the back, you must plug these wires back in.

  6. LG VX6000 Screen Replacement, Logic Board: Schritt 6, Bild 1 von 1
    • Carefully peel off the adhesive tab as shown in the photo

    • The tab should not fully separate from the phone.

  7. LG VX6000 Screen Replacement: Schritt 7, Bild 1 von 2 LG VX6000 Screen Replacement: Schritt 7, Bild 2 von 2
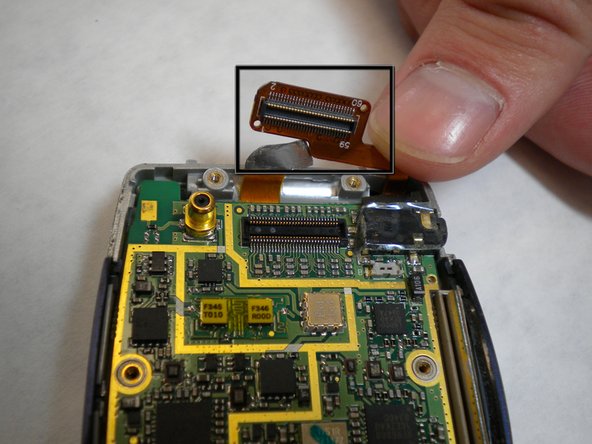
    • Locate the yellow connection towards the top of the phone. This is directly connected to the screen.

    • Remove the connector by carefully prying it away from the motherboard and lifting it away from the phone

    • Do not pull too hard on the connector.

  8. LG VX6000 Screen Replacement: Schritt 8, Bild 1 von 1
    • Gently lift a corner of the motherboard away from the casing to remove.

  9. LG VX6000 Screen Replacement, Screen: Schritt 9, Bild 1 von 3 LG VX6000 Screen Replacement, Screen: Schritt 9, Bild 2 von 3 LG VX6000 Screen Replacement, Screen: Schritt 9, Bild 3 von 3
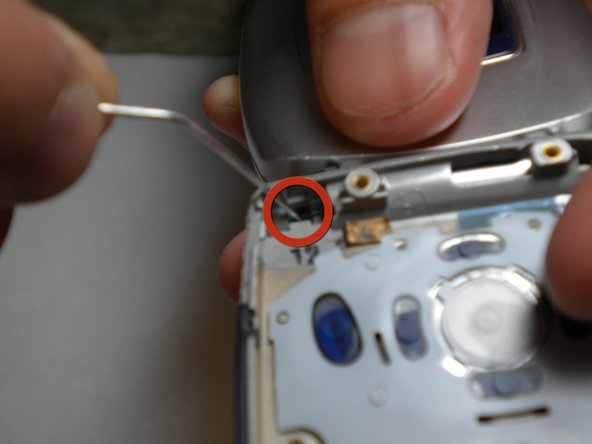
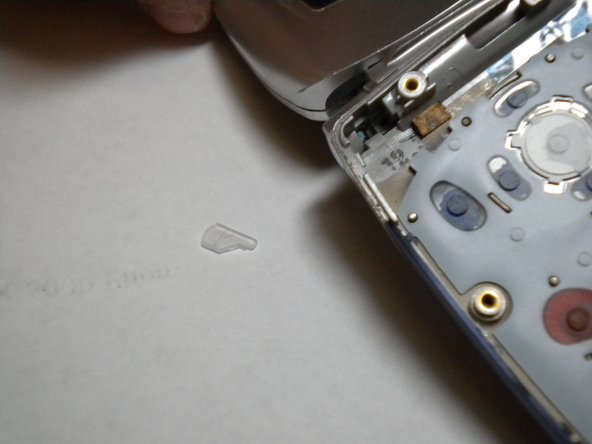
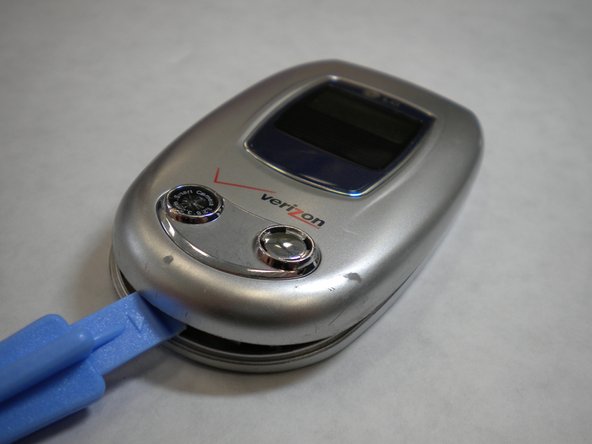
    • Using a paper clip or tweezers, pop out the screen by pressing the plastic tab in the top-left corner of the phone's bottom casing as indicated in the photo.

    • Be careful not to lose the tab that pops out. It is a small and clear piece of plastic.

    • The tab is fragile, handle with care.

  10. LG VX6000 Screen Replacement: Schritt 10, Bild 1 von 3 LG VX6000 Screen Replacement: Schritt 10, Bild 2 von 3 LG VX6000 Screen Replacement: Schritt 10, Bild 3 von 3
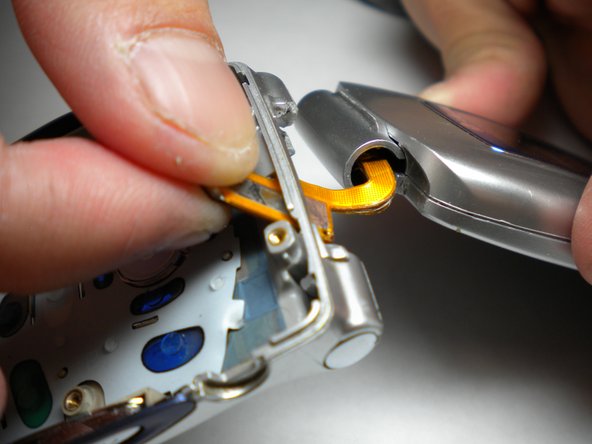
    • As shown in the photos, pull the orange strip through a thin opening at the top of the phone. Once this is done, the top and bottom halves can be separated.

  11. LG VX6000 Screen Replacement: Schritt 11, Bild 1 von 1
    • Set the bottom half of the phone aside.

    • Using tweezers, pull off the small rubber cushions located towards the four corners of the screen.

  12. LG VX6000 Screen Replacement: Schritt 12, Bild 1 von 1
    • With a Phillips tip screwdriver, unscrew the four newly exposed screws.

    • Keep screws from the different steps in different locations so as to not mix them up.

  13. LG VX6000 Screen Replacement: Schritt 13, Bild 1 von 3 LG VX6000 Screen Replacement: Schritt 13, Bild 2 von 3 LG VX6000 Screen Replacement: Schritt 13, Bild 3 von 3
    • Carefully open the casing using the iFixit plastic tool by prying each side a little bit at a time. Rotate and open until all the inside clips pop open and the casing opens up.

  14. LG VX6000 Screen Replacement: Schritt 14, Bild 1 von 2 LG VX6000 Screen Replacement: Schritt 14, Bild 2 von 2
    • After you pry open the casing, you will be left with the screen and circuit board in the top face plate.

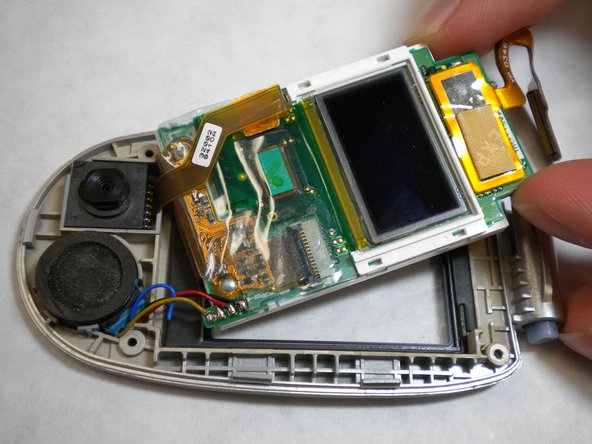
    • Gently pull the corner of screen and circuit board up and out of casing to remove screen from the top face plate.

    • Do not try to completely separate the circuit board from the casing. There are still wires connecting the two.

  15. LG VX6000 Screen Replacement: Schritt 15, Bild 1 von 1
    • Rotate the screen and the connected white frame away from the logic board.

    • Carefully peel the adhesive tape that connects the screen and logic board off. The screen can now be removed and replaced with a new screen unit.

Abschluss

To reassemble your device, follow these instructions in reverse order.

Team

Cal Poly, Team 4-11, Forte Winter 2010 Mitglied von Cal Poly, Team 4-11, Forte Winter 2010

CPSU-FORTE-W10S4G11

5 Mitglieder

11 Anleitungen geschrieben

0 Kommentare

Kommentar hinzufügen

Seitenaufrufe:

Letzte 24 Stunden: 0

Letzte 7 Tage: 0

Letzte 30 Tage: 2

Insgesamt: 2,748