Zum Hauptinhalt wechseln

Brother PT-1010 Battery Replacement

  1. Brother PT-1010 Battery Replacement, Removing Back Panel: Schritt 1, Bild 1 von 1
    • Turn device so you are looking down at the top

  2. Brother PT-1010 Battery Replacement: Schritt 2, Bild 1 von 2 Brother PT-1010 Battery Replacement: Schritt 2, Bild 2 von 2
    • Press firmly on arrow indicator and pull panel toward you.

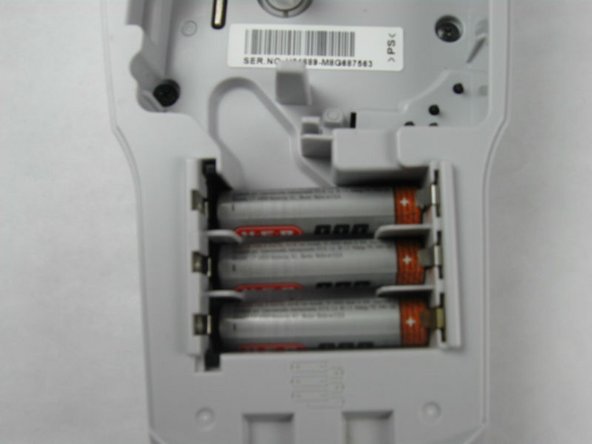
  3. Brother PT-1010 Battery Replacement, Remove Dead Batteries: Schritt 3, Bild 1 von 1
    • Remove dead batteries one at a time by pulling up on the side indicated with a + symbol.

    • Make sure the battery compartment is empty and clear of debris.

  4. Brother PT-1010 Battery Replacement: Schritt 4, Bild 1 von 2 Brother PT-1010 Battery Replacement: Schritt 4, Bild 2 von 2
    • Insert the first battery with the flat side (indicated by a - symbol on the battery) facing to the left of the battery compartment.

    • Do the same thing to insert the next 2 batteries.

  5. Brother PT-1010 Battery Replacement: Schritt 5, Bild 1 von 1
    • The next 3 batteries will be inserted on top of the others.

    • Insert the 4th battery with the flat side (indicated by the - symbol on the battery) facing to the right of the battery compartment.

  6. Brother PT-1010 Battery Replacement: Schritt 6, Bild 1 von 1
    • Repeat step 5 to insert the last 2 batteries.

  7. Brother PT-1010 Battery Replacement, Replace Back Panel: Schritt 7, Bild 1 von 1
    • Reinsert back panel.

Abschluss

To reassemble your device, follow these instructions in reverse order.

Ein:e weitere:r Nutzer:in hat diese Anleitung absolviert.

Haley Sweet

Mitglied seit: 10/30/14

460 Reputation

4 Anleitungen geschrieben

Team

Baylor, Team 4-4, Williams Fall 2014 Mitglied von Baylor, Team 4-4, Williams Fall 2014

BU-WILLIAMS-F14S4G4

4 Mitglieder

4 Anleitungen geschrieben

0 Kommentare

Kommentar hinzufügen

Seitenaufrufe:

Letzte 24 Stunden: 1

Letzte 7 Tage: 6

Letzte 30 Tage: 16

Insgesamt: 4,808