Zum Hauptinhalt wechseln

HP Envy x360 m6-aq103dx CPU Fan Replacement

Was du brauchst

  1. HP Envy x360 m6-aq103dx CPU Fan Replacement, Bottom Cover: Schritt 1, Bild 1 von 3 HP Envy x360 m6-aq103dx CPU Fan Replacement, Bottom Cover: Schritt 1, Bild 2 von 3 HP Envy x360 m6-aq103dx CPU Fan Replacement, Bottom Cover: Schritt 1, Bild 3 von 3
    • Flip the laptop over to expose the underside.

    • Remove the two grip pads with blue plastic opening tool by inserting the tool between the laptop and the pads and slowly lifting up.

    • The grip pads are tacky, remove slowly to avoid separating the adhesive.

  2. HP Envy x360 m6-aq103dx CPU Fan Replacement: Schritt 2, Bild 1 von 1
    • Remove the two 8 mm Phillips Head screws that were under the grip pads using a Phillip's Head 1 Screwdriver.

  3. HP Envy x360 m6-aq103dx CPU Fan Replacement: Schritt 3, Bild 1 von 1
    • Remove the six 5 mm Torx screws using a T5 Torx Screwdriver.

  4. HP Envy x360 m6-aq103dx CPU Fan Replacement: Schritt 4, Bild 1 von 3 HP Envy x360 m6-aq103dx CPU Fan Replacement: Schritt 4, Bild 2 von 3 HP Envy x360 m6-aq103dx CPU Fan Replacement: Schritt 4, Bild 3 von 3
    • Use the nylon spudger to pop off the bottom cover by inserting it into the heat vent and twisting to the left or right.

    • You may hear a slight clicking or popping, but that is normal.

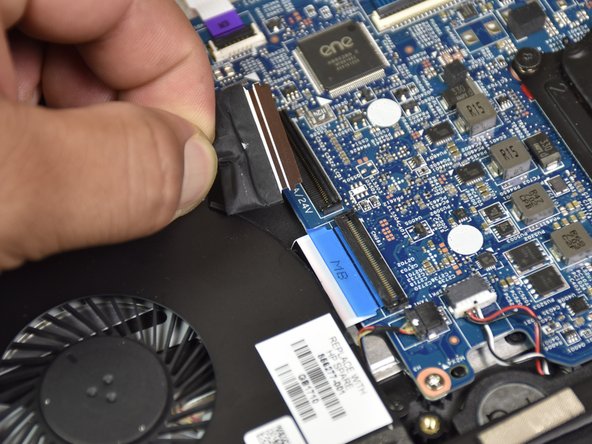
  5. HP Envy x360 m6-aq103dx CPU Fan Replacement, CPU Fan: Schritt 5, Bild 1 von 3 HP Envy x360 m6-aq103dx CPU Fan Replacement, CPU Fan: Schritt 5, Bild 2 von 3 HP Envy x360 m6-aq103dx CPU Fan Replacement, CPU Fan: Schritt 5, Bild 3 von 3
    • Put on the anti-static wristband first

    • Disconnect the port of the fan by flipping the black tab with the small blue plastic opening tool.

    • Remove the cable from the connector.

  6. HP Envy x360 m6-aq103dx CPU Fan Replacement: Schritt 6, Bild 1 von 3 HP Envy x360 m6-aq103dx CPU Fan Replacement: Schritt 6, Bild 2 von 3 HP Envy x360 m6-aq103dx CPU Fan Replacement: Schritt 6, Bild 3 von 3
    • Peel back a little bit of the grey tape connected to the round cable with the big blue opening tool.

    • Using your fingers, peel the tape off of the body of the computer.

    • Peel slowly to avoid separating the adhesive.

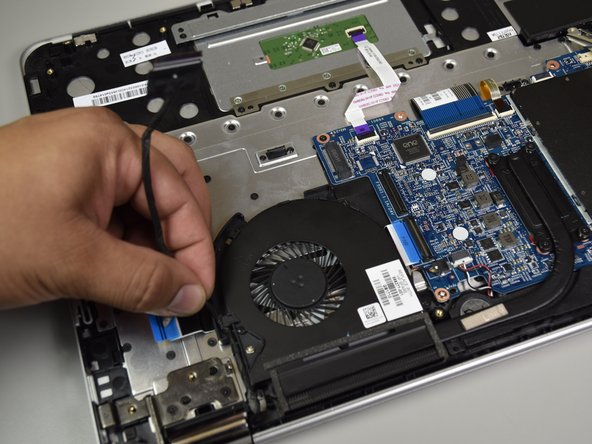
  7. HP Envy x360 m6-aq103dx CPU Fan Replacement: Schritt 7, Bild 1 von 2 HP Envy x360 m6-aq103dx CPU Fan Replacement: Schritt 7, Bild 2 von 2
    • Remove the black cable from the fan by unclicking it from the plastic body of the fan with your fingers and move it out of the area.

    • There will be clicking sounds when the black cable is removed.

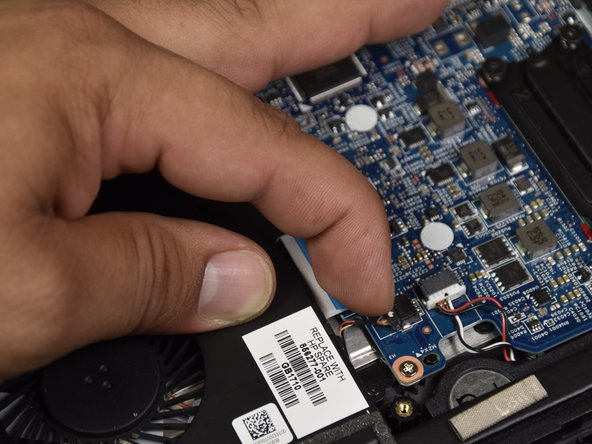
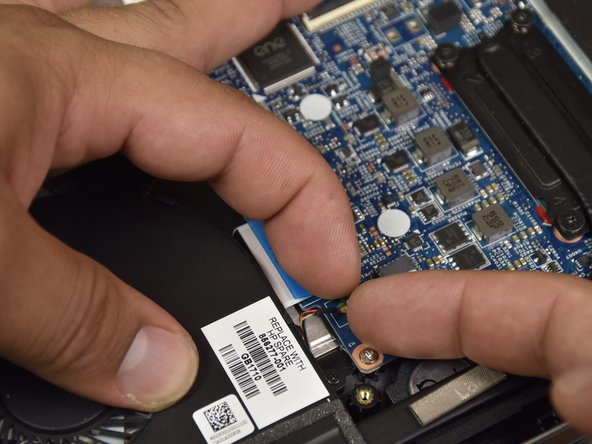
  8. HP Envy x360 m6-aq103dx CPU Fan Replacement: Schritt 8, Bild 1 von 3 HP Envy x360 m6-aq103dx CPU Fan Replacement: Schritt 8, Bild 2 von 3 HP Envy x360 m6-aq103dx CPU Fan Replacement: Schritt 8, Bild 3 von 3
    • Disconnect the port with the red yellow and blue wires by dislodging the wires with your fingers.

  9. HP Envy x360 m6-aq103dx CPU Fan Replacement: Schritt 9, Bild 1 von 1
    • Remove the two 4.5mm Phillips #1 screws.

  10. HP Envy x360 m6-aq103dx CPU Fan Replacement: Schritt 10, Bild 1 von 1
    • Loosen the four black screws by the curved heat sink with a Phillips head 1 screwdriver.

    • These screws do not come off.

  11. HP Envy x360 m6-aq103dx CPU Fan Replacement: Schritt 11, Bild 1 von 3 HP Envy x360 m6-aq103dx CPU Fan Replacement: Schritt 11, Bild 2 von 3 HP Envy x360 m6-aq103dx CPU Fan Replacement: Schritt 11, Bild 3 von 3
    • Lift the CPU fan out with your hand.

Abschluss

To reassemble your device, follow these instructions in reverse order.

4 weitere Nutzer:innen haben diese Anleitung absolviert.

Team

Cal Poly, Team S4-G3, Livingston Fall 2017 Mitglied von Cal Poly, Team S4-G3, Livingston Fall 2017

CPSU-LIVINGSTON-F17S4G3

4 Mitglieder

9 Anleitungen geschrieben

3 Kommentare

Step 5-7 can be bypassed I didn’t need to do it

diego.montenegro23 - Antwort

My first home repair so far. Really easy to follow guide. Great job!

Caleb Robinson - Antwort

Purchased tools and did the steps, no issues. worth the tools to use later. Worked in iT anyways.

Roy Rodgers - Antwort

Kommentar hinzufügen

Seitenaufrufe:

Letzte 24 Stunden: 0

Letzte 7 Tage: 4

Letzte 30 Tage: 10

Insgesamt: 4,456