Einleitung
If your stop and tail lights are not lighting up when you press your brakes on your 1997 Toyota Camry, the bulbs most likely have died and need to be replaced.
Working stop and tail lights are essential while driving as they signal to other drivers that you are slowing down or stopped. If your replace bulb indicator is on in your Toyota, this is a good indication that your bulbs need to be replaced.
Before removing the light bulbs in Step 2, ensure that no wires attached to the bulb assembly are damaged or frayed. This could indicate an electrical issue. This needs to be repaired prior to replacing the light bulb.
Make sure the ignition switch and light switch are off before beginning.
Was du brauchst
-
-
Open the trunk.
-
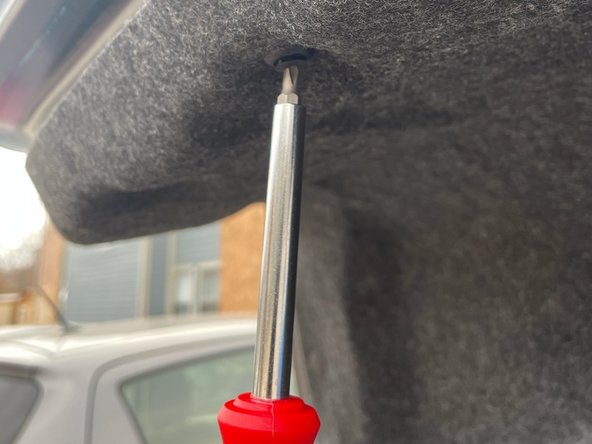
Loosen three 15 mm screws using a Phillips #1 screwdriver.
-
Pull the cover clips at the base to remove.
-
Remove the cover by folding the cover backwards to expose the bulb assembly.
-
-
-
Grab the inner light bulb assembly using your thumb and forefinger.
-
Rotate the bulb assembly a quarter turn counterclockwise.
-
Pull it straight outwards until the bulb is displayed.
-
-
-
-
While holding the assembly, grab the base of the light bulb with your thumb and forefinger.
-
Pull the bulb away from the assembly until it detaches. Discard the old bulb.
-
-
-
Grab the new inner tail light bulb 3157 and push it into the bulb assembly.
-
Insert the bulb assembly straight into the socket. Rotate it a quarter turn clockwise to secure it.
-
-
-
Unfold the cover and place it back over the bulb sockets. Push the three cover clips into their sockets .
-
Screw the three 15 mm screws in with Phillips #1 screwdriver to secure the cover.
-


Your stop and tail lights have been properly replaced and your replace bulb indicator should be off on your dashboard.
Your stop and tail lights have been properly replaced and your replace bulb indicator should be off on your dashboard.

Team

University of North Texas, Team S1-G4, Raign Spring 2021 Mitglied von University of North Texas, Team S1-G4, Raign Spring 2021
UNT-RAIGN-S21S1G4
2 Mitglieder
1 Anleitung geschrieben