Diese Version enthält möglicherweise inkorrekte Änderungen. Wechsle zur letzten geprüften Version.
Was du brauchst
-
Dieser Schritt ist noch nicht übersetzt. Hilf mit, ihn zu übersetzen!
-
If you have frame covers below your seat, remove them by removing the 4 mm allen bolts holding them on. Use a 4 mm allen wrench to turn the screws counter-clockwise until they come off.
-
Once the frame covers are off, remove the 4 mm allen seat bolts on both sides of the seat. Use the 4 mm allen wrench to turn the screws counter-clockwise until they come off.
-
Lift the front of the seat, then pull it off the frame.
-
-
Dieser Schritt ist noch nicht übersetzt. Hilf mit, ihn zu übersetzen!
-
Turn the two 4mm allen bolts in the front tank mounts counter-clockwise with an allen wrench until they come out.
-
Turn the two 12mm hex bolts in the tank's hinge base counter-clockwise with a socket wrench or box end wrench until they come out.
-
-
-
Dieser Schritt ist noch nicht übersetzt. Hilf mit, ihn zu übersetzen!
-
Disconnect the fuel level sensor connector, located near the tank hinge base. It will be a three wire connector and one side of the wire will be traceable to the underside of the tank.
-
Carefully lift the front of the tank to gain access to the hoses attached to the tank.
-
-
Dieser Schritt ist noch nicht übersetzt. Hilf mit, ihn zu übersetzen!
-
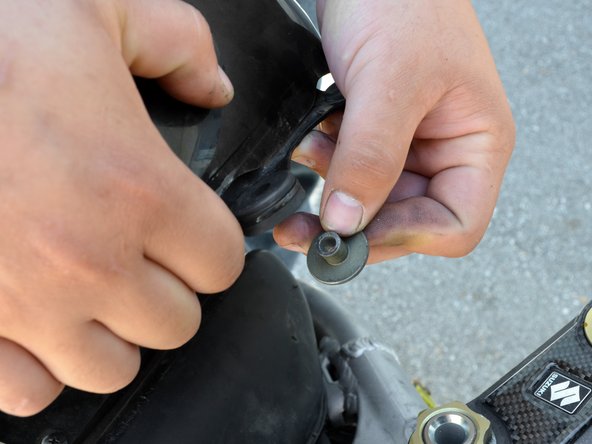
Locate the petcock on the left underside of the tank. It hill have 2 hoses attached to it and will be next to the fuel level sensor.
-
Disconnect the vacuum hose from the petcock.
-
Disconnect the fuel hose from the petcock
-
Disconnect the tank breather hose from the base of the tank.
-
-
Dieser Schritt ist noch nicht übersetzt. Hilf mit, ihn zu übersetzen!
-
Carefully lift the tank up and off the frame of the bike, being sure that the fuel level sensor wire does not get caught in the frame.
-


Rückgängig: Ich habe diese Anleitung nicht absolviert.
4 weitere Nutzer:innen haben diese Anleitung absolviert.

Ein Kommentar
Thanks . I have to reassemble the tank and I was not the one that took it apart so this tutorial is quite helpful. I had to buy a new rubber tank mount as they fall off easily also.