Einleitung
With time, the elements can cause the plastic housings on your BMW 3 Series E92 to fade or potentially crack, necessitating replacement.
Since the inner taillights function as a two-stage brake light, they must be replaced in order to ensure both the safety of the driver and those around them.
To facilitate an easy replacement process, this guide will showcase how to remove your old inner taillight and replace it by following the guide in reverse.
Since this job requires minimal tools and experience, it should be a more approachable DIY replacement for those new or experienced with vehicles.
Was du brauchst
-
-
Unlock your trunk.
-
Using the trunk handle, lift the trunk to it's highest position.
-
-
-
Using the appropriate trim tool, carefully remove all ten rivets from the trunk liner.
-
-
-
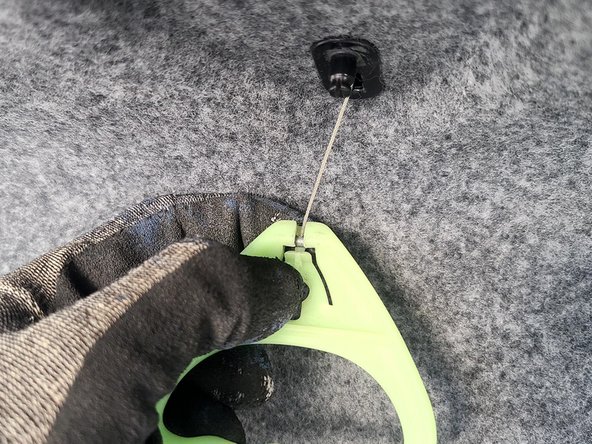
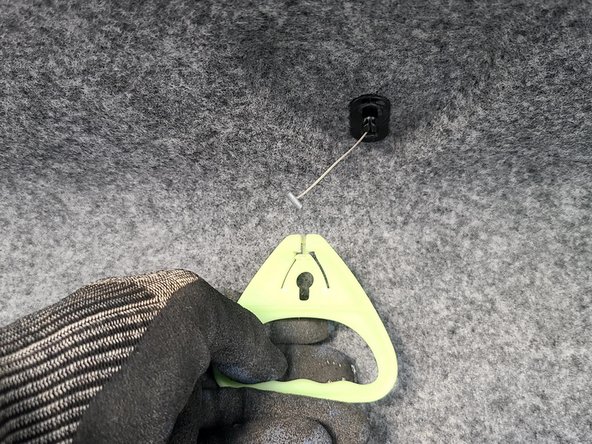
Pull on the green tab to release the inner trunk release handle.
-
Carefully remove the liner and put it off to the side for later reassembly.
-
-
-
-
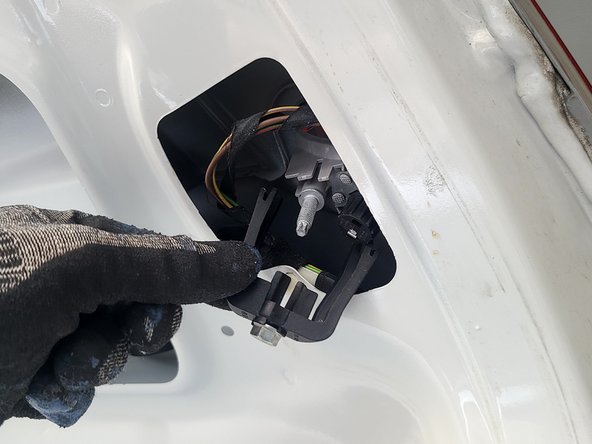
Using either a 10 mm socket or an open-end 10 mm wrench, turn the nut counterclockwise to loosen it and remove the bracket that secures the inner taillight.
-
-
-
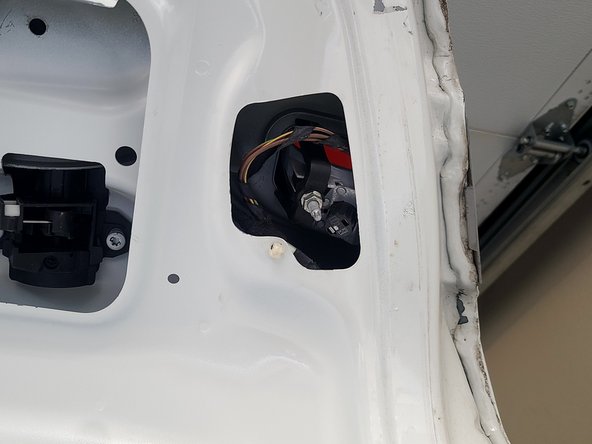
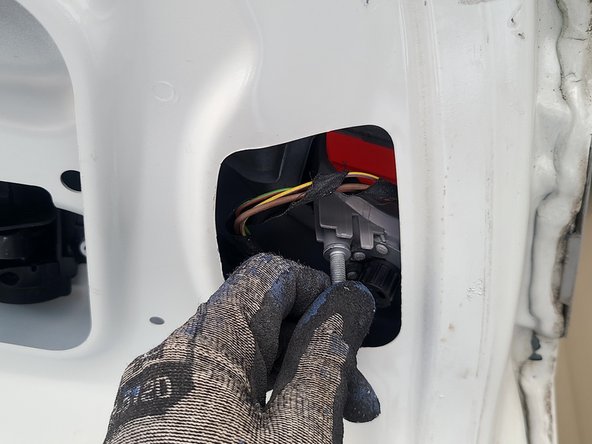
From underneath the inner taillight, push the housing with enough upward force to separate it from its socket.
-
-
-
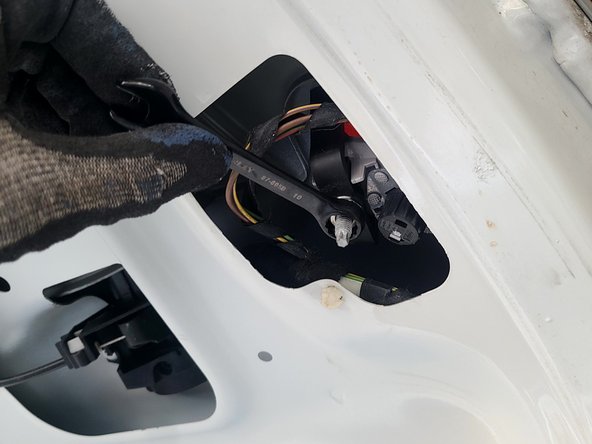
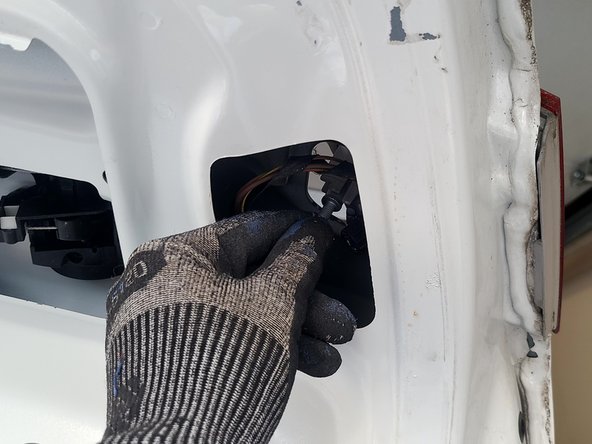
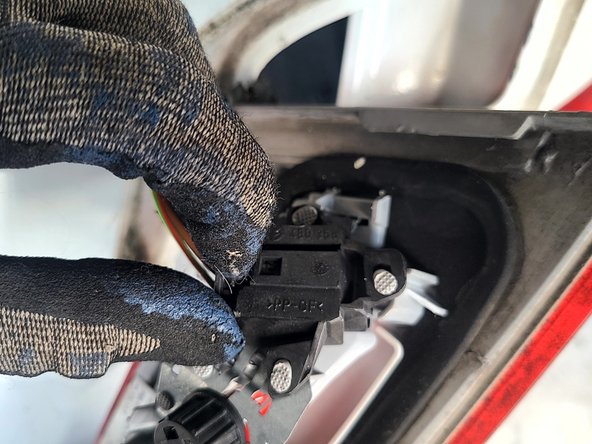
Tilt the inner taillight enough to gain access to the connector on the underside.
-
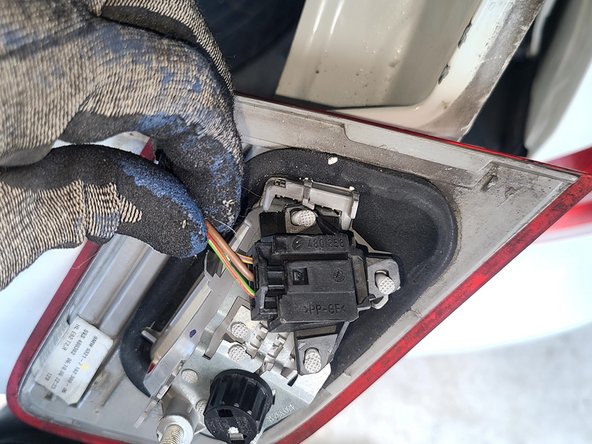
Firmly press the locking tab in the center of the connector.
-
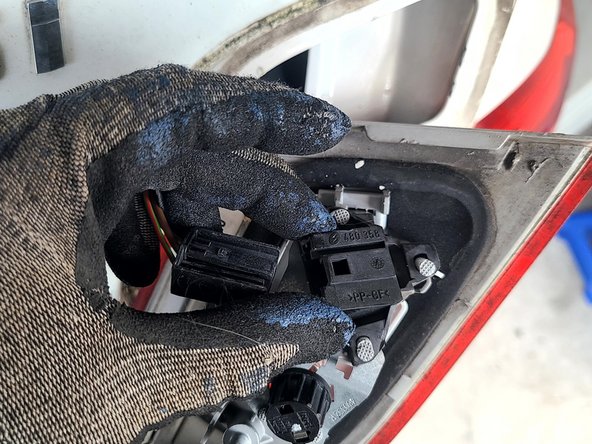
Pull downwards on the connector to disconnect the inner taillight housing.
-


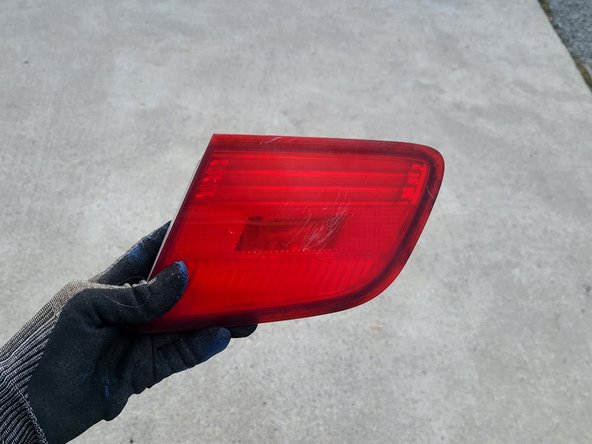
To reassemble the inner taillight, follow these instructions in reverse order.
To reassemble the inner taillight, follow these instructions in reverse order.

Team

York University, Team 1-7, O'Regan Fall 2023 Mitglied von York University, Team 1-7, O'Regan Fall 2023
YORK-O'REGAN-F23S1G7
1 Mitglied
1 Anleitung geschrieben