Zum Hauptinhalt wechseln

2005-2010 Hummer H3 Faulty Speaker Replacement

Was du brauchst

  1. 2005-2010 Hummer H3 Faulty Speaker Replacement, Disconnect Battery: Schritt 1, Bild 1 von 2 2005-2010 Hummer H3 Faulty Speaker Replacement, Disconnect Battery: Schritt 1, Bild 2 von 2
    • Ensure the vehicle is turned off before accessing the battery.

    • Remove the negative terminal first, followed by the positive terminal. Removing the positive terminal first could result in a direct short to the ground.

    • Use your 10-millimeter wrench to remove the hex nuts on the negative terminal. (Image 1)

    • Once the negative terminal's hex nut is removed, we can tuck the negative terminal and cable beside the battery. (Image 2)

    • Repeat these two steps for the positive terminal.

  2. 2005-2010 Hummer H3 Faulty Speaker Replacement, Locate and Remove Plastic Covers: Schritt 2, Bild 1 von 3 2005-2010 Hummer H3 Faulty Speaker Replacement, Locate and Remove Plastic Covers: Schritt 2, Bild 2 von 3 2005-2010 Hummer H3 Faulty Speaker Replacement, Locate and Remove Plastic Covers: Schritt 2, Bild 3 von 3
    • Identify plastic covers (Image 1)

    • Remove plastic covers with tweezers (Image 2 & 3)

    • Be careful not to scratch the plastic when you remove the coverings with the tweezers.

  3. 2005-2010 Hummer H3 Faulty Speaker Replacement, Removing the Fasteners: Schritt 3, Bild 1 von 3 2005-2010 Hummer H3 Faulty Speaker Replacement, Removing the Fasteners: Schritt 3, Bild 2 von 3 2005-2010 Hummer H3 Faulty Speaker Replacement, Removing the Fasteners: Schritt 3, Bild 3 von 3
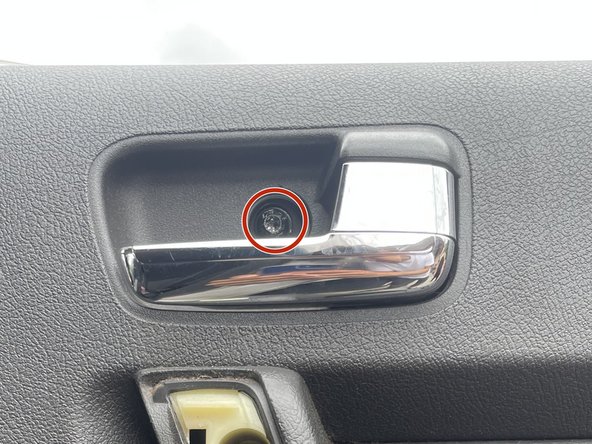
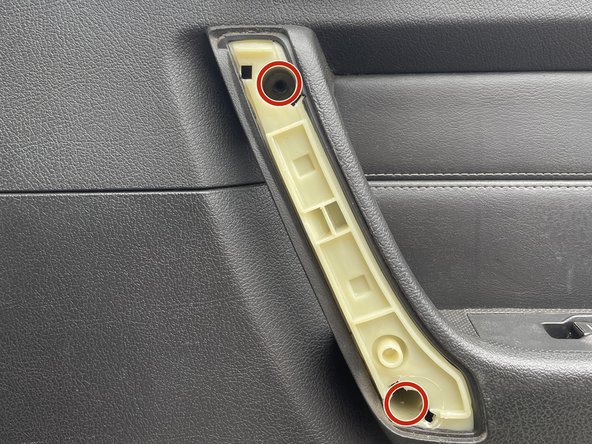
    • Remove the three highlighted fasteners with the T30 Torx Screwdriver. (Image 1 & 2)

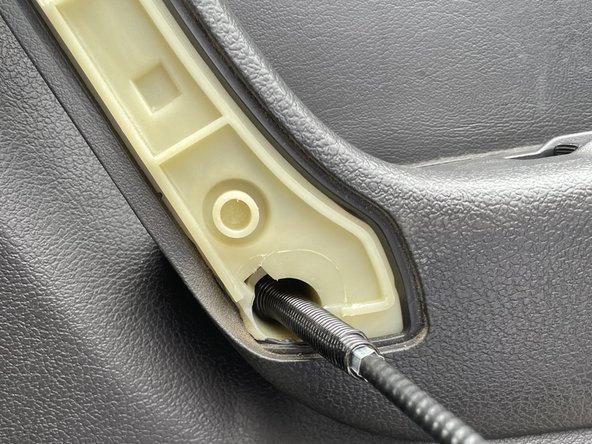
    • Use the magnetic pickup tool for loosened stubborn fasteners that are difficult to remove from the socket (Image 3)

  4. 2005-2010 Hummer H3 Faulty Speaker Replacement, Detaching Door Panel: Schritt 4, Bild 1 von 3 2005-2010 Hummer H3 Faulty Speaker Replacement, Detaching Door Panel: Schritt 4, Bild 2 von 3 2005-2010 Hummer H3 Faulty Speaker Replacement, Detaching Door Panel: Schritt 4, Bild 3 von 3
    • The door panel will not fully detach in this step. Do not yank after the panel is released from the frame!

    • It is recommended to have an extra helping hand for the following steps.

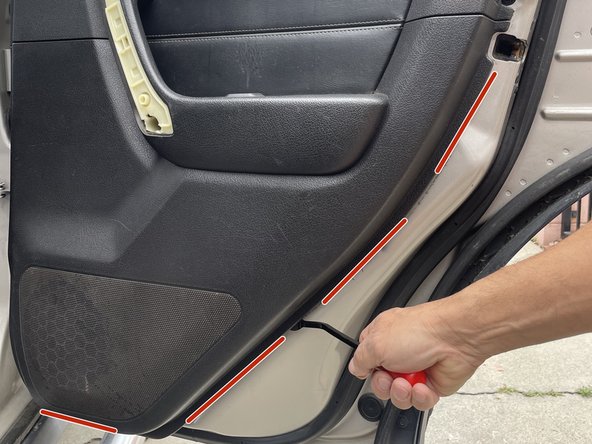
    • Shimmy the prybar along the outlined area until you feel a slight detachment from the door panel. (Image 1)

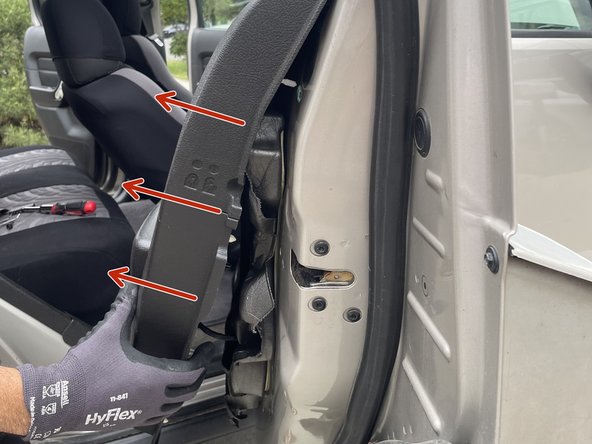
    • Grab the door panel and pull the bottom portion towards yourself slightly. (Image 2)

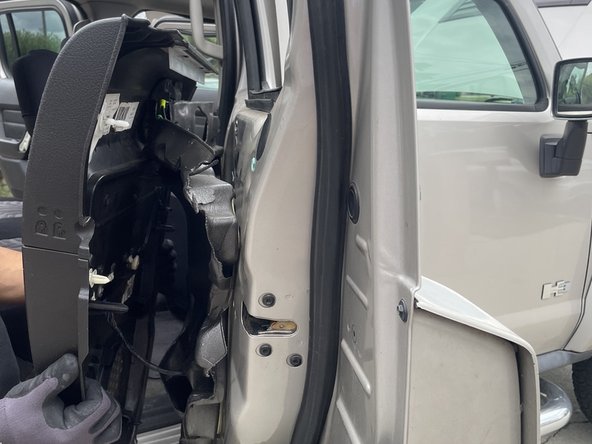
    • With the panel pulled slightly towards you, you can lift it, releasing it from the frame. (Image 3)

  5. 2005-2010 Hummer H3 Faulty Speaker Replacement, Disconnecting Cables from the Panel: Schritt 5, Bild 1 von 3 2005-2010 Hummer H3 Faulty Speaker Replacement, Disconnecting Cables from the Panel: Schritt 5, Bild 2 von 3 2005-2010 Hummer H3 Faulty Speaker Replacement, Disconnecting Cables from the Panel: Schritt 5, Bild 3 von 3
    • Do not yank the door panel.

    • Having an extra helping hand hold the panel while you complete the following steps is recommended.

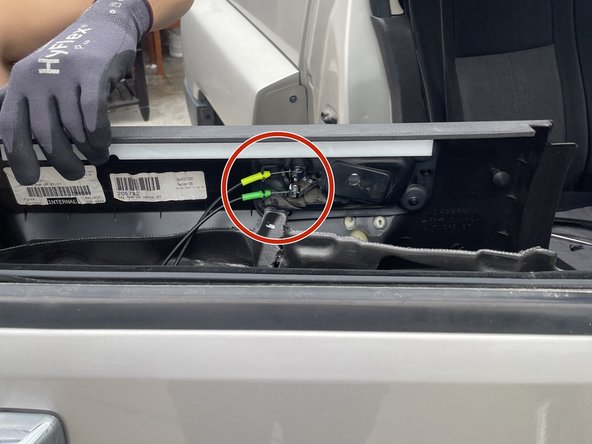
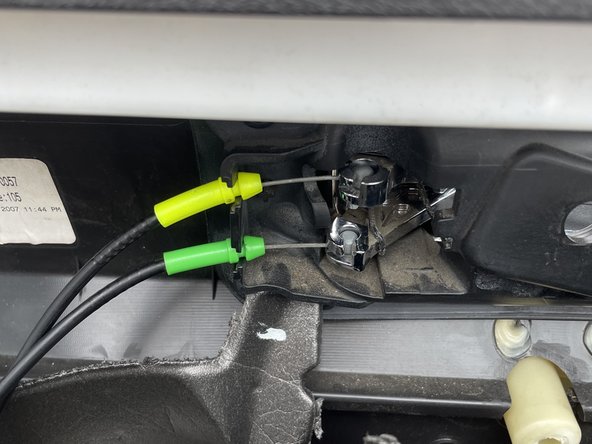
    • Locate the two metal cables used for the handle and locking mechanism attached to the ball sockets behind the door panel. (Image 1)

    • Rotate the yellow cable 90 degrees counterclockwise and lift the cable from the ball socket. Repeat for the green cable. (Image 2)

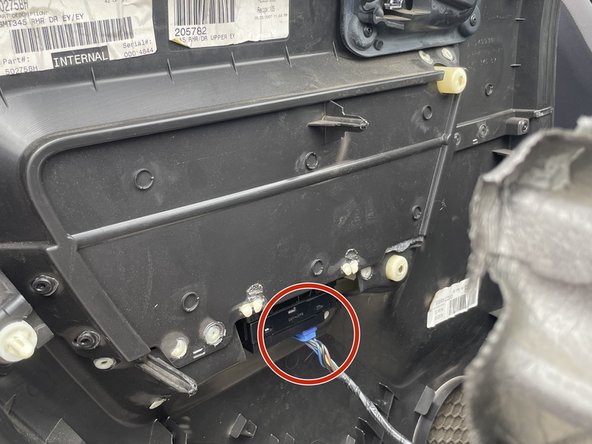
    • With both cables removed from the panel, we can now remove the Blue electrical cable.

    • Press on the clip of the blue cable and gently unplug. (Image 3)

  6. 2005-2010 Hummer H3 Faulty Speaker Replacement, Removing faulty rear side speaker: Schritt 6, Bild 1 von 3 2005-2010 Hummer H3 Faulty Speaker Replacement, Removing faulty rear side speaker: Schritt 6, Bild 2 von 3 2005-2010 Hummer H3 Faulty Speaker Replacement, Removing faulty rear side speaker: Schritt 6, Bild 3 von 3
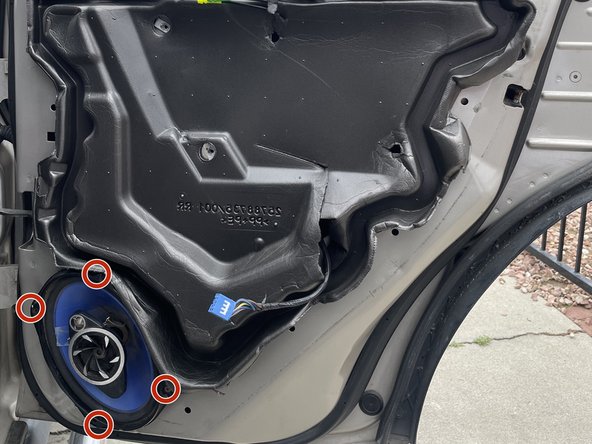
    • Locate the four fasteners that hold the speaker in place. (Image 1)

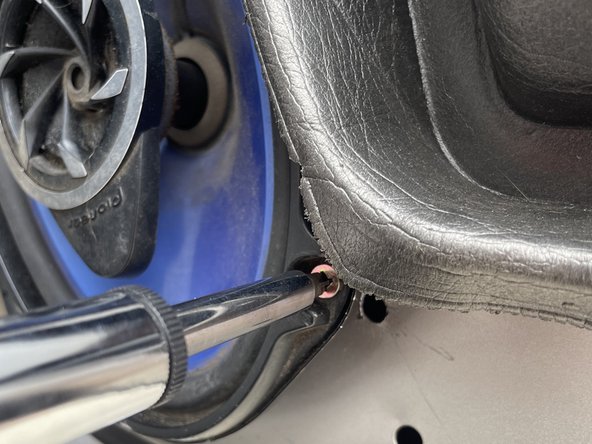
    • Use the Phillips Head Screwdriver size PH2 to remove the four fasteners (Image 2)

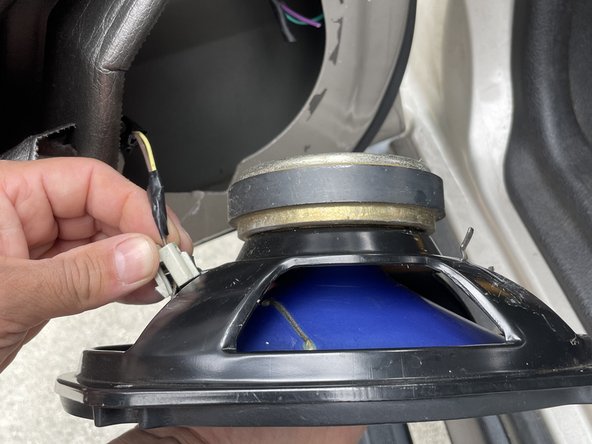
    • With the fasteners removed, we can gently pull the speaker out, which will reveal the final cable.

    • Locate the clip on the cable connected to the speaker and gently unplug it. (Image 3)

Abschluss

To reassemble your device, follow these instructions in reverse order.

Justin Cobian

Mitglied seit: 05/04/23

133 Reputation

1 Anleitung geschrieben

0 Kommentare

Kommentar hinzufügen

Seitenaufrufe:

Letzte 24 Stunden: 3

Letzte 7 Tage: 6

Letzte 30 Tage: 10

Insgesamt: 146