Diese Version enthält möglicherweise inkorrekte Änderungen. Wechsle zur letzten geprüften Version.
Was du brauchst
-
Dieser Schritt ist noch nicht übersetzt. Hilf mit, ihn zu übersetzen!
-
Pop open the hood and locate the battery.
-
Loosen the bolt on the positive terminal with the 10mm wrench.
-
Pull up and detach the terminal to disrupt power flow.
-
-
Dieser Schritt ist noch nicht übersetzt. Hilf mit, ihn zu übersetzen!
-
Pry open the screw cover on the inside of the handle with the small flathead screwdriver.
-
Unscrew the handle with the phillips screwdriver.
-
-
Dieser Schritt ist noch nicht übersetzt. Hilf mit, ihn zu übersetzen!
-
Pull the handle cover down and out of its pocket.
-
Slide the cover to the right off the handle.
-
Detach the tab on the back of the locking mechanism to completely remove the cover.
-
-
Dieser Schritt ist noch nicht übersetzt. Hilf mit, ihn zu übersetzen!
-
Peel off the rubber insert in the inner arm rest.
-
Unscrew the inner arm rest panel with the phillips screwdriver. This screw is holding the arm rest panel together.
-
-
Dieser Schritt ist noch nicht übersetzt. Hilf mit, ihn zu übersetzen!
-
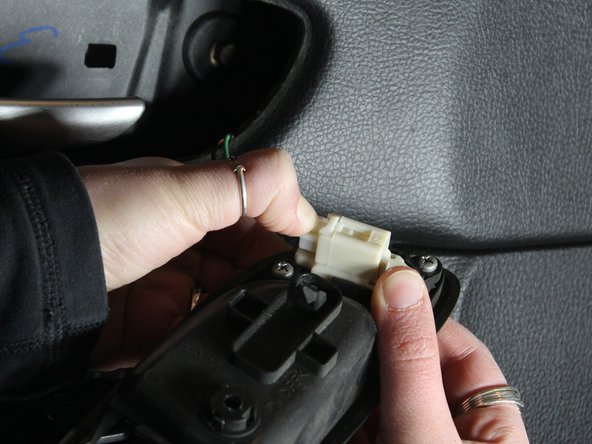
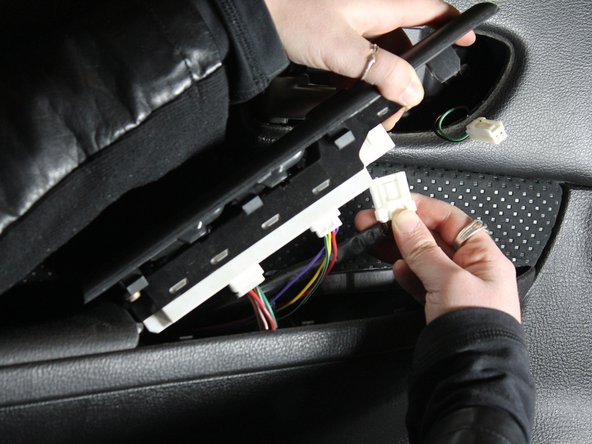
Pry the power window switch case out of the arm rest with your flathead screwdriver.
-
Detach all tabs on the back of the switch case to remove completely.
-
-
-
Dieser Schritt ist noch nicht übersetzt. Hilf mit, ihn zu übersetzen!
-
Pop out the cover by the outside mirror to relieve door tension.
-
-
Dieser Schritt ist noch nicht übersetzt. Hilf mit, ihn zu übersetzen!
-
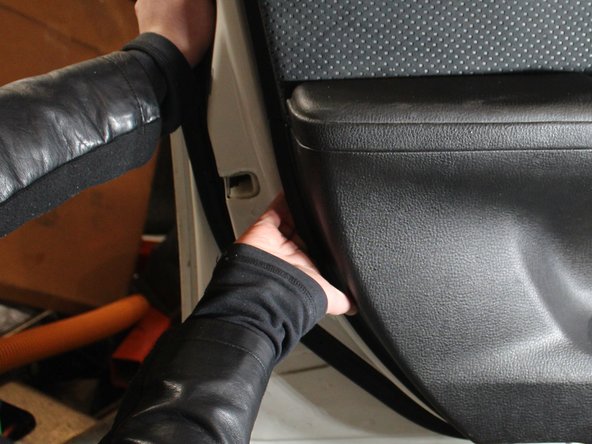
Pop out the door panel starting on the side closest to the door hinges.
-
-
Dieser Schritt ist noch nicht übersetzt. Hilf mit, ihn zu übersetzen!
-
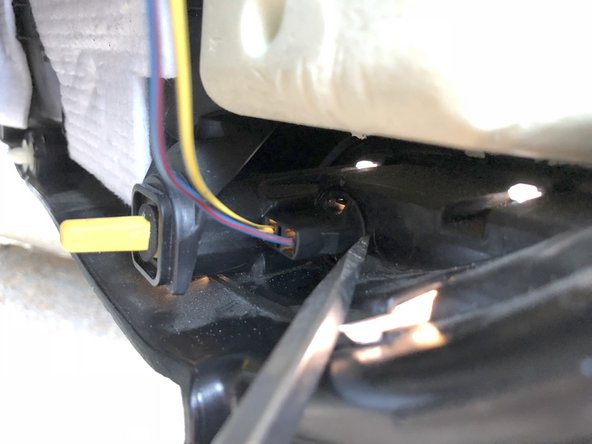
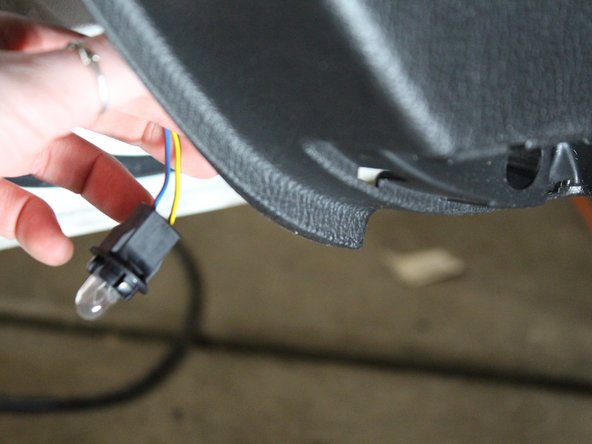
Use a flathead screwdriver to press the clip holding the light from the back of the door and pull the lightbulb out.
-
-
Dieser Schritt ist noch nicht übersetzt. Hilf mit, ihn zu übersetzen!
-
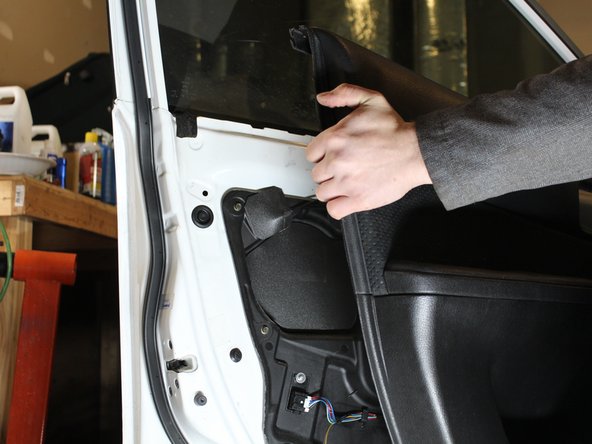
Lift the door panel up and out to remove.
-
-
Dieser Schritt ist noch nicht übersetzt. Hilf mit, ihn zu übersetzen!
-
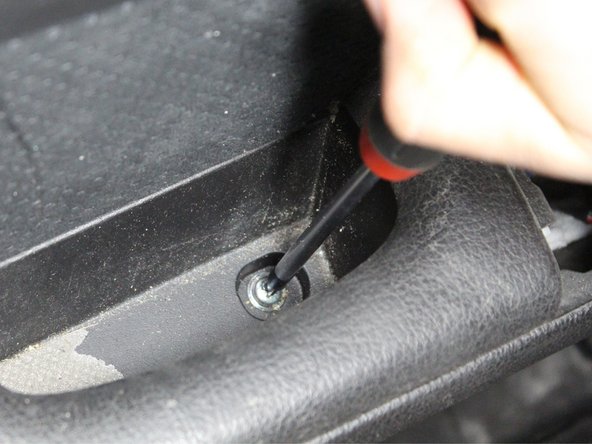
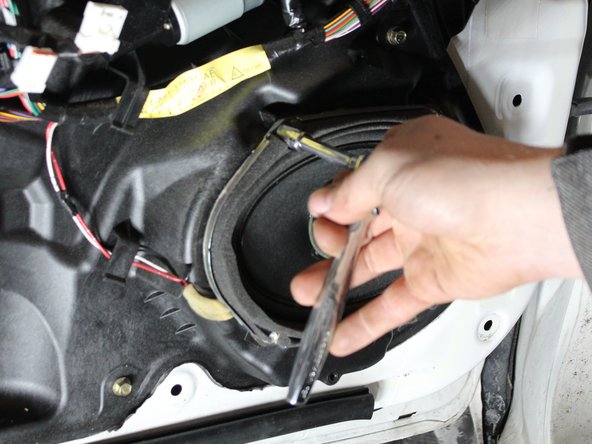
Unscrew four bolts holding the speaker with the ratchet.
-
Pull out the speaker.
-
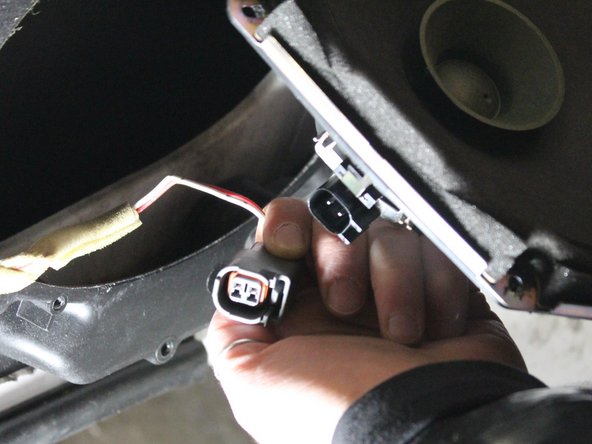
Detach the connector in the back.
-
-
Dieser Schritt ist noch nicht übersetzt. Hilf mit, ihn zu übersetzen!
-
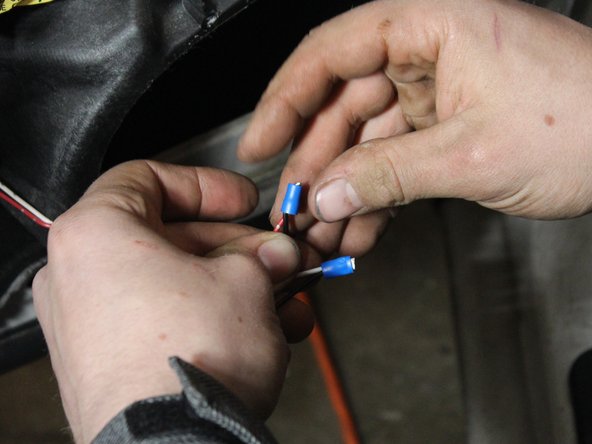
Cut and strip the wires that were connected to the speaker.
-
-
Dieser Schritt ist noch nicht übersetzt. Hilf mit, ihn zu übersetzen!
-
Splice the wires from the door to the new speaker's wires making sure to connect the correct wire polarity. (The small connector wire from the speaker is positive.)
-
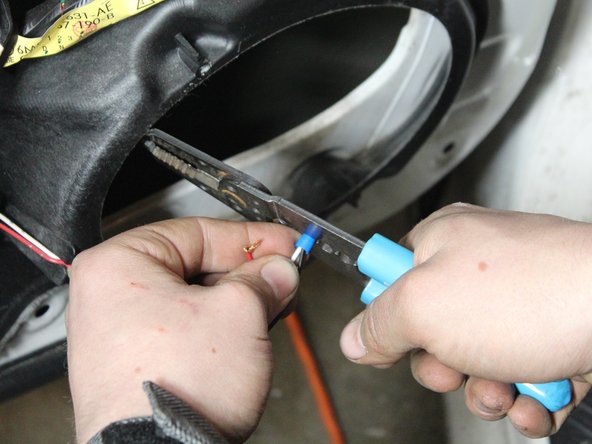
Cover and crimp the wires with the butt-end connectors.
-
-
Dieser Schritt ist noch nicht übersetzt. Hilf mit, ihn zu übersetzen!
-
Attach to the speaker terminals.
-
-
Dieser Schritt ist noch nicht übersetzt. Hilf mit, ihn zu übersetzen!
-
Insert the new speaker and screw into place.
-


Rückgängig: Ich habe diese Anleitung nicht absolviert.
Ein:e weitere:r Nutzer:in hat diese Anleitung absolviert.

Team

Eastern Washington University, Team S27-G3, Crane Winter 2018 Mitglied von Eastern Washington University, Team S27-G3, Crane Winter 2018
EWU-CRANE-W18S27G3
3 Mitglieder
4 Anleitungen geschrieben