Diese Version enthält möglicherweise inkorrekte Änderungen. Wechsle zur letzten geprüften Version.
Was du brauchst
-
Dieser Schritt ist noch nicht übersetzt. Hilf mit, ihn zu übersetzen!
-
Use soft disassemble tools to remove the bezels hiding the screws.
-
-
-
Dieser Schritt ist noch nicht übersetzt. Hilf mit, ihn zu übersetzen!
-
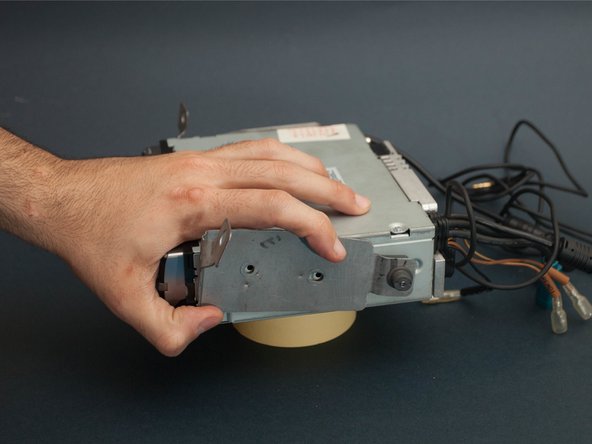
Unscrew mounting plates from original headunit to custom headunit.
-
-
Dieser Schritt ist noch nicht übersetzt. Hilf mit, ihn zu übersetzen!
-
Screw the mounting plates on to your custom head unit.
-
-
Dieser Schritt ist noch nicht übersetzt. Hilf mit, ihn zu übersetzen!
-
You will need an adapter from Suzuki's headunit connection to generic connection.
-
-
Dieser Schritt ist noch nicht übersetzt. Hilf mit, ihn zu übersetzen!
-
Return the AC grill, screws and bezels.
-


Rückgängig: Ich habe diese Anleitung nicht absolviert.
18 weitere Nutzer:innen haben diese Anleitung absolviert.

8 Kommentare
Thanks for this, exactly what ive been looking for. I dont suppose you'd know the type of adapter necessary to connect the suzuki plug to an after market stereo? Thanks again for the guide!
Absolutely brilliant guide. Thanks. Had to purchase a different harness adaptor for my 14 alto sz3. It says on the packet the harness is for Honda Acc 9/98> but this fits and works 100%. Available from Halfords it is item PC2-68-4. Once again many thanks for the guide.
Thanks Jossef Harush for such a detailed guide. It really helps me a lot but at last due to some reasons the connection cable tear out and I have to reach out Gomechanic team for the replacement with a genuine wire. Love their service as well as your guide too.
Thanks so much for this guide.
We have removed the screws on the head unit but it will not pull out at all, it seems completely stuck. Any suggestions on how to remove it or something we are missing?