Diese Version enthält möglicherweise inkorrekte Änderungen. Wechsle zur letzten geprüften Version.
Was du brauchst
-
Dieser Schritt ist noch nicht übersetzt. Hilf mit, ihn zu übersetzen!
-
Flip the camera upside down and peel off the two plastic screw covers with the metal spudger to reveal the screws.
-
-
Dieser Schritt ist noch nicht übersetzt. Hilf mit, ihn zu übersetzen!
-
Remove the two 5 mm screws from the bottom of the camera with a T4 screwdriver.
-
-
-
Dieser Schritt ist noch nicht übersetzt. Hilf mit, ihn zu übersetzen!
-
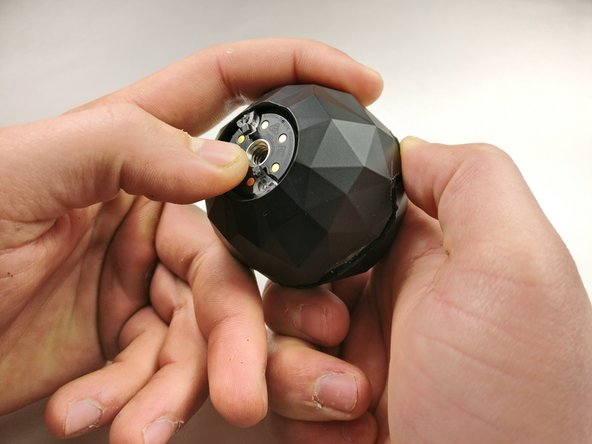
Gently pry the plastic ring from around the charging plate with the metal spudger.
-
Remove the outside shell by pressing against the center of the charging plate and pulling the bottom shell away from the top shell.
-
-
Dieser Schritt ist noch nicht übersetzt. Hilf mit, ihn zu übersetzen!
-
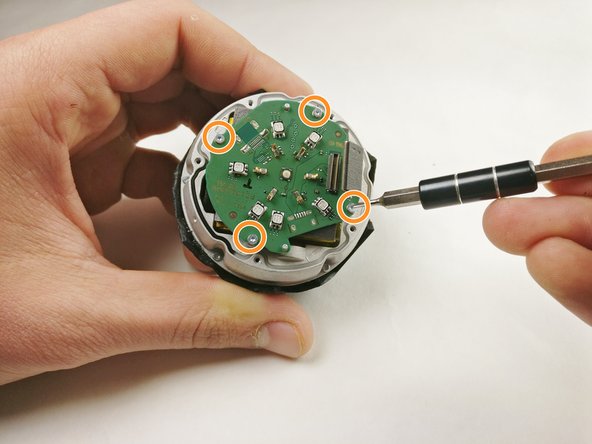
Remove the five 2 mm screws using a T4 screwdriver.
-
Pull off the charging plate assembly.
-
-
Dieser Schritt ist noch nicht übersetzt. Hilf mit, ihn zu übersetzen!
-
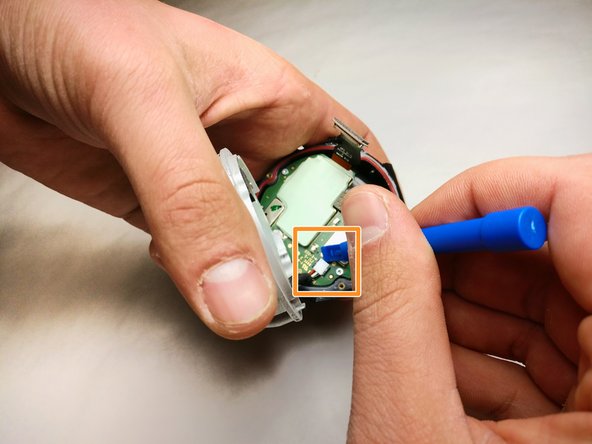
Gently pry the plug off the port on the circuit board with a plastic opening tool.
-
Remove the four 2 mm screws using a T4 screwdriver.
-
Remove the circuit board from the device.
-
-
Dieser Schritt ist noch nicht übersetzt. Hilf mit, ihn zu übersetzen!
-
Remove the five 4 mm screws around the battery assembly with a T4 screwdriver.
-
Lift the battery assembly and gently pry the plug out of its port on the board below with a plastic opening tool.
-
Press the battery from the back of the battery assembly to remove it with a plastic opening tool until the glue releases the battery.
-


Rückgängig: Ich habe diese Anleitung nicht absolviert.
2 weitere Nutzer:innen haben diese Anleitung absolviert.
Team

IUPUI, Team S5-G3, Baechle Fall 2017 Mitglied von IUPUI, Team S5-G3, Baechle Fall 2017
IUPUI-BAECHLE-F17S5G3
3 Mitglieder
3 Anleitungen geschrieben
4 Kommentare
Wich one battery Can I use to replace It?
Where can i purchase a battery
I would like to purchase a 360 fly battery