Zum Hauptinhalt wechseln

ASDA ES177 Steam Iron Power cord Replacement

Was du brauchst

  1. ASDA ES177 Steam Iron Power cord Replacement, Disassembly: Schritt 1, Bild 1 von 3 ASDA ES177 Steam Iron Power cord Replacement, Disassembly: Schritt 1, Bild 2 von 3 ASDA ES177 Steam Iron Power cord Replacement, Disassembly: Schritt 1, Bild 3 von 3
    • Remove the security screw from the back panel.

    • Be cautious of any residual charge when disassembling.

  2. ASDA ES177 Steam Iron Power cord Replacement, Remove the back plate: Schritt 2, Bild 1 von 3 ASDA ES177 Steam Iron Power cord Replacement, Remove the back plate: Schritt 2, Bild 2 von 3 ASDA ES177 Steam Iron Power cord Replacement, Remove the back plate: Schritt 2, Bild 3 von 3
    • Insert a flathead screwdriver to pop off the back plate

  3. ASDA ES177 Steam Iron Power cord Replacement, Remove the cord from the holder: Schritt 3, Bild 1 von 3 ASDA ES177 Steam Iron Power cord Replacement, Remove the cord from the holder: Schritt 3, Bild 2 von 3 ASDA ES177 Steam Iron Power cord Replacement, Remove the cord from the holder: Schritt 3, Bild 3 von 3
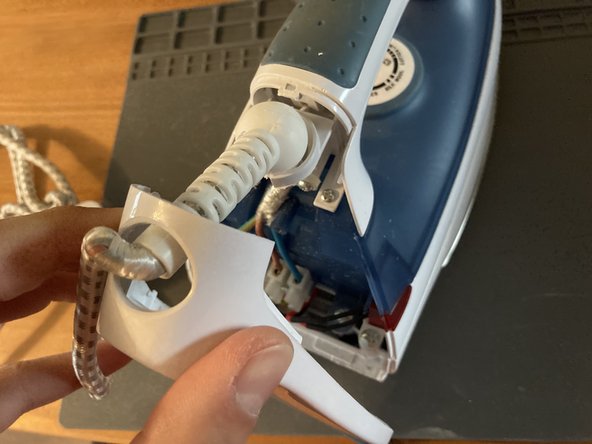
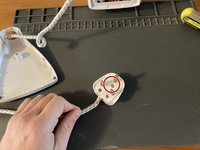
    • Remove the retainer clamp by unscrewing the two Phillips screws.

  4. ASDA ES177 Steam Iron Power cord Replacement, Release the cord from the connector: Schritt 4, Bild 1 von 3 ASDA ES177 Steam Iron Power cord Replacement, Release the cord from the connector: Schritt 4, Bild 2 von 3 ASDA ES177 Steam Iron Power cord Replacement, Release the cord from the connector: Schritt 4, Bild 3 von 3
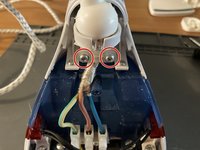
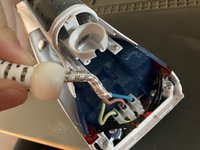
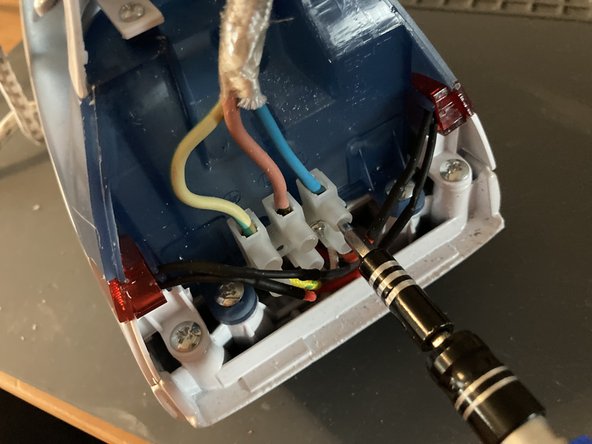
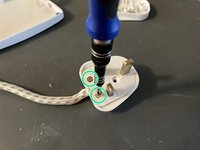
    • Remove the three flat-headed screws from the connector

  5. ASDA ES177 Steam Iron Power cord Replacement, Remove the plug: Schritt 5, Bild 1 von 3 ASDA ES177 Steam Iron Power cord Replacement, Remove the plug: Schritt 5, Bild 2 von 3 ASDA ES177 Steam Iron Power cord Replacement, Remove the plug: Schritt 5, Bild 3 von 3
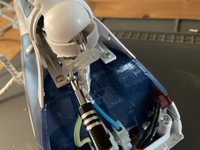
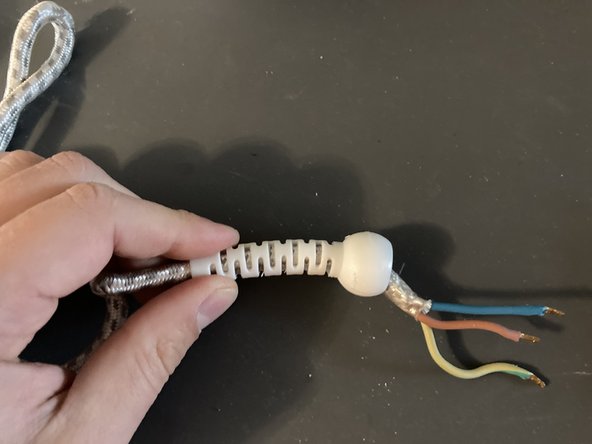
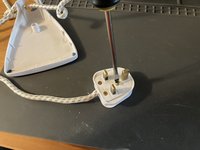
    • Unscrew the main screw to reveal the 3-core cable.

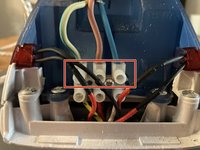
    • Remove the two screws that retain the cord in the plug.

  6. ASDA ES177 Steam Iron Power cord Replacement, Remove the rotator support: Schritt 6, Bild 1 von 1
    • Remove the rotator guide.

Abschluss

To reassemble your device, follow these instructions in reverse order.

2 weitere Personen haben diese Anleitung absolviert.

honakrisi

Mitglied seit: 01/28/20

3.718 Reputation

8 Anleitungen geschrieben

0 Kommentare

Kommentar hinzufügen

Seitenaufrufe:

Letzte 24 Stunden: 1

Letzte 7 Tage: 2

Letzte 30 Tage: 8

Insgesamt: 980