Zum Hauptinhalt wechseln

ASUS FonePad 7 Vetro/Touch Replacement

Was du brauchst

  1. ASUS FonePad 7 Vetro/Touch Replacement, Rear Panel: Schritt 1, Bild 1 von 2 ASUS FonePad 7 Vetro/Touch Replacement, Rear Panel: Schritt 1, Bild 2 von 2
    • Make sure your device is turned off. Then with a plastic opening tool, carefully remove the back panel by carefully working your way around the perimeter.

  2. ASUS FonePad 7 Vetro/Touch Replacement, Battery: Schritt 2, Bild 1 von 2 ASUS FonePad 7 Vetro/Touch Replacement, Battery: Schritt 2, Bild 2 von 2
    • Remove adesive strips.

    • Disconnect the battery connectors by carefully pulling down on them using a spudger or plastic opening tool.

  3. ASUS FonePad 7 Vetro/Touch Replacement, Battery: Schritt 3, Bild 1 von 3 ASUS FonePad 7 Vetro/Touch Replacement, Battery: Schritt 3, Bild 2 von 3 ASUS FonePad 7 Vetro/Touch Replacement, Battery: Schritt 3, Bild 3 von 3
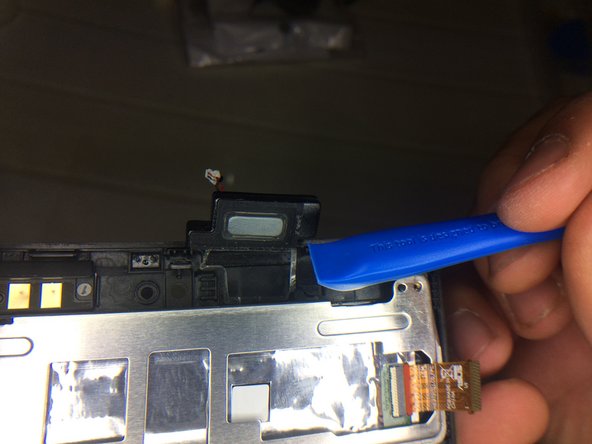
    • Disconnect Touch Connectors using a spudger or plastic opener tool.

    • Disconnect the ZIF connectors holding the battery.

    • You can also use your hand to remove ZIF connectors.

    • ZIF connectors are delicate so be careful when you are removing them.

  4. ASUS FonePad 7 Vetro/Touch Replacement, Remove Battery: Schritt 4, Bild 1 von 1
    • Using a plastic opening tool carefully pry the battery loose. The battery is glued to the pad; slight pressure will be needed to remove the battery.
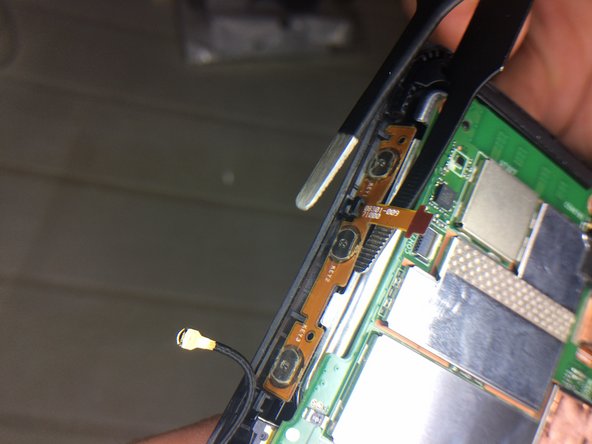
  5. ASUS FonePad 7 Vetro/Touch Replacement, Power Management: Schritt 5, Bild 1 von 2 ASUS FonePad 7 Vetro/Touch Replacement, Power Management: Schritt 5, Bild 2 von 2
    • Disconnect cable

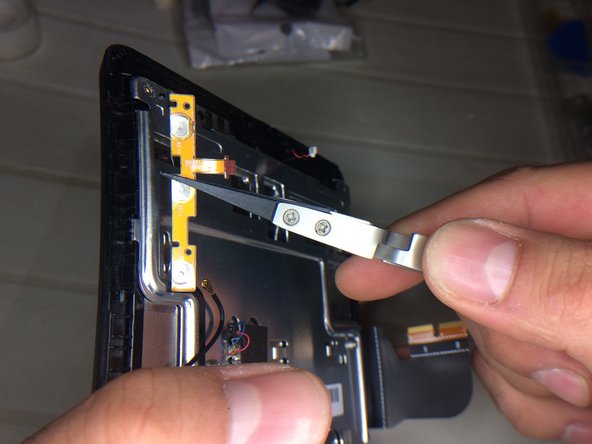
    • Remove the two Philips #0 screws from the power management board

    • Remove Philips #0 screw

  6. ASUS FonePad 7 Vetro/Touch Replacement, MotherBoard: Schritt 6, Bild 1 von 2 ASUS FonePad 7 Vetro/Touch Replacement, MotherBoard: Schritt 6, Bild 2 von 2
    • Remove GPS antenna with a spudger.

    • Disconnect the connector

  7. ASUS FonePad 7 Vetro/Touch Replacement, Power and Volume Buttons: Schritt 7, Bild 1 von 3 ASUS FonePad 7 Vetro/Touch Replacement, Power and Volume Buttons: Schritt 7, Bild 2 von 3 ASUS FonePad 7 Vetro/Touch Replacement, Power and Volume Buttons: Schritt 7, Bild 3 von 3
    • Remove the power and volume connector

  8. ASUS FonePad 7 Vetro/Touch Replacement, Earpiece: Schritt 8, Bild 1 von 2 ASUS FonePad 7 Vetro/Touch Replacement, Earpiece: Schritt 8, Bild 2 von 2
    • Disconnect Earpiece connector

  9. ASUS FonePad 7 Vetro/Touch Replacement, Display Cable: Schritt 9, Bild 1 von 2 ASUS FonePad 7 Vetro/Touch Replacement, Display Cable: Schritt 9, Bild 2 von 2
    • Remove the Display connector from motherboard.

  10. ASUS FonePad 7 Vetro/Touch Replacement, MotherBoard: Schritt 10, Bild 1 von 1
    • Remove 4screw Philips #0 from motherboard

  11. ASUS FonePad 7 Vetro/Touch Replacement, Components: Schritt 11, Bild 1 von 3 ASUS FonePad 7 Vetro/Touch Replacement, Components: Schritt 11, Bild 2 von 3 ASUS FonePad 7 Vetro/Touch Replacement, Components: Schritt 11, Bild 3 von 3
    • Remove Components

  12. ASUS FonePad 7 Vetro/Touch Replacement, Remove Glass (TouchScreen): Schritt 12, Bild 1 von 2 ASUS FonePad 7 Vetro/Touch Replacement, Remove Glass (TouchScreen): Schritt 12, Bild 2 von 2
    • Inserisci qui la competenza.

  13. ASUS FonePad 7 Vetro/Touch Replacement, Replace with new Glass. Good Job ;): Schritt 13, Bild 1 von 1
    • Inserisci qui la competenza.

Abschluss

Per rimontare il dispositivo, segui queste istruzioni in ordine inverso.

4 weitere Nutzer:innen haben diese Anleitung absolviert.

Andrew

Mitglied seit: 02/17/15

141 Reputation

1 Anleitung geschrieben

0 Kommentare

Kommentar hinzufügen

Seitenaufrufe:

Letzte 24 Stunden: 0

Letzte 7 Tage: 5

Letzte 30 Tage: 18

Insgesamt: 3,188