Einleitung
This guide provides instructions for the replacement of the Asus GL752VW-DH74 battery.
Was du brauchst
-
-
-
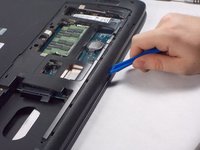
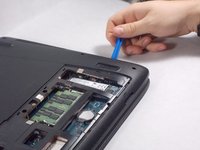
Unscrew the nine remaining 8 mm Phillips-head screws on the back of the device.
-


To reassemble your device, follow these instructions in reverse order.
To reassemble your device, follow these instructions in reverse order.
Rückgängig: Ich habe diese Anleitung nicht absolviert.
21 weitere Personen haben diese Anleitung absolviert.
Team

UMass Dartmouth, Team S1-G3, Isaacson Fall 2017 Mitglied von UMass Dartmouth, Team S1-G3, Isaacson Fall 2017
UMASSD-ISAACSON-F17S1G3
3 Mitglieder
5 Anleitungen geschrieben
5 Kommentare
Thank you for your help, I now know how to change the battery, I tried disconnecting and reconnecting it see if I would get any power at all but zip, I will look on Ebay to try and buy a battery for it but I hope it’s that as it was working fine then said battery had no charge when I always made sure it never ran out so not sure what the problem was, at first I thought it was the chord but wasn’t that as I changed it.
I have added comments to steps 5, 6, and 7. The biggest piece of advice is just to make sure you have all 20 screws removed before trying to remove the keyboard (the guide does NOT mention all 20 of these screws). This might be more than necessary but I felt safer removing them than risking snapping one of the plastic clips that holds the keyboard in place.
Dont forget to put the three screws back in the frame prior to putting the optical drive back in and dont forget to put the battery screws back in, other than that a great guide.