Einleitung
This guide will illustrate the steps involved in replacing the laptop's hard drive. This may be necessary if your computer won't boot or if you run out of space.
Was du brauchst
-
-
Turn the laptop off and unplug all cables.
-
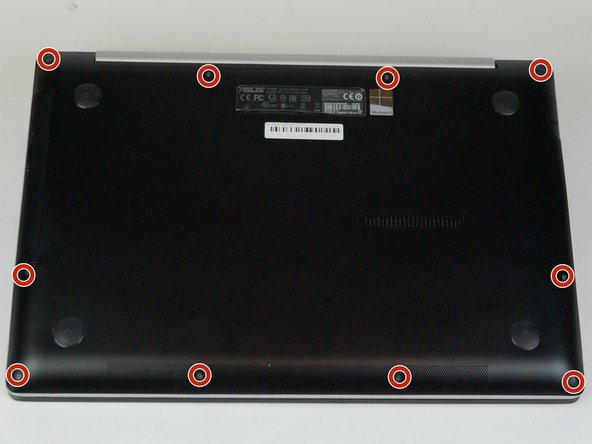
Flip over so the bottom is facing you.
-
Remove the ten 3mm Torx T5 screws from the bottom cover.
-
-
-
Use a spudger to wedge between the laptop and bottom cover—lift upwards to pry open.
-
Run the spudger along the perimeter of the bottom cover to remove.
-
-
-
-
Remove two 4mm black Phillips #1 screws from CD/DVD bracket.
-
Remove the single 4mm silver Phillips #1 screw from the bottom of the CD/DVD bracket.
-
Remove the CD/DVD bracket.
-
-
-
Remove the four 4mm silver Phillips #1 screws that are holding the hard drive in place.
-


To reassemble your device, follow these instructions in reverse order.
To reassemble your device, follow these instructions in reverse order.
Rückgängig: Ich habe diese Anleitung nicht absolviert.
3 weitere Personen haben diese Anleitung absolviert.
Team

USF Tampa, Team S5-G1, Passmore Spring 2018 Mitglied von USF Tampa, Team S5-G1, Passmore Spring 2018
USFT-PASSMORE-S18S5G1
4 Mitglieder
6 Anleitungen geschrieben