Einleitung
It is a common issue among ASUS Q400A laptops to refrain from charging. Among battery and charger issues, it is likely that the power jack isn't operating correctly. The following is a guide explaining how to gain access to the power jack for replacement.
Was du brauchst
-
-
Flip laptop over with the battery facing toward you.
-
Slide both tabs with the lock/unlock symbol, near the battery on the right of the notebook, to the unlock position.
-
Grab the top edge of the battery & lift upward to relieve the battery from its slot.
-
-
-
Remove the one black 8mm Phillips #0 screw.
-
Lift and remove the bottom cover panel using the plastic opening tool.
-
-
-
Remove the single silver 8mm Phillips #0 screw.
-
Remove the three 8mm Phillips #0 screws.
-
-
-
-
Remove the seven black 8mm Phillips #0 screws around the perimeter.
-
Remove the two silver 8mm Phillips #0 screws that are under the battery.
-
-
-
Flip the device right-side up and pry up the keyboard and touchpad gently using both hands.
-
-
-
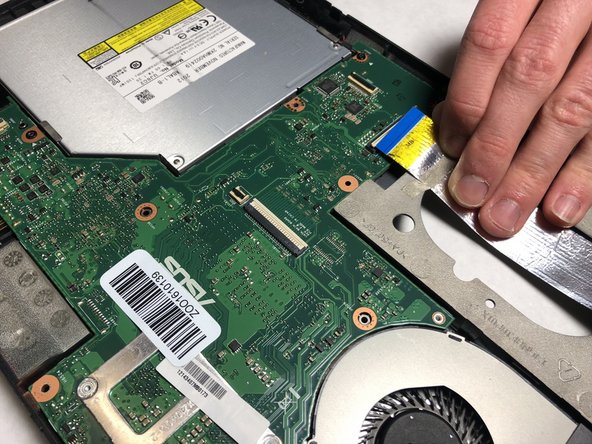
Release the ZIF (zero insertion force) connector using a plastic spudger.
-
Remove the ribbon cable by hand from the ZIF connector.
-
-
-
Unscrew the two black 8mm Phillips #0 screws.
-
Firmly grasp each antenna head with a pair of blunt tweezers and detach it by lifting up straight.
-
-
-
Lift the motherboard gently to completely remove this component from the device.
-
Detach Audio Cable gently by hand and you have now access to replace the power jack.
-


To reassemble your device, follow these instructions in reverse order.
To reassemble your device, follow these instructions in reverse order.
Rückgängig: Ich habe diese Anleitung nicht absolviert.
Ein:e weitere:r Nutzer:in hat diese Anleitung absolviert.

Team

IUPUI, Team S1-G3, Harley Fall 2018 Mitglied von IUPUI, Team S1-G3, Harley Fall 2018
IUPUI-HARLEY-F18S1G3
3 Mitglieder
2 Anleitungen geschrieben