Zum Hauptinhalt wechseln
Gemeinsam reparieren - Jetzt registrieren

ASUS TUF Gaming FX505DY Display Assembly Replacement

Was du brauchst

  1. ASUS TUF Gaming FX505DY Display Assembly Replacement, Back Case: Schritt 1, Bild 1 von 1
    • Turn off the laptop.

    • Disconnect the charging cable.

    • Failure to disconnect the charging cable and power down the computer could result in personal or property damage.

    • Flip the laptop so the back is facing up.

    Frag FixBot

    Kommentar hinzufügen

  2. ASUS TUF Gaming FX505DY Display Assembly Replacement: Schritt 2, Bild 1 von 2 ASUS TUF Gaming FX505DY Display Assembly Replacement: Schritt 2, Bild 2 von 2
    • Use a Phillips #1 screwdriver to remove the five 6 mm screws that secure the back panel.

    • Use the same screwdriver to remove the six 13 mm screws securing the back panel.

    Frag FixBot

    Kommentar hinzufügen

  3. ASUS TUF Gaming FX505DY Display Assembly Replacement: Schritt 3, Bild 1 von 2 ASUS TUF Gaming FX505DY Display Assembly Replacement: Schritt 3, Bild 2 von 2
    • Insert the plastic opening tool at a corner and pry up along the edges, leaving the back side with the hinges for last.

    • Do not insert the opening tool too far into the laptop to avoid damaging internal components.

    Frag FixBot

    Kommentar hinzufügen

  4. ASUS TUF Gaming FX505DY Display Assembly Replacement: Schritt 4, Bild 1 von 2 ASUS TUF Gaming FX505DY Display Assembly Replacement: Schritt 4, Bild 2 von 2
    • Gently lift up the back panel to release any remaining clips on the side with the hinges and remove the panel.

    Frag FixBot

    Kommentar hinzufügen

  5. ASUS TUF Gaming FX505DY Display Assembly Replacement, Solid State Drive: Schritt 5, Bild 1 von 2 ASUS TUF Gaming FX505DY Display Assembly Replacement, Solid State Drive: Schritt 5, Bild 2 von 2
    • Remove the two 3 mm screws holding the solid state drive and its foil wrap in place using a Phillips #1 screwdriver.

    • The drive will pop up at an angle.

    Frag FixBot

    Kommentar hinzufügen

  6. ASUS TUF Gaming FX505DY Display Assembly Replacement: Schritt 6, Bild 1 von 3 ASUS TUF Gaming FX505DY Display Assembly Replacement: Schritt 6, Bild 2 von 3 ASUS TUF Gaming FX505DY Display Assembly Replacement: Schritt 6, Bild 3 von 3
    • Slide the foil wrap off of the drive.

    Frag FixBot

    Kommentar hinzufügen

  7. ASUS TUF Gaming FX505DY Display Assembly Replacement: Schritt 7, Bild 1 von 2 ASUS TUF Gaming FX505DY Display Assembly Replacement: Schritt 7, Bild 2 von 2
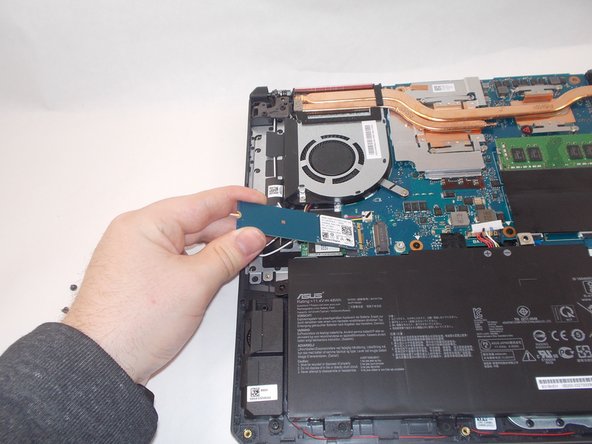
    • Remove the solid state drive by pulling it at an angle from the motherboard.

    Frag FixBot

    Kommentar hinzufügen

  8. ASUS TUF Gaming FX505DY Display Assembly Replacement, Wi-Fi Card: Schritt 8, Bild 1 von 1
    • Remove the tape covering the Wi-Fi card.

    Frag FixBot

    Kommentar hinzufügen

  9. ASUS TUF Gaming FX505DY Display Assembly Replacement: Schritt 9, Bild 1 von 3 ASUS TUF Gaming FX505DY Display Assembly Replacement: Schritt 9, Bild 2 von 3 ASUS TUF Gaming FX505DY Display Assembly Replacement: Schritt 9, Bild 3 von 3
    In diesem Schritt verwendetes Werkzeug:
    Tweezers
    $4.99
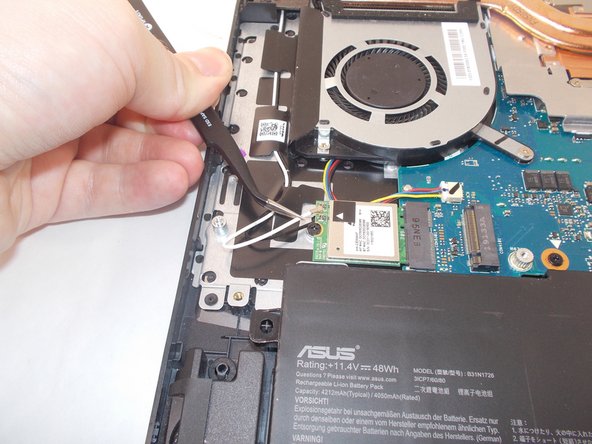
    • Using ESD-safe tweezers, remove the two coaxial antennas by lifting up on the wires near the connectors.

    Frag FixBot

    Kommentar hinzufügen

  10. ASUS TUF Gaming FX505DY Display Assembly Replacement: Schritt 10, Bild 1 von 2 ASUS TUF Gaming FX505DY Display Assembly Replacement: Schritt 10, Bild 2 von 2
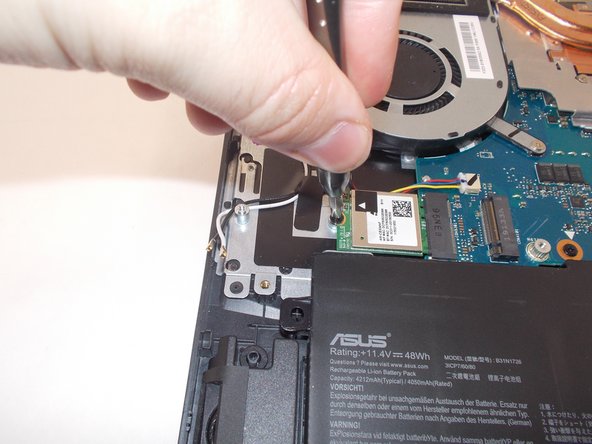
    • Remove the 6 mm screw using a Phillips #1 screwdriver.

    Frag FixBot

    Kommentar hinzufügen

  11. ASUS TUF Gaming FX505DY Display Assembly Replacement: Schritt 11, Bild 1 von 2 ASUS TUF Gaming FX505DY Display Assembly Replacement: Schritt 11, Bild 2 von 2
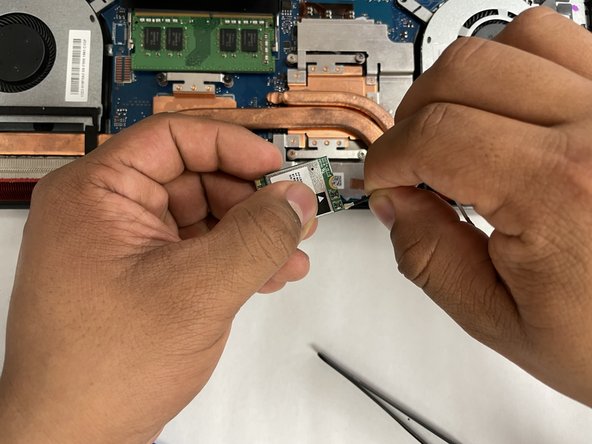
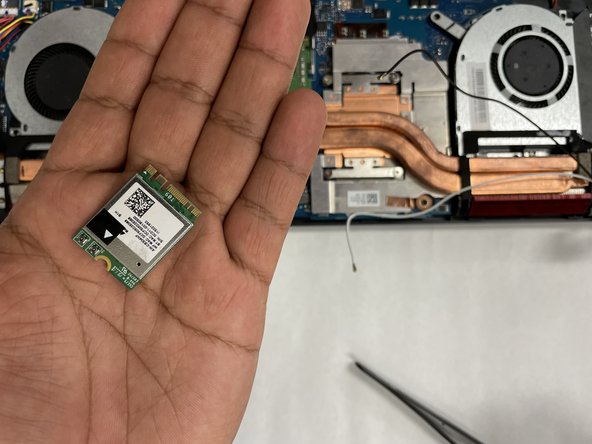
    • Remove the Wi-Fi card by pulling it straight away from its slot.

    Frag FixBot

    Kommentar hinzufügen

  12. ASUS TUF Gaming FX505DY Display Assembly Replacement, Display Assembly: Schritt 12, Bild 1 von 3 ASUS TUF Gaming FX505DY Display Assembly Replacement, Display Assembly: Schritt 12, Bild 2 von 3 ASUS TUF Gaming FX505DY Display Assembly Replacement, Display Assembly: Schritt 12, Bild 3 von 3
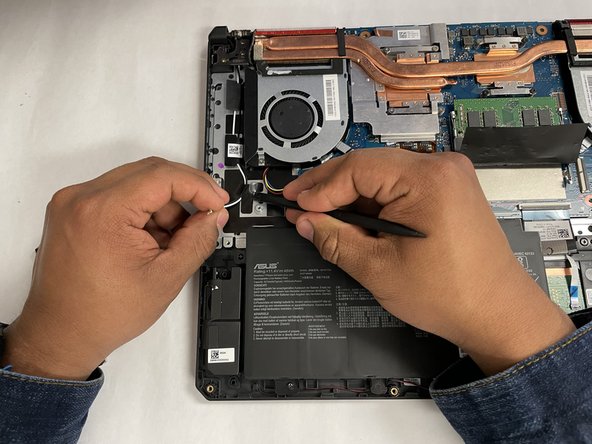
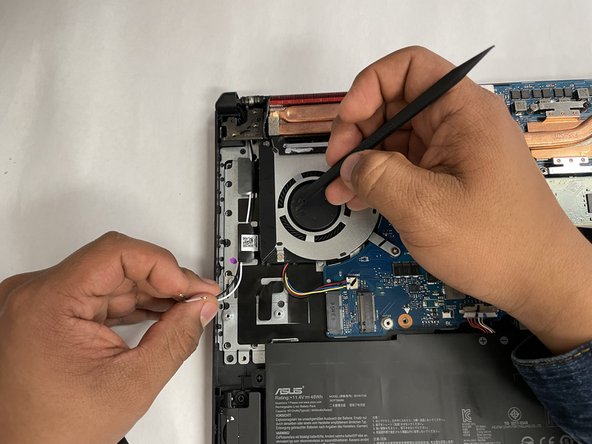
    • Disconnect the white and black wires from the Wi-Fi chip

    Frag FixBot

    Kommentar hinzufügen

  13. ASUS TUF Gaming FX505DY Display Assembly Replacement: Schritt 13, Bild 1 von 3 ASUS TUF Gaming FX505DY Display Assembly Replacement: Schritt 13, Bild 2 von 3 ASUS TUF Gaming FX505DY Display Assembly Replacement: Schritt 13, Bild 3 von 3
    • Remove the white and black wires from the black tape.

    Frag FixBot

    Kommentar hinzufügen

  14. ASUS TUF Gaming FX505DY Display Assembly Replacement: Schritt 14, Bild 1 von 3 ASUS TUF Gaming FX505DY Display Assembly Replacement: Schritt 14, Bild 2 von 3 ASUS TUF Gaming FX505DY Display Assembly Replacement: Schritt 14, Bild 3 von 3
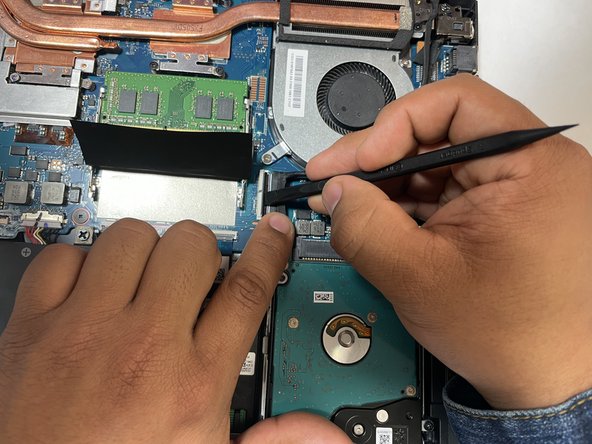
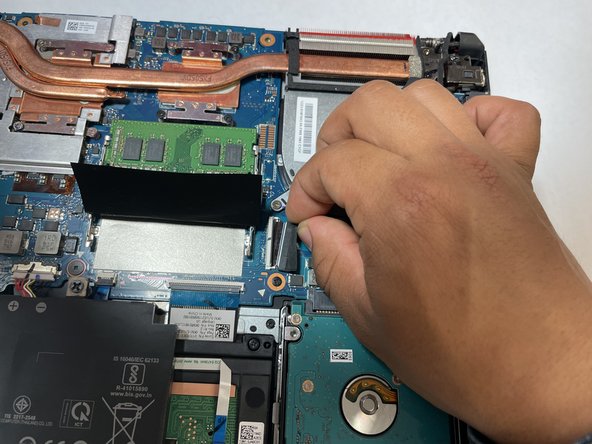
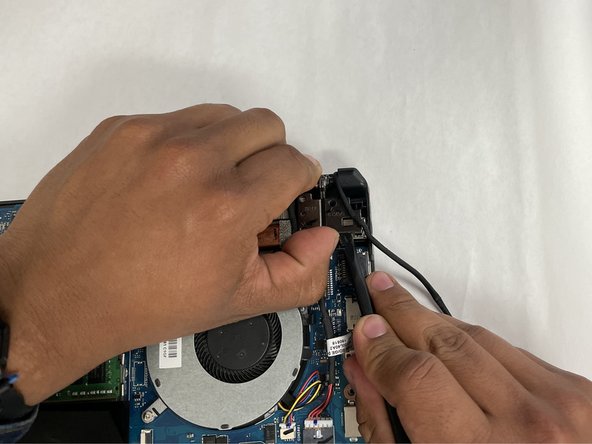
    • Unhinge and pull the display cable from the mother board.

    • The port should be labeled "LVDS" and located between the cooling fan and the hard drive.

    Frag FixBot

    Kommentar hinzufügen

  15. ASUS TUF Gaming FX505DY Display Assembly Replacement: Schritt 15, Bild 1 von 3 ASUS TUF Gaming FX505DY Display Assembly Replacement: Schritt 15, Bild 2 von 3 ASUS TUF Gaming FX505DY Display Assembly Replacement: Schritt 15, Bild 3 von 3
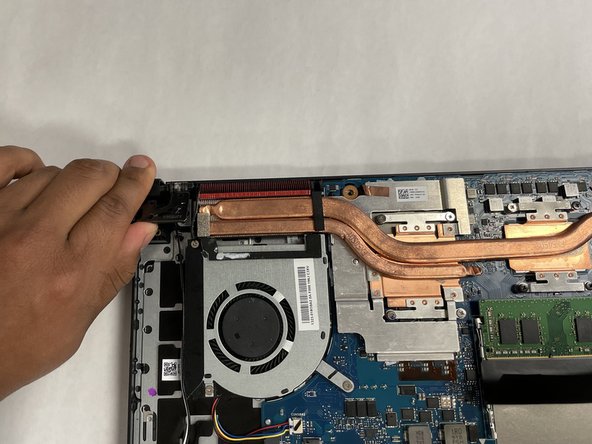
    • Unscrew and lift the hinge.

    • Some hinges may be tough to pull, proceed with caution.

    Frag FixBot

    Kommentar hinzufügen

  16. ASUS TUF Gaming FX505DY Display Assembly Replacement: Schritt 16, Bild 1 von 2 ASUS TUF Gaming FX505DY Display Assembly Replacement: Schritt 16, Bild 2 von 2
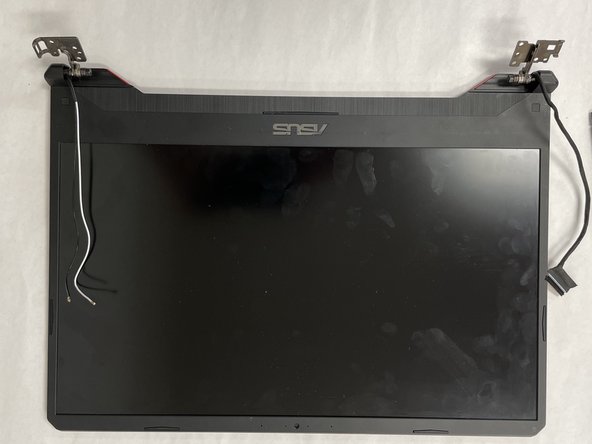
    • Unhinge the other side, and remove the display from the rest of the computer.

    Frag FixBot

    Kommentar hinzufügen

Abschluss

To reassemble your device, follow these instructions in reverse order.

Rückgängig: Ich habe diese Anleitung nicht absolviert.

Team

IUPUI, Team 2-3, Harley Spring 2023 Mitglied von IUPUI, Team 2-3, Harley Spring 2023

IUPUI-HARLEY-S23S2G3

3 Mitglieder

3 Anleitungen geschrieben

0 Kommentare zur Anleitung

Kommentar hinzufügen

Seitenaufrufe:

Letzte 24 Stunden: 1

Letzte 7 Tage: 18

Letzte 30 Tage: 87

Insgesamt: 1,743