Einleitung
Although it is extremely rare, the charging port on the laptop could be defective, misaligned, or broken if the laptop fails to show any signs of receiving power.
This guide should act like a "last resort" if all other methods of charging the laptop fails.
Please note that the use of soldering is required in order to remove the old charging port from the motherboard.
Was du brauchst
-
-
Unscrew the (10) screws on the bottom of the computer chassis using the JIS #0 screwdriver.
-
-
-
Slightly lift the lower case and push it toward the rear of the computer to free the mounting tabs.
-
-
-
Remove the (6) six screws attaching the battery to the frame using the JIS #0 screwdriver.
-
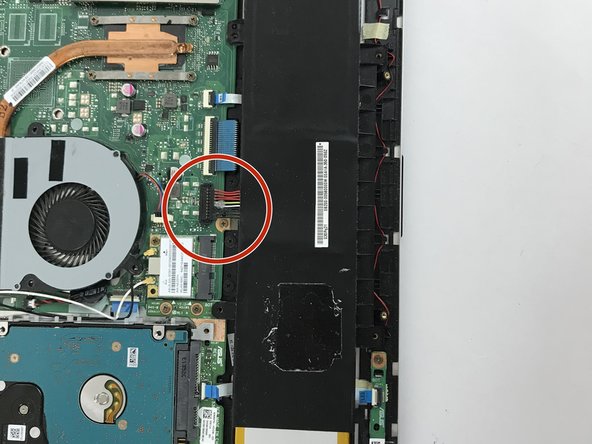
Use the black plastic spudger to remove the battery from the device.
-
-
-
-
Gently take the battery out of the laptop, making sure that all wires connecting to it are disconnected.
-
-
Schritt 5 Motherboard
Achtung: Die Schritte 5-6 stammen von einer Anleitung, die derzeit bearbeitet wird.
-
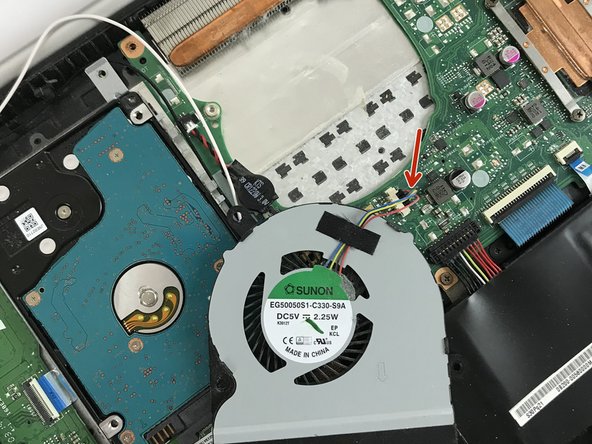
When removing the cooling fan, carefully unplug the cable that is connected to the motherboard.
-
Once you have carefully unplugged the cable, the cooling fan should just come off with ease.
-
-
-
Carefully remove the motherboard.
-
You can now replace it with a new motherboard or perform any necessary modifications to it.
-
-
-
Solder the four connections to the charging port on the motherboard.
-


To reassemble your device, follow these instructions in reverse order.
To reassemble your device, follow these instructions in reverse order.
Team

USF Tampa, Team S5-G1, Walkup Fall 2017 Mitglied von USF Tampa, Team S5-G1, Walkup Fall 2017
USFT-WALKUP-F17S5G1
4 Mitglieder
6 Anleitungen geschrieben