Einleitung
This guide is designed to show how to safely remove the motherboard, on the Asus ZenFone Zoom 3, for replacement. You will need to take the back off the phone, as well as taking out the battery to get to the motherboard housing. You will need a soldering iron. Using tools, such as the soldering iron, can be dangerous so make sure you use proper precautions and following this guide if you are unfamiliar.
Was du brauchst
-
-
Use the sim card attachment for the screwdriver found in the IFIXIT box to remove the sim card tray from the phone.
-
-
-
Remove the 3.5 mm screws on both sides of the charging port, at the bottom of the phone, using the T2 screwdriver.
-
-
-
Utilize the PH #00 attachment to remove the 3.3 mm screws in the bracket to the top left of the battery.
-
-
-
-
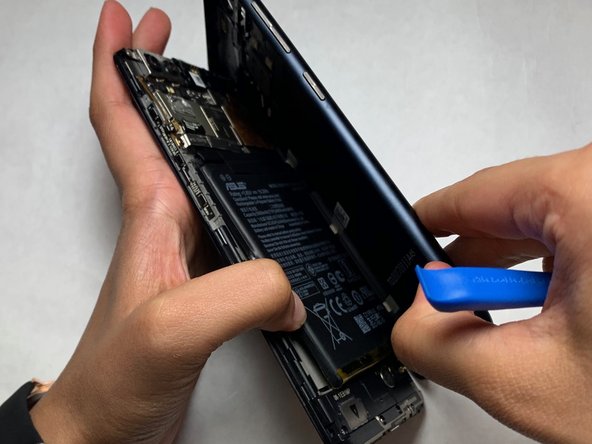
After removing the bracket and screws, pull up on the battery from the bottom of the unit and set aside.
-
-
-
Remove all three screws near the top of the phone with the PH #00.
-
The top right and left screws are 3.25 mm.
-
The middle screw is 2.65 mm.
-
-
-
De-solder the single black speaker wire attached to the left side of the phone.
-
-
-
Use the flat-edge side of iFixIt plastic spudger to detach both the ribbon connectors off the motherboard at their connection point.
-
-
-
Use the tweezers to lift up on the edges of the motherboard located above where the battery, and remove the motherboard.
-
-
-
The finished product should be a motherboard with no connections to the body of the phone.
-


Rückgängig: Ich habe diese Anleitung nicht absolviert.
Ein:e weitere:r Nutzer:in hat diese Anleitung absolviert.
Team

IUPUI, Team S2-G3, Harley Summer 2019 Mitglied von IUPUI, Team S2-G3, Harley Summer 2019
IUPUI-HARLEY-SU19S2G3
4 Mitglieder
6 Anleitungen geschrieben