Zum Hauptinhalt wechseln

Acer Aspire 3003WLCi Optical Drive Replacement

Was du brauchst

  1. Acer Aspire 3003WLCi Optical Drive Replacement, Battery: Schritt 1, Bild 1 von 1
    • Turn the Acer Aspire 3003WLCi so that the bottom of the laptop is facing up. Orient it so that the battery is on your left.

  2. Acer Aspire 3003WLCi Optical Drive Replacement: Schritt 2, Bild 1 von 3 Acer Aspire 3003WLCi Optical Drive Replacement: Schritt 2, Bild 2 von 3 Acer Aspire 3003WLCi Optical Drive Replacement: Schritt 2, Bild 3 von 3
    • There will be two switches on the back of the laptop: one at the top of the battery, and one at the bottom.

    • Shift the bottom switch into an upward position in order to unlock the battery.

    • To unlock the upper switch, forcefully push the switch up and hold it in this position.

  3. Acer Aspire 3003WLCi Optical Drive Replacement: Schritt 3, Bild 1 von 2 Acer Aspire 3003WLCi Optical Drive Replacement: Schritt 3, Bild 2 von 2
    • While holding the upper switch in the upward position, remove the battery by pulling it out to the left.

    • You may need to be a bit forceful when pulling the battery to the left if it hasn't been removed before.

    • You have to maintain pulling the upper switch upwards, or the battery will not come out.

  4. Acer Aspire 3003WLCi Optical Drive Replacement, Internal Fan: Schritt 4, Bild 1 von 1
    • The panel you will be removing to access the internal fan is located at the bottom of the laptop.

  5. Acer Aspire 3003WLCi Optical Drive Replacement: Schritt 5, Bild 1 von 1
    • Using a Phillips #0 screwdriver, unscrew the two 5mm captive screws on the panel.

    • The screws will not come out of the panel. This is intentional by the manufacturer.

  6. Acer Aspire 3003WLCi Optical Drive Replacement: Schritt 6, Bild 1 von 1
    • Lift and remove the panel.

    • If you have difficulty removing the panel, use a spudger to pry the panel open.

  7. Acer Aspire 3003WLCi Optical Drive Replacement: Schritt 7, Bild 1 von 3 Acer Aspire 3003WLCi Optical Drive Replacement: Schritt 7, Bild 2 von 3 Acer Aspire 3003WLCi Optical Drive Replacement: Schritt 7, Bild 3 von 3
    • The fan is in the upper right corner of the panel.

    • Using a Phillips #00 screwdriver, remove each of the four 2.5mm screws securing the fan to the laptop.

  8. Acer Aspire 3003WLCi Optical Drive Replacement: Schritt 8, Bild 1 von 2 Acer Aspire 3003WLCi Optical Drive Replacement: Schritt 8, Bild 2 von 2
    • Disconnect the fan power cable from the motherboard by pulling the cable up and out of the connector.

  9. Acer Aspire 3003WLCi Optical Drive Replacement: Schritt 9, Bild 1 von 2 Acer Aspire 3003WLCi Optical Drive Replacement: Schritt 9, Bild 2 von 2
    • Remove the fan by pulling it away from its surrounding copper.

    • The fan is secured on the other side of the copper by a piece of tape, so it may help to wiggle the fan multiple times to try and loosen the tape.

  10. Acer Aspire 3003WLCi Optical Drive Replacement, Hard Drive: Schritt 10, Bild 1 von 1
    • Locate the hard drive access panel in the upper right corner of the laptop.

  11. Acer Aspire 3003WLCi Optical Drive Replacement: Schritt 11, Bild 1 von 1
    • Using a Phillips #0 screwdriver, unscrew the two 5mm captive screws attached to the access panel.

    • The screws will not come out all the way. Once they are loose enough you should be able to open the panel.

  12. Acer Aspire 3003WLCi Optical Drive Replacement: Schritt 12, Bild 1 von 1
    • Lift and remove the panel to access the hard drive.

    • This panel can be difficult to remove. If you have trouble, use a spudger to pry the cover up.

  13. Acer Aspire 3003WLCi Optical Drive Replacement: Schritt 13, Bild 1 von 2 Acer Aspire 3003WLCi Optical Drive Replacement: Schritt 13, Bild 2 von 2
    • The hard drive is connected to the computer; simply pull it back from the connector and take it out of the laptop casing.

  14. Acer Aspire 3003WLCi Optical Drive Replacement, Optical Drive: Schritt 14, Bild 1 von 3 Acer Aspire 3003WLCi Optical Drive Replacement, Optical Drive: Schritt 14, Bild 2 von 3 Acer Aspire 3003WLCi Optical Drive Replacement, Optical Drive: Schritt 14, Bild 3 von 3
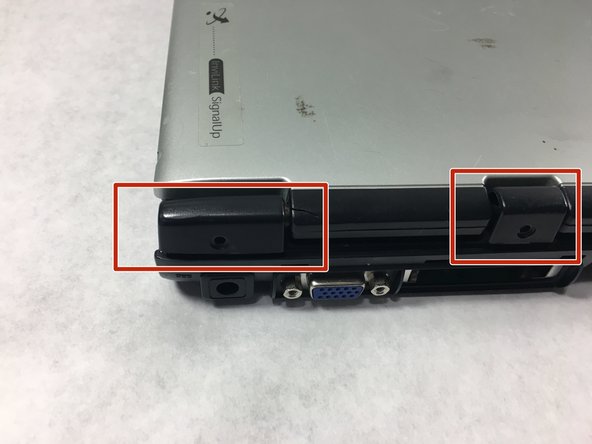
    • Turn the Acer Aspire 3003WLCi so that the back of the laptop is facing towards you.

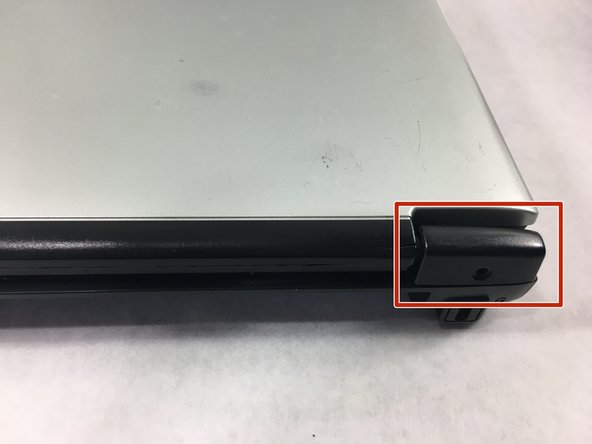
    • You will be opening the tabs on the back of the laptop in order to access the internal components.

  15. Acer Aspire 3003WLCi Optical Drive Replacement: Schritt 15, Bild 1 von 3 Acer Aspire 3003WLCi Optical Drive Replacement: Schritt 15, Bild 2 von 3 Acer Aspire 3003WLCi Optical Drive Replacement: Schritt 15, Bild 3 von 3
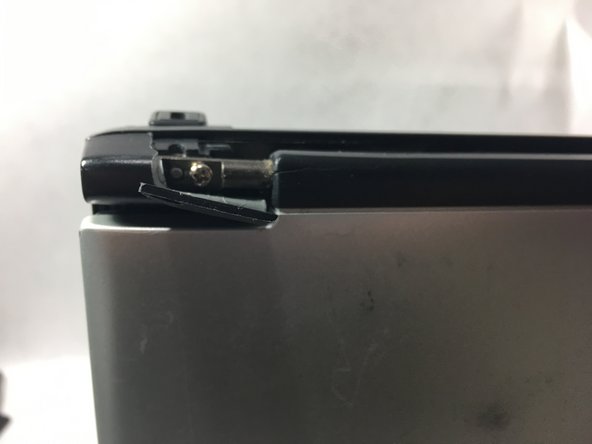
    • Using a metal spudger, lift each tab to access the screws underneath.

    • There are two screws under the leftmost tab and two screws under the rightmost tab.

    • Remove all four screws with the Phillips #00 screwdriver.

  16. Acer Aspire 3003WLCi Optical Drive Replacement: Schritt 16, Bild 1 von 2 Acer Aspire 3003WLCi Optical Drive Replacement: Schritt 16, Bild 2 von 2
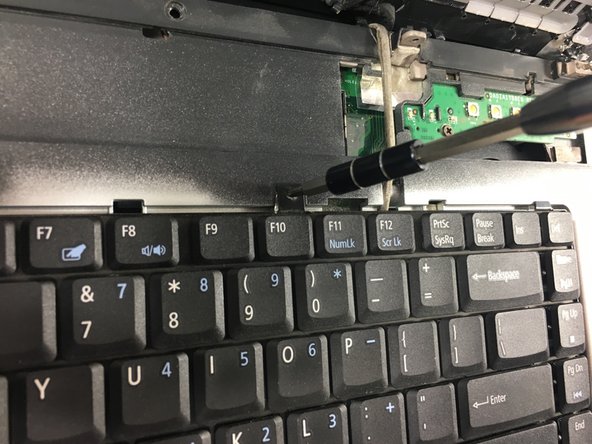
    • Lower the display until the 3 screws at the base of the display become visible.

    • Using the Phillips #0 screwdriver, remove the highlighted three 5mm screws.

  17. Acer Aspire 3003WLCi Optical Drive Replacement: Schritt 17, Bild 1 von 2 Acer Aspire 3003WLCi Optical Drive Replacement: Schritt 17, Bild 2 von 2
    • Using the Phillips #0 screwdriver, remove the two screws that keep the keyboard in place.

    • Remove the keyboard and unplug; the plug is under the keyboard when you lift it up.

  18. Acer Aspire 3003WLCi Optical Drive Replacement: Schritt 18, Bild 1 von 2 Acer Aspire 3003WLCi Optical Drive Replacement: Schritt 18, Bild 2 von 2
    • Using the Phillips #0 screwdriver, remove the two 5mm screws that are highlighted to get access to the internal area of the laptop.

  19. Acer Aspire 3003WLCi Optical Drive Replacement: Schritt 19, Bild 1 von 3 Acer Aspire 3003WLCi Optical Drive Replacement: Schritt 19, Bild 2 von 3 Acer Aspire 3003WLCi Optical Drive Replacement: Schritt 19, Bild 3 von 3
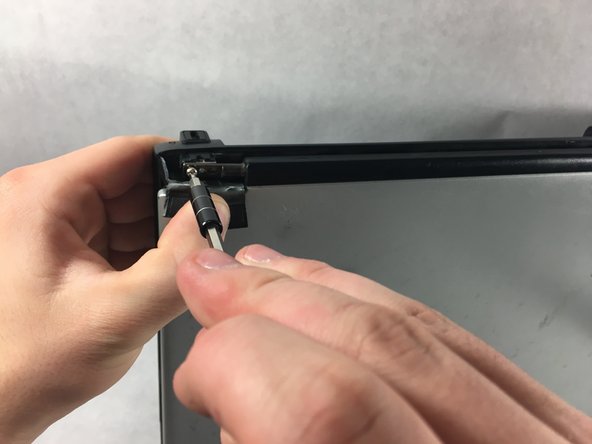
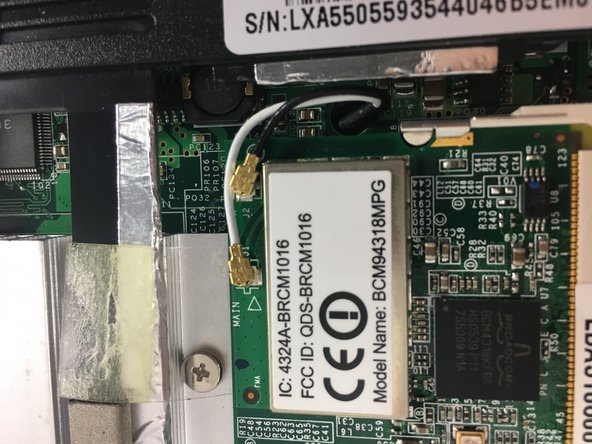
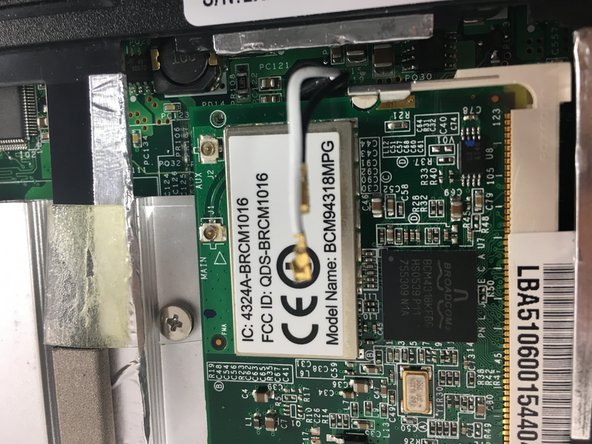
    • To completely remove the display, flip back over to the other side of the laptop. and unplug the two black and white coaxial cables.

  20. Acer Aspire 3003WLCi Optical Drive Replacement: Schritt 20, Bild 1 von 2 Acer Aspire 3003WLCi Optical Drive Replacement: Schritt 20, Bild 2 von 2
    • Flip the laptop over again and unplug the black and red cable from its socket. The display will come off entirely when the cables are removed.

  21. Acer Aspire 3003WLCi Optical Drive Replacement: Schritt 21, Bild 1 von 2 Acer Aspire 3003WLCi Optical Drive Replacement: Schritt 21, Bild 2 von 2
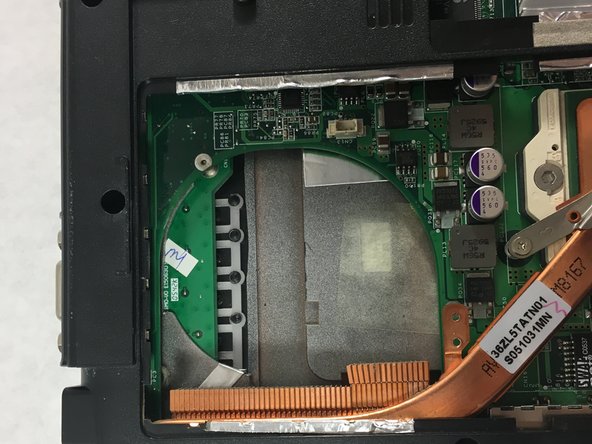
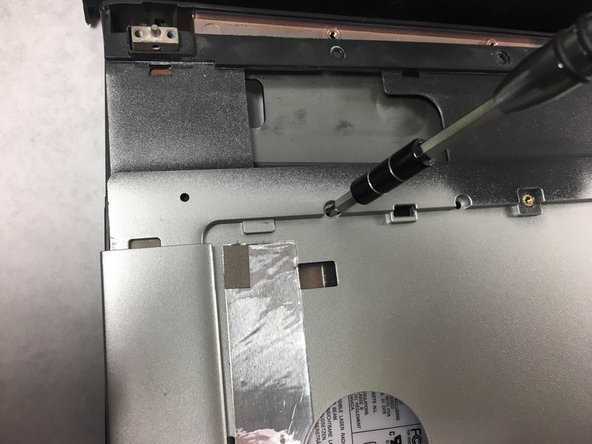
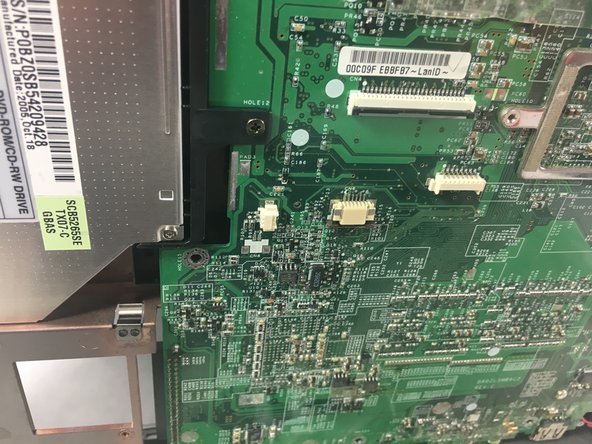
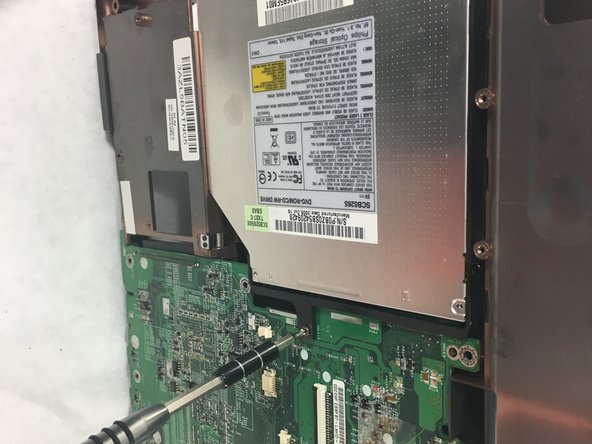
    • You now have a clear view of the optical drive.

    • Using the Phillips #0 screwdriver, remove the 5mm screw that keeps the optical drive in place.

  22. Acer Aspire 3003WLCi Optical Drive Replacement: Schritt 22, Bild 1 von 3 Acer Aspire 3003WLCi Optical Drive Replacement: Schritt 22, Bild 2 von 3 Acer Aspire 3003WLCi Optical Drive Replacement: Schritt 22, Bild 3 von 3
    • Slide the optical drive out of its socket.

Abschluss

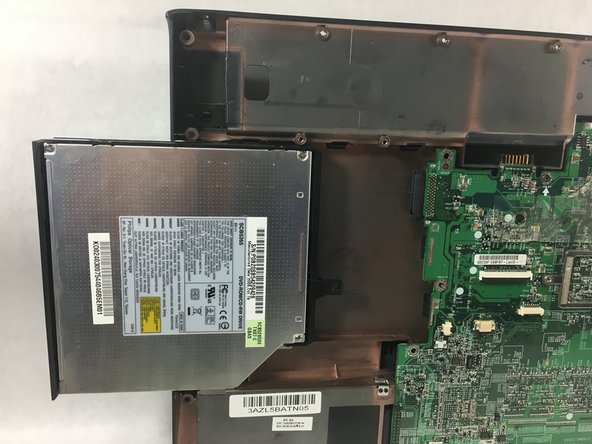
To reassemble your device, follow these instructions in reverse order.

Tristin Viale

Mitglied seit: 03/25/19

675 Reputation

5 Anleitungen geschrieben

Team

UMass Dartmouth, Team S2-G2, Bailey Spring 2019 Mitglied von UMass Dartmouth, Team S2-G2, Bailey Spring 2019

UMASSD-BAILEY-S19S2G2

4 Mitglieder

5 Anleitungen geschrieben

0 Kommentare

Kommentar hinzufügen

Seitenaufrufe:

Letzte 24 Stunden: 0

Letzte 7 Tage: 0

Letzte 30 Tage: 8

Insgesamt: 269