Zum Hauptinhalt wechseln

Acer Aspire 4743-6481 Screen Replacement

Was du brauchst

  1. Acer Aspire 4743-6481 Screen Replacement, Battery: Schritt 1, Bild 1 von 1
    • Turn over the laptop to view the underside.

  2. Acer Aspire 4743-6481 Screen Replacement: Schritt 2, Bild 1 von 1
    In diesem Schritt verwendetes Werkzeug:
    Tweezers
    $4.99
    Kaufen
    • Use tweezers (or a similar tool) to slide the orange push pin. To release the battery, push it to the left.

  3. Acer Aspire 4743-6481 Screen Replacement: Schritt 3, Bild 1 von 1
    • You can lift the battery up and out now.

  4. Acer Aspire 4743-6481 Screen Replacement, Screen: Schritt 4, Bild 1 von 1
    • Position the laptop so you have a clear view of the front of the screen.

    • Remove the two screw covers at the bottom sides of the screen casing using a flat tool.

    • Remove the two 5.0 mm Phillips screws. They will be directly underneath the screw covers.

  5. Acer Aspire 4743-6481 Screen Replacement: Schritt 5, Bild 1 von 1
    • Use a flat tool, to pry open along every side of the front casing of the screen.

    • It will require a small amount of force to grudge open. Make sure every side of the casing is loose before removing it.

    • You should use a metal pry tool only if you are unsuccessful with a plastic one. The metal tool could cause damage to your device.

  6. Acer Aspire 4743-6481 Screen Replacement: Schritt 6, Bild 1 von 1
    • Remove the front casing.

    • Remove the four 5.0 mm Phillips screws located next to every corner of the screen.

  7. Acer Aspire 4743-6481 Screen Replacement: Schritt 7, Bild 1 von 1
    • After removing the screws, gently place the screen on top of the keyboard.

    • Do not attempt to remove the screen yet since it is not fully disconnected from the laptop.

    • You may use a piece of cloth or similar material beneath the new screen to avoid scratching it with the other surface.

  8. Acer Aspire 4743-6481 Screen Replacement: Schritt 8, Bild 1 von 3 Acer Aspire 4743-6481 Screen Replacement: Schritt 8, Bild 2 von 3 Acer Aspire 4743-6481 Screen Replacement: Schritt 8, Bild 3 von 3
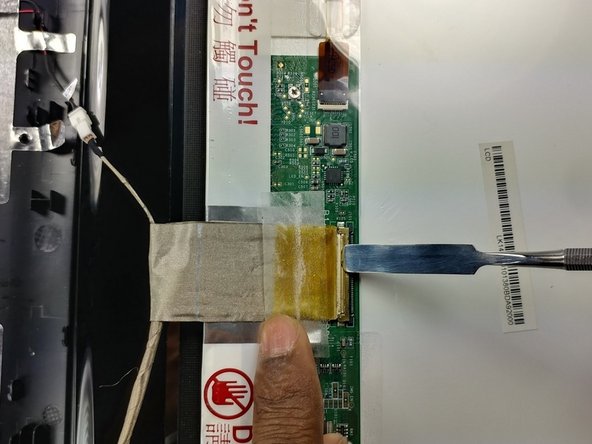
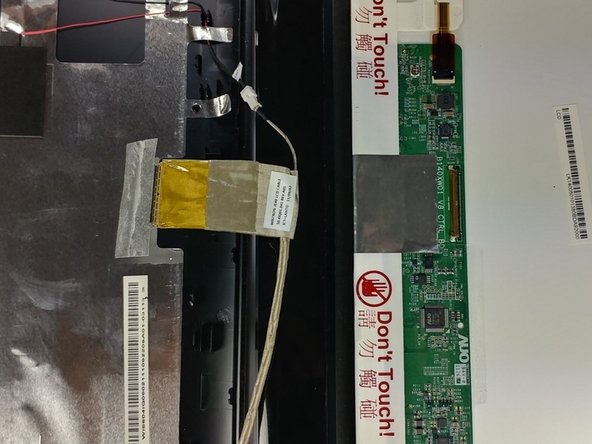
    • Gently remove the tape that covers the connector cable, as highlighted in the first picture.

    • With a flat tool, gently disconnect the connector cable from the damaged screen.

  9. Acer Aspire 4743-6481 Screen Replacement: Schritt 9, Bild 1 von 1
    • Remove the four remaining 3.5 mm Phillips screws from the screen piece.

    • There will be two screws on each side, one on the bottom and another on the top.

  10. Acer Aspire 4743-6481 Screen Replacement: Schritt 10, Bild 1 von 1
    • The screen can be easily removed from its frame now.

Abschluss

To reassemble your device, carefully follow these instructions in reverse order.

2 weitere Nutzer:innen haben diese Anleitung absolviert.

Team

USF Tampa, Team S5-G1, Lacy Spring 2017 Mitglied von USF Tampa, Team S5-G1, Lacy Spring 2017

USFT-LACY-S17S5G1

4 Mitglieder

5 Anleitungen geschrieben

0 Kommentare

Kommentar hinzufügen

Seitenaufrufe:

Letzte 24 Stunden: 9

Letzte 7 Tage: 17

Letzte 30 Tage: 24

Insgesamt: 1,740