Diese Version enthält möglicherweise inkorrekte Änderungen. Wechsle zur letzten geprüften Version.
Was du brauchst
-
Dieser Schritt ist noch nicht übersetzt. Hilf mit, ihn zu übersetzen!
-
Turn the laptop off and remove the power cord.
-
-
Dieser Schritt ist noch nicht übersetzt. Hilf mit, ihn zu übersetzen!
-
Press in the SD Card or the SD Card Dummy if no SD Card is there. Remove card when it pops out.
-
-
Dieser Schritt ist noch nicht übersetzt. Hilf mit, ihn zu übersetzen!
-
Flip the laptop over on its face, so that the back is showing.
-
-
Dieser Schritt ist noch nicht übersetzt. Hilf mit, ihn zu übersetzen!
-
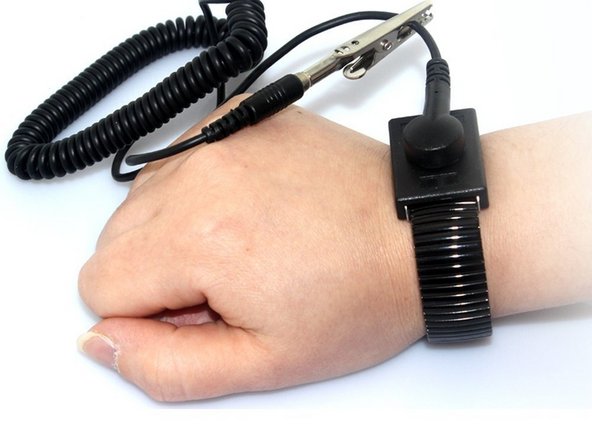
Put grounding strap on one of your wrists and attach the other end to a large metal object (recommended method).
-
If you don't have a grounding strap an alternative approach is to touch a metal object that is either large or connected to the earth. Then avoid doing things that would accumulate static electricity on your body.
-
-
-
Dieser Schritt ist noch nicht übersetzt. Hilf mit, ihn zu übersetzen!
-
Unlock the battery by flipping a switch near the release latch.
-
-
Dieser Schritt ist noch nicht übersetzt. Hilf mit, ihn zu übersetzen!
-
Slide the release latch to the left to release the battery from the PC.
-
-
Dieser Schritt ist noch nicht übersetzt. Hilf mit, ihn zu übersetzen!
-
Use your hands to pry the battery free of the computer.
-
-
Dieser Schritt ist noch nicht übersetzt. Hilf mit, ihn zu übersetzen!
-
Loosen the captive screw and remove the single M2.5 x L8 screw from the back panel using a Phillips #0 screwdriver.
-
-
Dieser Schritt ist noch nicht übersetzt. Hilf mit, ihn zu übersetzen!
-
Gently pry off the panel with an opening tool. This will reveal the RAM.
-
-
Dieser Schritt ist noch nicht übersetzt. Hilf mit, ihn zu übersetzen!
-
Use the opening tool to assist in carefully removing the RAM from the PC. Next lift the RAM up slowly and pull it out with your fingers.
-


Rückgängig: Ich habe diese Anleitung nicht absolviert.
Ein:e weitere:r Nutzer:in hat diese Anleitung absolviert.
Team

UMass Dartmouth, Team S3-G6, Peak Spring 2018 Mitglied von UMass Dartmouth, Team S3-G6, Peak Spring 2018
UMASSD-PEAK-S18S3G6
3 Mitglieder
9 Anleitungen geschrieben