Zum Hauptinhalt wechseln

Acer Aspire 7736Z-4809 Keyboard Replacement

Was du brauchst

  1. Acer Aspire 7736Z-4809 Keyboard Replacement, Acer Aspire 7736Z-4809 Repair Preparation: Schritt 1, Bild 1 von 1
    • Unplug and power off the laptop.

    • If the battery is still connected to the laptop, remove the battery.

  2. Acer Aspire 7736Z-4809 Keyboard Replacement: Schritt 2, Bild 1 von 1
    • Flip over the laptop so that the back panel of the laptop is facing up.

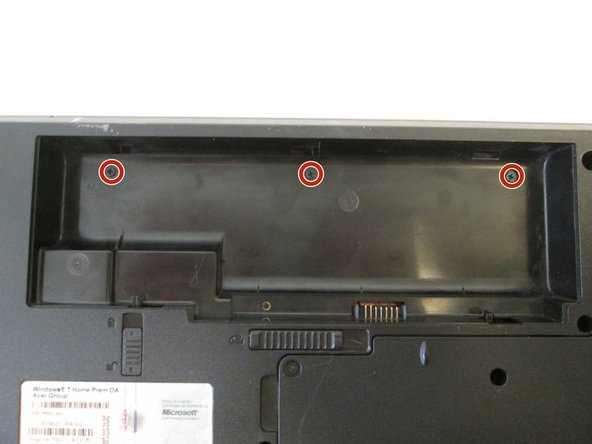
  3. Acer Aspire 7736Z-4809 Keyboard Replacement, Keyboard: Schritt 3, Bild 1 von 2 Acer Aspire 7736Z-4809 Keyboard Replacement, Keyboard: Schritt 3, Bild 2 von 2
    • Use the Phillips #1 screwdriver to remove the three 4.5mm Phillips #1 screws.

  4. Acer Aspire 7736Z-4809 Keyboard Replacement: Schritt 4, Bild 1 von 3 Acer Aspire 7736Z-4809 Keyboard Replacement: Schritt 4, Bild 2 von 3 Acer Aspire 7736Z-4809 Keyboard Replacement: Schritt 4, Bild 3 von 3
    • Orient the laptop so that the hinges between the LCD module and the laptop's bottom base are visible.

    • Use the plastic opening tools to separate the speaker panel from the laptop.

  5. Acer Aspire 7736Z-4809 Keyboard Replacement: Schritt 5, Bild 1 von 2 Acer Aspire 7736Z-4809 Keyboard Replacement: Schritt 5, Bild 2 von 2
    • Flip over the LCD module of the laptop.

    • Use the plastic opening tools to separate the speaker panel from the laptop.

    • Insert the opening tool into the crack between the panel and the frame at either end. Slide the opening tool across the line. Reinsert the opening tool into the crack and apply leverage until the frame releases.

    • Repeat this step with the other side of the laptop.

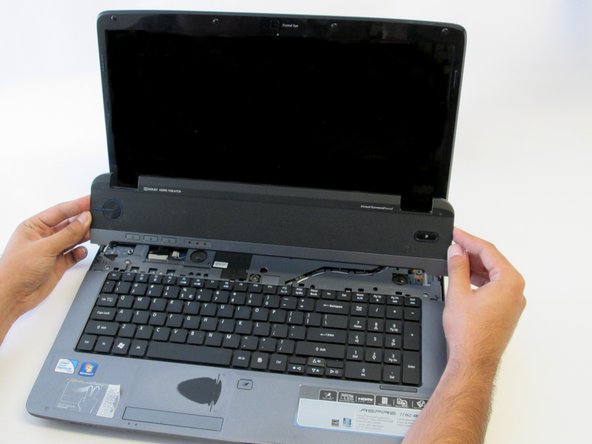
  6. Acer Aspire 7736Z-4809 Keyboard Replacement: Schritt 6, Bild 1 von 3 Acer Aspire 7736Z-4809 Keyboard Replacement: Schritt 6, Bild 2 von 3 Acer Aspire 7736Z-4809 Keyboard Replacement: Schritt 6, Bild 3 von 3
    • Gently hold the speaker panel by the sides and pull upwards to release the panel.

  7. Acer Aspire 7736Z-4809 Keyboard Replacement: Schritt 7, Bild 1 von 1
    • Use the flat end of the medium sized metal spudger tool to release the two tabs at the top of the keyboard.

    • Do not remove the keyboard yet.

  8. Acer Aspire 7736Z-4809 Keyboard Replacement: Schritt 8, Bild 1 von 3 Acer Aspire 7736Z-4809 Keyboard Replacement: Schritt 8, Bild 2 von 3 Acer Aspire 7736Z-4809 Keyboard Replacement: Schritt 8, Bild 3 von 3
    • Insert a finger into the opening above the F11 key and pry the keyboard until it is released from the casing.

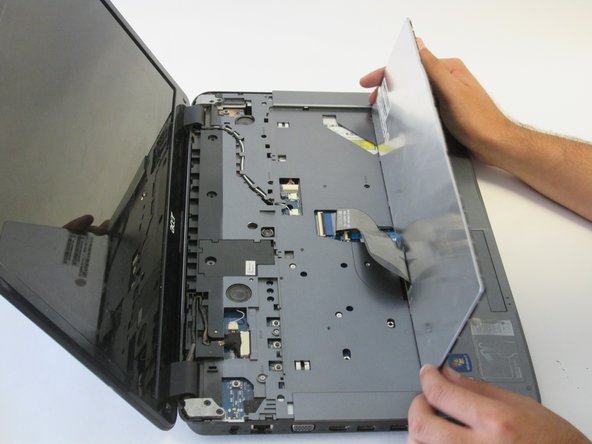
  9. Acer Aspire 7736Z-4809 Keyboard Replacement: Schritt 9, Bild 1 von 3 Acer Aspire 7736Z-4809 Keyboard Replacement: Schritt 9, Bild 2 von 3 Acer Aspire 7736Z-4809 Keyboard Replacement: Schritt 9, Bild 3 von 3
    • Gently raise the keyboard with your hands.

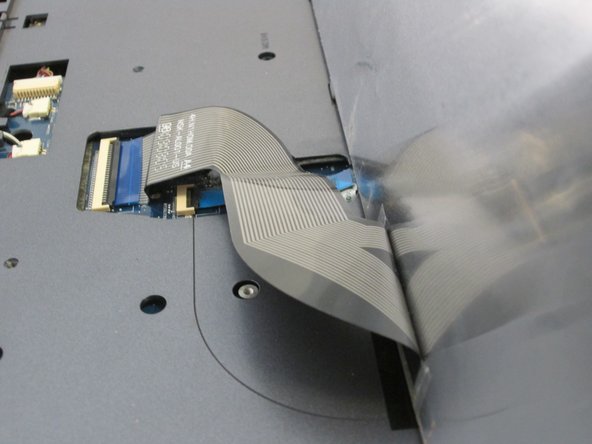
  10. Acer Aspire 7736Z-4809 Keyboard Replacement: Schritt 10, Bild 1 von 3 Acer Aspire 7736Z-4809 Keyboard Replacement: Schritt 10, Bild 2 von 3 Acer Aspire 7736Z-4809 Keyboard Replacement: Schritt 10, Bild 3 von 3
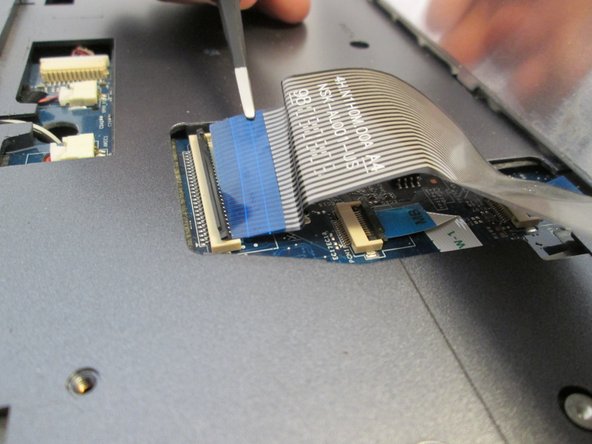
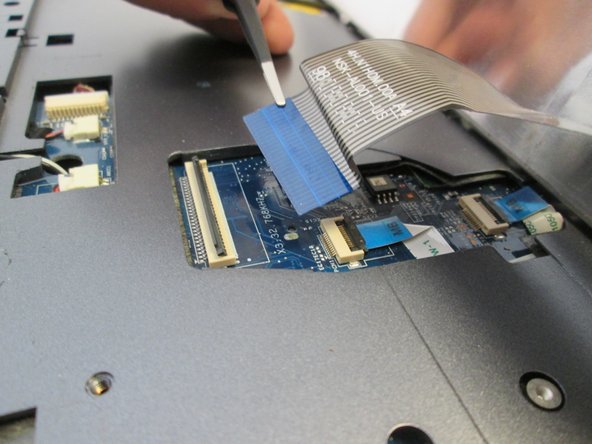
    • Lift the black latch upwards to release the ZIF connector.

  11. Acer Aspire 7736Z-4809 Keyboard Replacement: Schritt 11, Bild 1 von 1
    • Remove the keyboard from the keyboard slot.

Abschluss

To reassemble your device, follow these instructions in reverse order.

Ein:e weitere:r Nutzer:in hat diese Anleitung absolviert.

Team

UC Davis, Team 2-4, Oliver Fall 2016 Mitglied von UC Davis, Team 2-4, Oliver Fall 2016

UCD-OLIVER-F16S2G4

5 Mitglieder

10 Anleitungen geschrieben

0 Kommentare

Kommentar hinzufügen

Seitenaufrufe:

Letzte 24 Stunden: 0

Letzte 7 Tage: 0

Letzte 30 Tage: 2

Insgesamt: 1,174