Zum Hauptinhalt wechseln

Acer Aspire E1-510P-4637 Touch Screen Display Replacement

Was du brauchst

  1. Acer Aspire E1-510P-4637 Touch Screen Display Replacement, Battery: Schritt 1, Bild 1 von 1
    • To release the battery, depress the battery release with a nylon spudger. Hold the latch down and slide it over.

  2. Acer Aspire E1-510P-4637 Touch Screen Display Replacement: Schritt 2, Bild 1 von 1
    • Firmly grab hold of the battery and slide it out of the laptop.

  3. Acer Aspire E1-510P-4637 Touch Screen Display Replacement, Touch Screen Display: Schritt 3, Bild 1 von 3 Acer Aspire E1-510P-4637 Touch Screen Display Replacement, Touch Screen Display: Schritt 3, Bild 2 von 3 Acer Aspire E1-510P-4637 Touch Screen Display Replacement, Touch Screen Display: Schritt 3, Bild 3 von 3
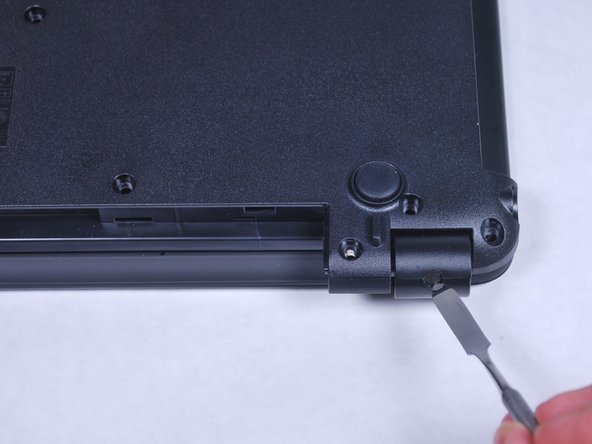
    • Remove the plastic screw covers located near the laptop's hinge using a metal spudger.

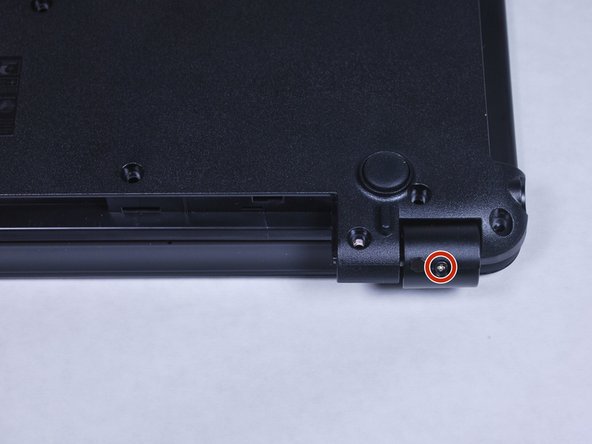
    • Remove the two M2.5x8 screws highlighted in the picture with a PH0 Phillips screwdriver.

  4. Acer Aspire E1-510P-4637 Touch Screen Display Replacement: Schritt 4, Bild 1 von 3 Acer Aspire E1-510P-4637 Touch Screen Display Replacement: Schritt 4, Bild 2 von 3 Acer Aspire E1-510P-4637 Touch Screen Display Replacement: Schritt 4, Bild 3 von 3
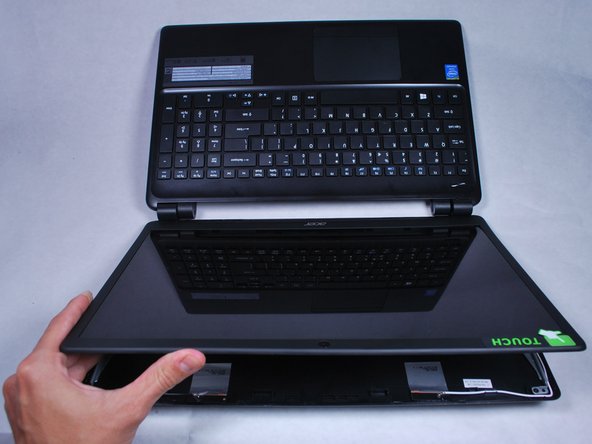
    • Flip the laptop over and open it up so the screen is facing up and the top of the screen is facing you.

    • Use a plastic opening tool to separate the the touchscreen from the back cover.

    • Carefully work your way around the frame and gently pry. Be careful not to brake the frame or damage the screen.

  5. Acer Aspire E1-510P-4637 Touch Screen Display Replacement: Schritt 5, Bild 1 von 3 Acer Aspire E1-510P-4637 Touch Screen Display Replacement: Schritt 5, Bild 2 von 3 Acer Aspire E1-510P-4637 Touch Screen Display Replacement: Schritt 5, Bild 3 von 3
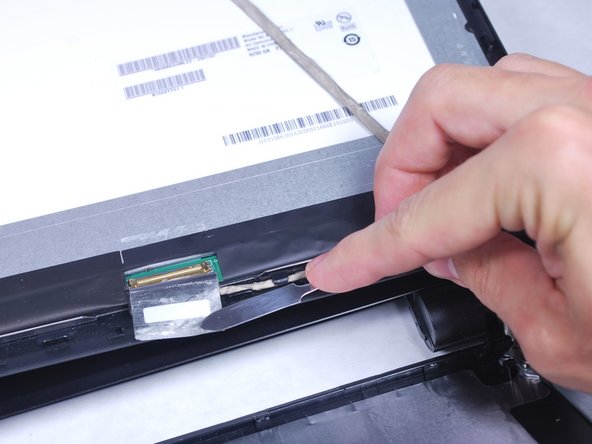
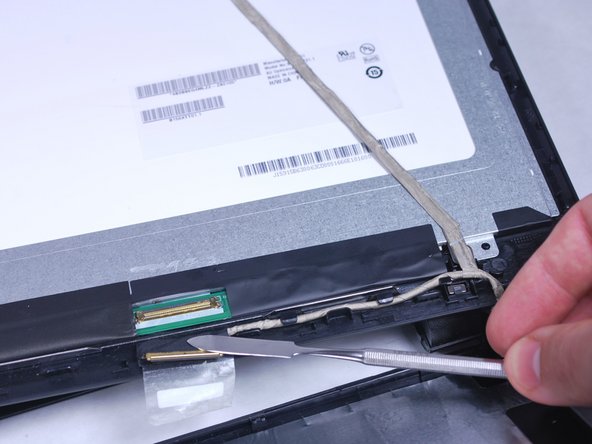
    • Disconnect the display cable by first taking off the tape using a metal spudger and then pulling on the black tab.

  6. Acer Aspire E1-510P-4637 Touch Screen Display Replacement: Schritt 6, Bild 1 von 2 Acer Aspire E1-510P-4637 Touch Screen Display Replacement: Schritt 6, Bild 2 von 2
    • Take off the yellow tape connecting the display to the border.

  7. Acer Aspire E1-510P-4637 Touch Screen Display Replacement: Schritt 7, Bild 1 von 2 Acer Aspire E1-510P-4637 Touch Screen Display Replacement: Schritt 7, Bild 2 von 2
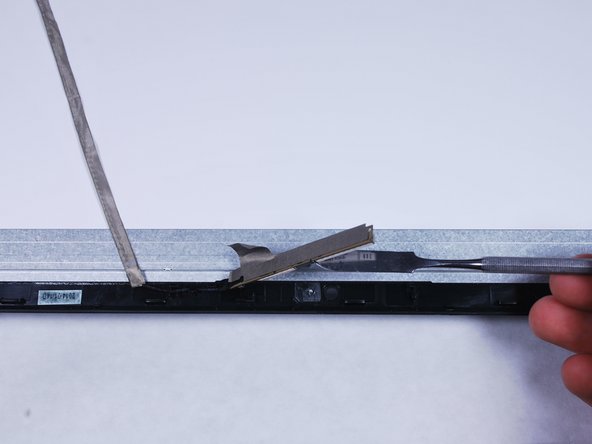
    • Pull back the adhesive using the metal spudger.

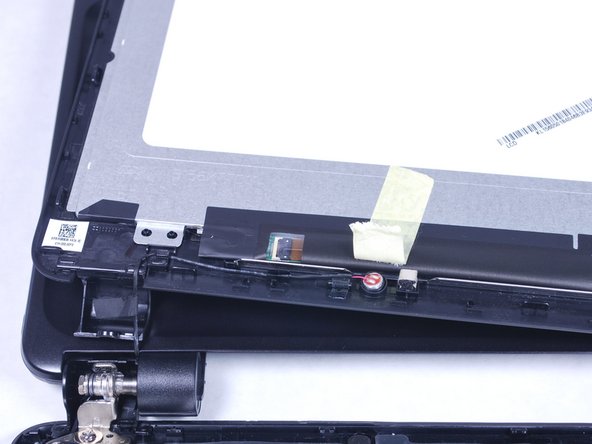
    • Pry out the camera by lifting the adhesive with the metal spudger. Then, remove the camera by lifting it up by one side.

  8. Acer Aspire E1-510P-4637 Touch Screen Display Replacement: Schritt 8, Bild 1 von 1
    • Remove the two brackets holding the displays by unscrewing both M1 .6x3 screws with a PH0 Phillips screwdriver.

  9. Acer Aspire E1-510P-4637 Touch Screen Display Replacement: Schritt 9, Bild 1 von 1
    • Release the display from the border using your hands.

Abschluss

To reassemble your device, follow these instructions in reverse order.

2 weitere Nutzer:innen haben diese Anleitung absolviert.

Team

Cal Poly, Team 34-15, Maness Spring 2016 Mitglied von Cal Poly, Team 34-15, Maness Spring 2016

CPSU-MANESS-S16S34G15

4 Mitglieder

6 Anleitungen geschrieben

Ein Kommentar

the touchscreen its glue together with the LCD?

Chris Foliaki - Antwort

Kommentar hinzufügen

Seitenaufrufe:

Letzte 24 Stunden: 0

Letzte 7 Tage: 4

Letzte 30 Tage: 5

Insgesamt: 1,190