Zum Hauptinhalt wechseln

Acer Aspire E5-571-58CG Power Jack Replacement

Was du brauchst

  1. Acer Aspire E5-571-58CG Power Jack Replacement, Battery: Schritt 1, Bild 1 von 2 Acer Aspire E5-571-58CG Power Jack Replacement, Battery: Schritt 1, Bild 2 von 2
    • Make sure the laptop is powered off.

    • Flip the laptop over and locate the battery release switch.

    • Insert the pointed end of the spudger into the battery release switch.

    • Push the battery release switch to the right.

  2. Acer Aspire E5-571-58CG Power Jack Replacement: Schritt 2, Bild 1 von 3 Acer Aspire E5-571-58CG Power Jack Replacement: Schritt 2, Bild 2 von 3 Acer Aspire E5-571-58CG Power Jack Replacement: Schritt 2, Bild 3 von 3
    • While the battery release switch is pushed to the right, carefully slide the battery out of its socket.

  3. Acer Aspire E5-571-58CG Power Jack Replacement, Power Jack: Schritt 3, Bild 1 von 3 Acer Aspire E5-571-58CG Power Jack Replacement, Power Jack: Schritt 3, Bild 2 von 3 Acer Aspire E5-571-58CG Power Jack Replacement, Power Jack: Schritt 3, Bild 3 von 3
    • Remove the top panel of the laptop with the plastic opening tool.

  4. Acer Aspire E5-571-58CG Power Jack Replacement: Schritt 4, Bild 1 von 2 Acer Aspire E5-571-58CG Power Jack Replacement: Schritt 4, Bild 2 von 2
    • Remove the plastic safeguard from the CD drive slot.

  5. Acer Aspire E5-571-58CG Power Jack Replacement: Schritt 5, Bild 1 von 3 Acer Aspire E5-571-58CG Power Jack Replacement: Schritt 5, Bild 2 von 3 Acer Aspire E5-571-58CG Power Jack Replacement: Schritt 5, Bild 3 von 3
    • Remove the marked screws with the JIS #00 screwdriver.

  6. Acer Aspire E5-571-58CG Power Jack Replacement: Schritt 6, Bild 1 von 2 Acer Aspire E5-571-58CG Power Jack Replacement: Schritt 6, Bild 2 von 2
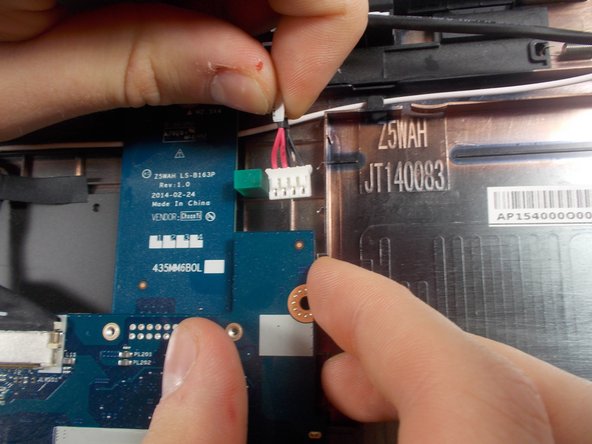
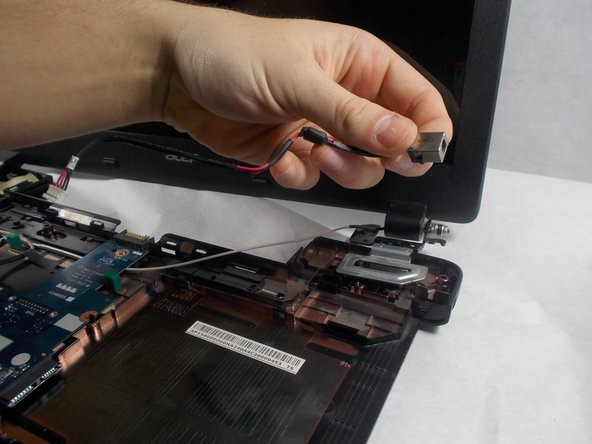
    • Disconnect the opposite end of the power jack from the motherboard by carefully pulling the wire.

  7. Acer Aspire E5-571-58CG Power Jack Replacement: Schritt 7, Bild 1 von 2 Acer Aspire E5-571-58CG Power Jack Replacement: Schritt 7, Bild 2 von 2
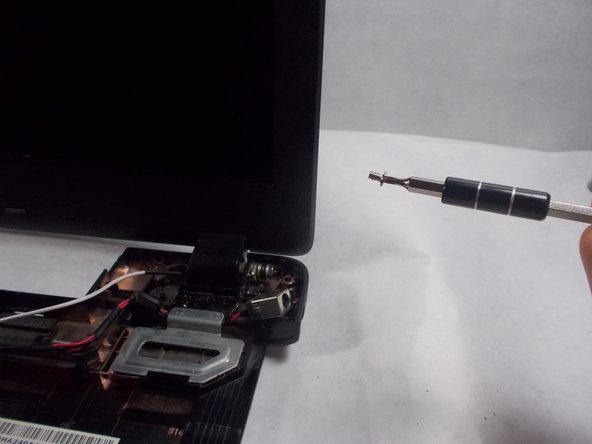
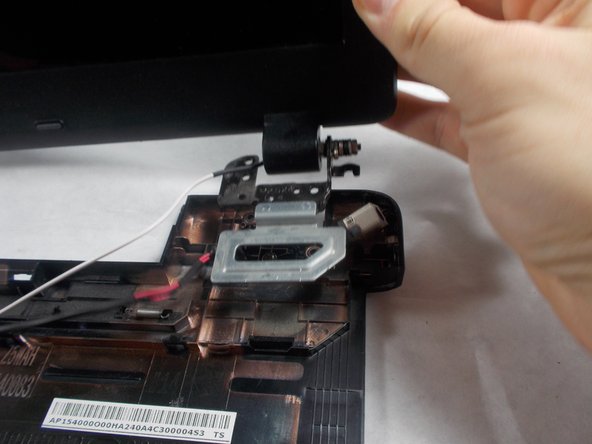
    • Lift the bottom right side of the screen to move the metal plate covering the power jack.

  8. Acer Aspire E5-571-58CG Power Jack Replacement: Schritt 8, Bild 1 von 2 Acer Aspire E5-571-58CG Power Jack Replacement: Schritt 8, Bild 2 von 2
    • Carefully lift the power jack out of the laptop.

Abschluss

To reassemble your device, follow these instructions in reverse order.

Ein:e weitere:r Nutzer:in hat diese Anleitung absolviert.

Aliana Johnson

Mitglied seit: 10/24/18

145 Reputation

1 Anleitung geschrieben

Team

UMass Dartmouth, Team S7-G7, Valliere Fall 2018 Mitglied von UMass Dartmouth, Team S7-G7, Valliere Fall 2018

UMASSD-VALLIERE-F18S7G7

5 Mitglieder

5 Anleitungen geschrieben

0 Kommentare

Kommentar hinzufügen

Seitenaufrufe:

Letzte 24 Stunden: 0

Letzte 7 Tage: 2

Letzte 30 Tage: 9

Insgesamt: 1,255