Zum Hauptinhalt wechseln

Acer Aspire E5-571-58CG Touchpad Replacement

Was du brauchst

  1. Acer Aspire E5-571-58CG Touchpad Replacement, Keyboard: Schritt 1, Bild 1 von 3 Acer Aspire E5-571-58CG Touchpad Replacement, Keyboard: Schritt 1, Bild 2 von 3 Acer Aspire E5-571-58CG Touchpad Replacement, Keyboard: Schritt 1, Bild 3 von 3
    • Make sure laptop is upright.

    • Pry the keyboard cover off with the plastic opening tool.

  2. Acer Aspire E5-571-58CG Touchpad Replacement: Schritt 2, Bild 1 von 3 Acer Aspire E5-571-58CG Touchpad Replacement: Schritt 2, Bild 2 von 3 Acer Aspire E5-571-58CG Touchpad Replacement: Schritt 2, Bild 3 von 3
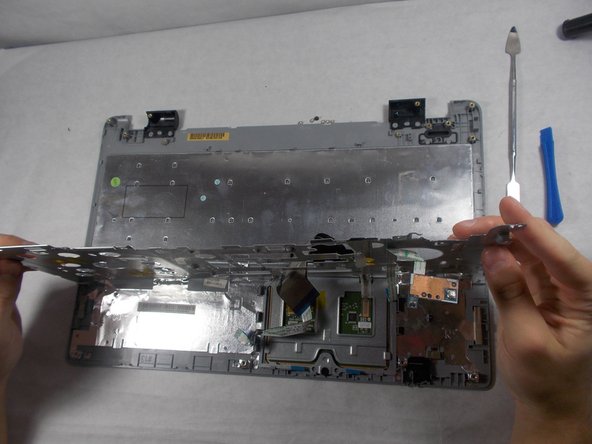
    • Flip the keyboard cover upside down.

    • Use the JIS #000 screw bit to remove the marked M1.4 x 2 mm screws from the back of the metal panel.

  3. Acer Aspire E5-571-58CG Touchpad Replacement: Schritt 3, Bild 1 von 3 Acer Aspire E5-571-58CG Touchpad Replacement: Schritt 3, Bild 2 von 3 Acer Aspire E5-571-58CG Touchpad Replacement: Schritt 3, Bild 3 von 3
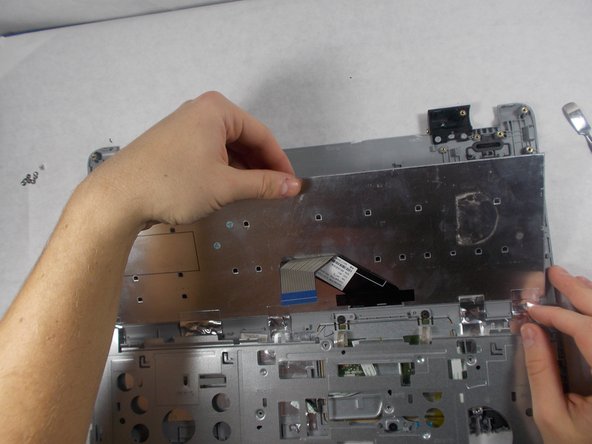
    • Push the metal panel forward to unlock it from plastic holders on both sides.

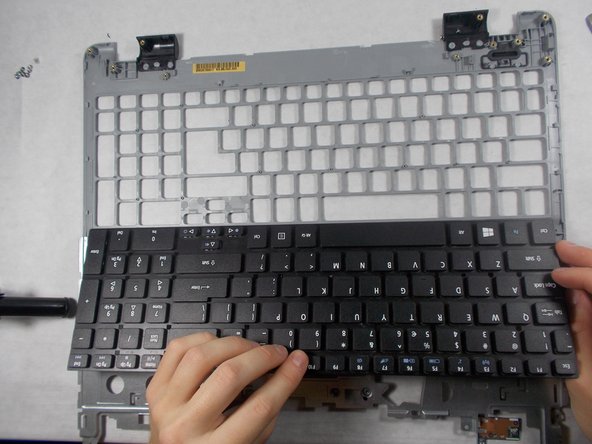
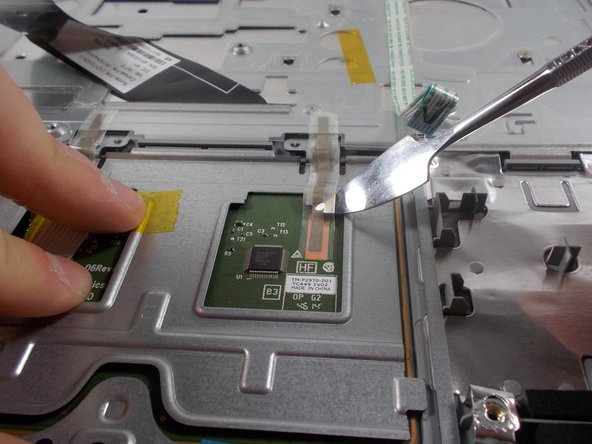
    • Lift the metal panel up and peel it back to expose the keyboard component.

  4. Acer Aspire E5-571-58CG Touchpad Replacement: Schritt 4, Bild 1 von 3 Acer Aspire E5-571-58CG Touchpad Replacement: Schritt 4, Bild 2 von 3 Acer Aspire E5-571-58CG Touchpad Replacement: Schritt 4, Bild 3 von 3
    • Use the metal spudger to lift the keyboard component out of the metal panel.

  5. Acer Aspire E5-571-58CG Touchpad Replacement, Touchpad: Schritt 5, Bild 1 von 2 Acer Aspire E5-571-58CG Touchpad Replacement, Touchpad: Schritt 5, Bild 2 von 2
    • Make sure you have removed the keyboard before attempting to remove the touchpad.

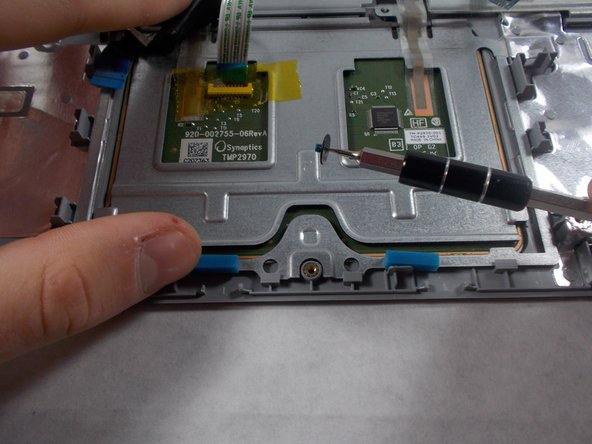
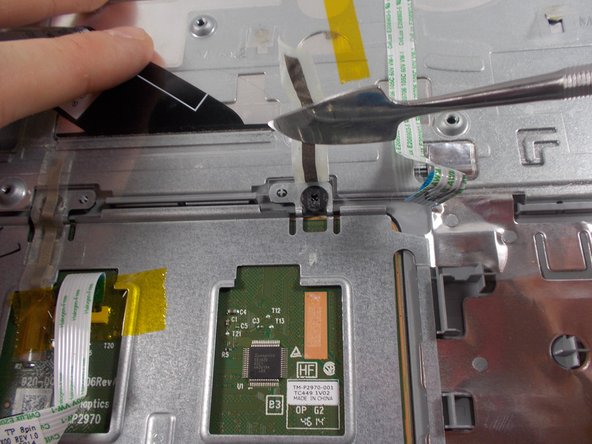
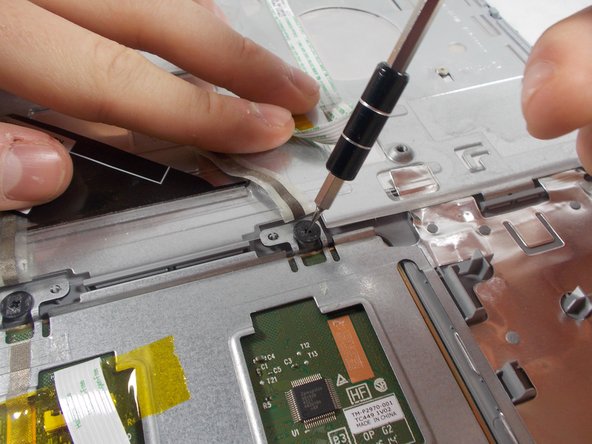
    • Use a 1 1/2 mm flathead screw bit to remove the black screw at the bottom of the panel.

  6. Acer Aspire E5-571-58CG Touchpad Replacement: Schritt 6, Bild 1 von 3 Acer Aspire E5-571-58CG Touchpad Replacement: Schritt 6, Bild 2 von 3 Acer Aspire E5-571-58CG Touchpad Replacement: Schritt 6, Bild 3 von 3
    • Peel back the marked strips with the metal spudger.

  7. Acer Aspire E5-571-58CG Touchpad Replacement: Schritt 7, Bild 1 von 3 Acer Aspire E5-571-58CG Touchpad Replacement: Schritt 7, Bild 2 von 3 Acer Aspire E5-571-58CG Touchpad Replacement: Schritt 7, Bild 3 von 3
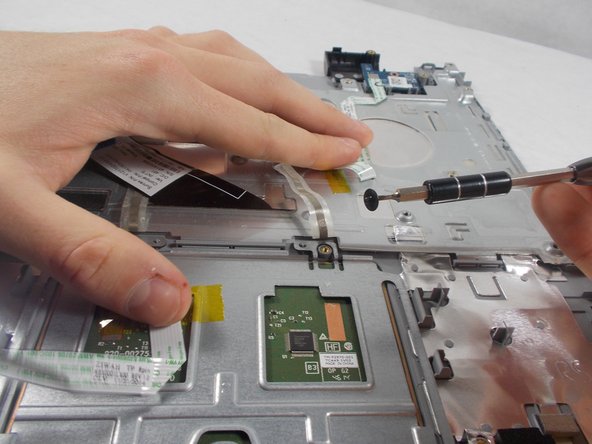
    • Use a 1 1/2 mm flathead screw bit to remove the two black screws at the top of the panel.

  8. Acer Aspire E5-571-58CG Touchpad Replacement: Schritt 8, Bild 1 von 2 Acer Aspire E5-571-58CG Touchpad Replacement: Schritt 8, Bild 2 von 2
    • Lift the touch pad out of the metal panel with a metal spudger.

Abschluss

To reassemble your device, follow these instructions in reverse order.

Daniel Mello

Mitglied seit: 10/16/18

258 Reputation

2 Anleitungen geschrieben

Team

UMass Dartmouth, Team S7-G7, Valliere Fall 2018 Mitglied von UMass Dartmouth, Team S7-G7, Valliere Fall 2018

UMASSD-VALLIERE-F18S7G7

5 Mitglieder

5 Anleitungen geschrieben

0 Kommentare

Kommentar hinzufügen

Seitenaufrufe:

Letzte 24 Stunden: 1

Letzte 7 Tage: 4

Letzte 30 Tage: 10

Insgesamt: 1,232