Zum Hauptinhalt wechseln

Acer Aspire E5-571P-55TL RAM Replacement

Was du brauchst

  1. Acer Aspire E5-571P-55TL RAM Replacement, Battery: Schritt 1, Bild 1 von 1
    • Make sure that laptop is turned off.

    • Turn the laptop upside down with the battery facing you.

  2. Acer Aspire E5-571P-55TL RAM Replacement: Schritt 2, Bild 1 von 1
    • Place the Spudger into the battery lock and slide it to the left until you hear the battery unlock.

  3. Acer Aspire E5-571P-55TL RAM Replacement: Schritt 3, Bild 1 von 2 Acer Aspire E5-571P-55TL RAM Replacement: Schritt 3, Bild 2 von 2
    • Pull the battery towards you to remove it from the laptop.

  4. Acer Aspire E5-571P-55TL RAM Replacement, Keyboard: Schritt 4, Bild 1 von 2 Acer Aspire E5-571P-55TL RAM Replacement, Keyboard: Schritt 4, Bild 2 von 2
    • Using a Phillips #0 screwdriver, remove each of the eighteen 8 mm screws from the bottom of the laptop.

  5. Acer Aspire E5-571P-55TL RAM Replacement: Schritt 5, Bild 1 von 3 Acer Aspire E5-571P-55TL RAM Replacement: Schritt 5, Bild 2 von 3 Acer Aspire E5-571P-55TL RAM Replacement: Schritt 5, Bild 3 von 3
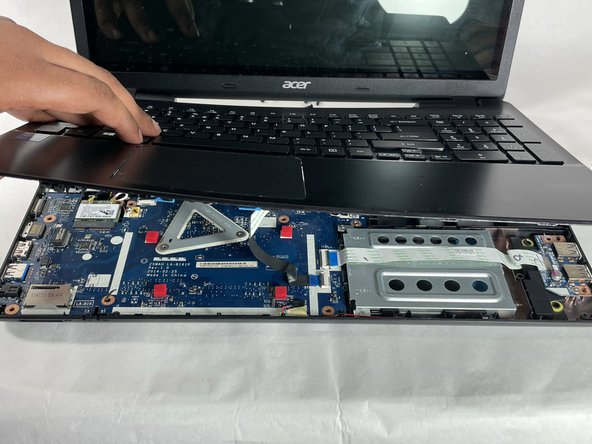
    • Carefully place your fingers underneath the top of the keyboard just below the screen.

    • Pull upwards until you can hear the keyboard click out of place.

    • Continue around the entire laptop, carefully pulling the keyboard and palm rest assembly slightly from the frame to reveal the ribbon connectors.

    • Don't pull the keyboard off the frame yet because it's attached by ribbon connectors.

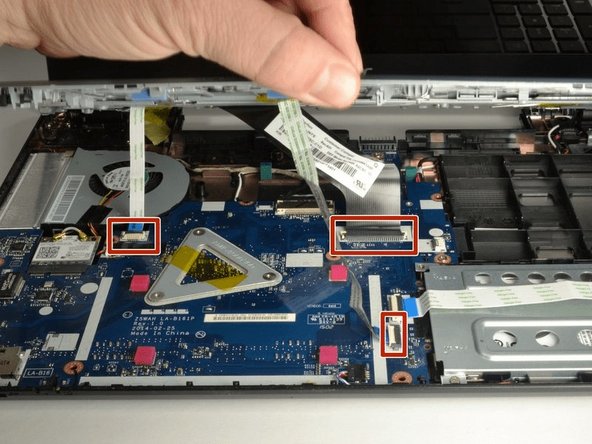
    • After the keyboard is detached, unplug each of the three ribbon cables and remove the keyboard and palm rest assembly.

  6. Acer Aspire E5-571P-55TL RAM Replacement, CPU Fan: Schritt 6, Bild 1 von 2 Acer Aspire E5-571P-55TL RAM Replacement, CPU Fan: Schritt 6, Bild 2 von 2
    • Before replacing the CPU fan, you'll have to remove the network card found below the fan.

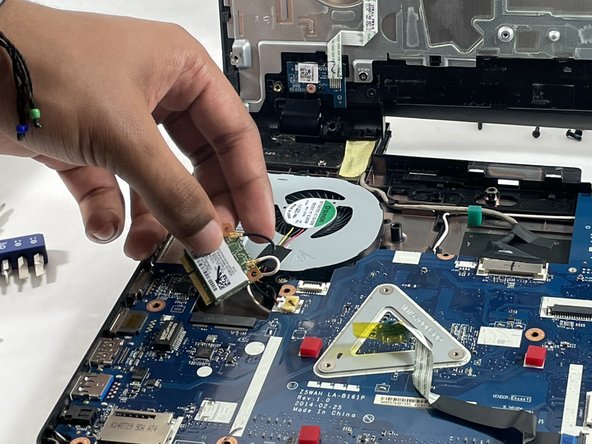
    • Using a Philips #0 screwdriver, remove the two 3 mm screws from the corners of the Wi-Fi card.

    • Carefully lift the network card from it's slot, and disconnect the two coaxial cables.

  7. Acer Aspire E5-571P-55TL RAM Replacement: Schritt 7, Bild 1 von 2 Acer Aspire E5-571P-55TL RAM Replacement: Schritt 7, Bild 2 von 2
    • The CPU fan can be found in the upper left corner of the laptop.

    • Using a Phillips #0 screwdriver, remove the two 4.5 mm screws from the fan.

  8. Acer Aspire E5-571P-55TL RAM Replacement: Schritt 8, Bild 1 von 2 Acer Aspire E5-571P-55TL RAM Replacement: Schritt 8, Bild 2 von 2
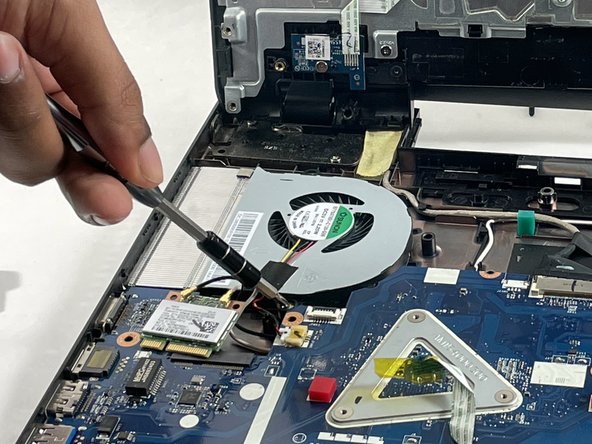
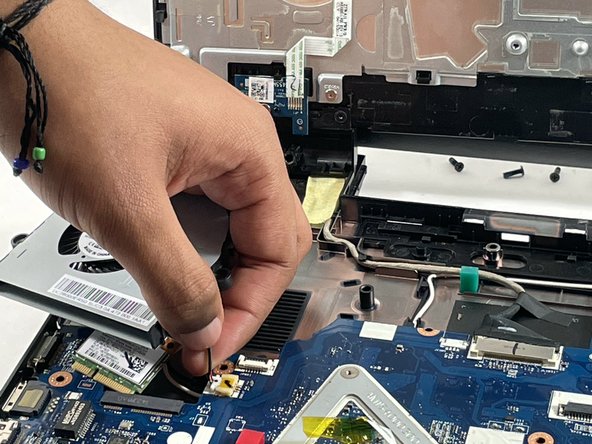
    • Use tweezers to safely remove the fan plug from the motherboard. To remove the plug, gently push left.

  9. Acer Aspire E5-571P-55TL RAM Replacement: Schritt 9, Bild 1 von 1
    • Make sure that all fan wires are disconnected from the board.

    • Lift the curved end of the fan, and safely remove it.

  10. Acer Aspire E5-571P-55TL RAM Replacement, Hard Drive: Schritt 10, Bild 1 von 1
    • Using a Phillips #0 screwdriver, remove the two 8 mm screws holding the hard drive carriage in place.

  11. Acer Aspire E5-571P-55TL RAM Replacement: Schritt 11, Bild 1 von 2 Acer Aspire E5-571P-55TL RAM Replacement: Schritt 11, Bild 2 von 2
    • Carefully unplug the ribbon cable running across the hard drive carriage and place it to the side.

    • Remove the hard drive by sliding it to your right, away from the motherboard, next pull the hard drive towards yourself and away from the laptop.

  12. Acer Aspire E5-571P-55TL RAM Replacement: Schritt 12, Bild 1 von 1
    • Once again using a Phillips #0 screwdriver, remove the two 3 mm screws highlighted on each side of the hard drive case.

    • Open the hard drive case to replace the hard drive.

  13. Acer Aspire E5-571P-55TL RAM Replacement, Motherboard: Schritt 13, Bild 1 von 2 Acer Aspire E5-571P-55TL RAM Replacement, Motherboard: Schritt 13, Bild 2 von 2
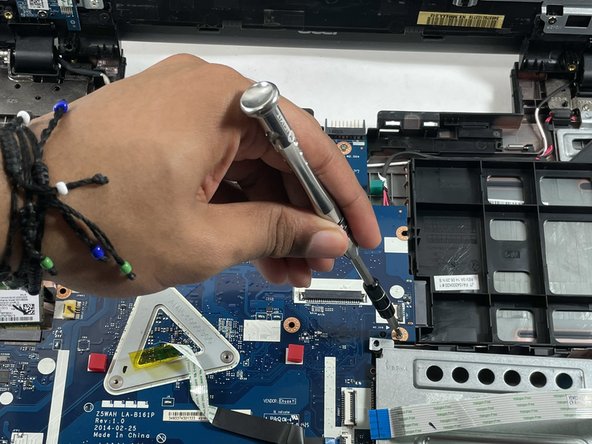
    • With a Phillips #0 screwdriver, remove the two 4 mm screws from the motherboard.

  14. Acer Aspire E5-571P-55TL RAM Replacement: Schritt 14, Bild 1 von 3 Acer Aspire E5-571P-55TL RAM Replacement: Schritt 14, Bild 2 von 3 Acer Aspire E5-571P-55TL RAM Replacement: Schritt 14, Bild 3 von 3
    • Carefully disconnect the speaker connection to the motherboard.

  15. Acer Aspire E5-571P-55TL RAM Replacement: Schritt 15, Bild 1 von 3 Acer Aspire E5-571P-55TL RAM Replacement: Schritt 15, Bild 2 von 3 Acer Aspire E5-571P-55TL RAM Replacement: Schritt 15, Bild 3 von 3
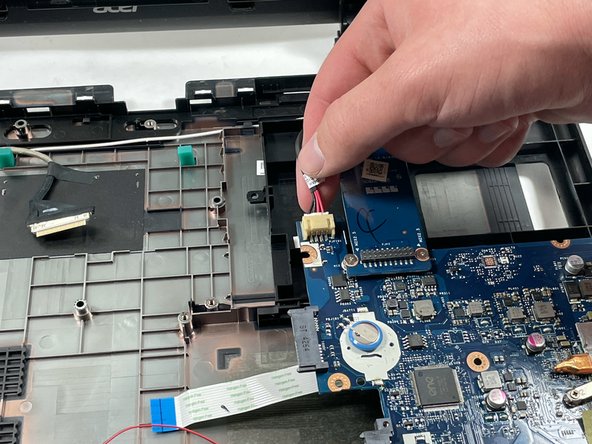
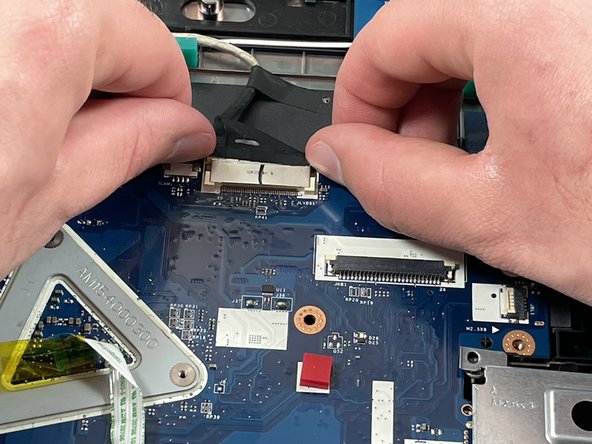
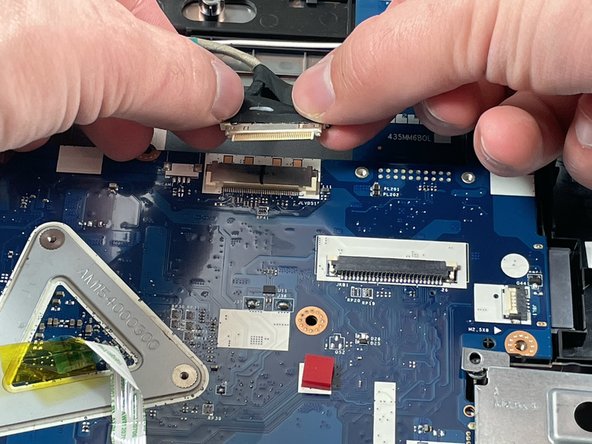
    • The last connection to the motherboard is the screen. Gently disconnect the cable from the motherboard.

  16. Acer Aspire E5-571P-55TL RAM Replacement: Schritt 16, Bild 1 von 1
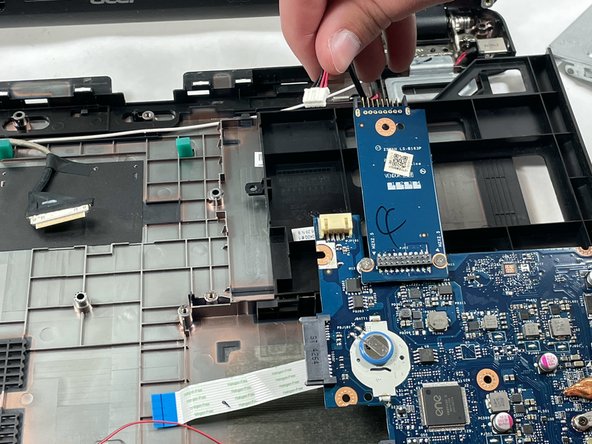
    • Lift the motherboard up from the top right corner, and then pull it right to release it from the case.

  17. Acer Aspire E5-571P-55TL RAM Replacement, RAM: Schritt 17, Bild 1 von 2 Acer Aspire E5-571P-55TL RAM Replacement, RAM: Schritt 17, Bild 2 von 2
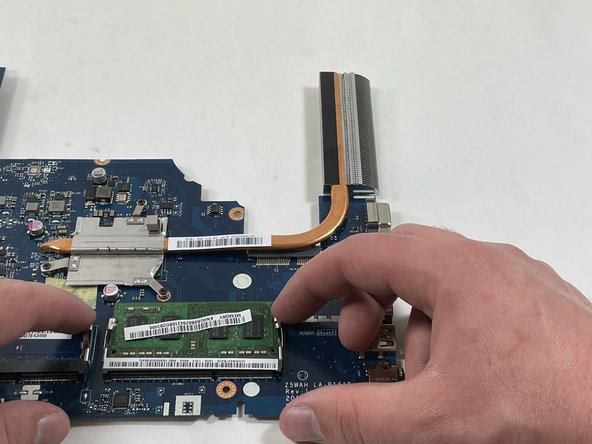
    • Flipe the motherboard over.

    • The RAM is locked into place by two clips.

    • Using the tips of each index finger, gently pull the clips away from the RAM module.

  18. Acer Aspire E5-571P-55TL RAM Replacement: Schritt 18, Bild 1 von 1
    • When the RAM stick is released, slide it out of the slot.

Abschluss

To reassemble your device, follow these instructions in reverse order.

Max Piekos

Mitglied seit: 03/23/22

459 Reputation

4 Anleitungen geschrieben

Team

UMass Dartmouth, Team B-1, Gurgel Spring 2022 Mitglied von UMass Dartmouth, Team B-1, Gurgel Spring 2022

UMASSD-GURGEL-S22SBG1

4 Mitglieder

6 Anleitungen geschrieben

0 Kommentare

Kommentar hinzufügen

Seitenaufrufe:

Letzte 24 Stunden: 0

Letzte 7 Tage: 1

Letzte 30 Tage: 9

Insgesamt: 362