Einleitung
Hard drives store all your data, but they are slow and can fail. This guide will show you how to replace a broken or slow hard drive with a different hard drive or solid state drive.
Was du brauchst
-
-
-
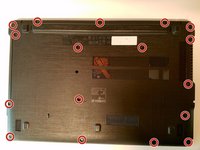
Unscrew all 17 (5mm) Philips head screws from the bottom.
-
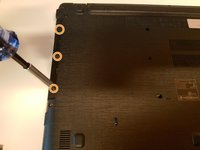
Unscrew the 3 (2.5mm) Philips head screws underneath the optical drive.
-
-
-
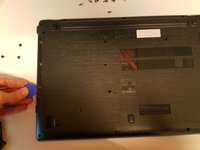
Run a pick around the edge of the laptop (between the two parts) to open it.
-
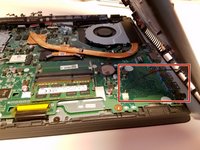
Lift the left side of the case up and unplug the speaker cable before fully taking the bottom off.
-


To reassemble your device, follow these instructions in reverse order.
To reassemble your device, follow these instructions in reverse order.
Rückgängig: Ich habe diese Anleitung nicht absolviert.
9 weitere Personen haben diese Anleitung absolviert.

Team

Cal Poly, Team S12-G5, Banghart Winter 2018 Mitglied von Cal Poly, Team S12-G5, Banghart Winter 2018
CPSU-BANGHART-W18S12G5
2 Mitglieder
15 Anleitungen geschrieben