Einleitung
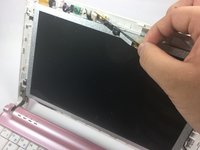
This process is simple, but you may have to detach the camera by pulling a little harder than expected. When doing this be careful not to pull on any wires directly, just the casing.
Was du brauchst
-
-
With your fingers, remove 6 rubber coverings located at the edges of screen. The rubber coverings are held in place with a small amount of adhesive, but you should be able to peel them off easily.
-
-
-
Using a Phillips #1 screwdriver, unscrew the six 5.2mm screws in the places where the rubber coverings were located.
-
-
-
-
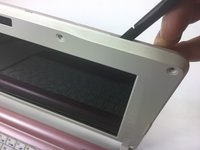
Slide the spudger between the thin gap located between the white and pink plastic casing at the top.
-
Move the spudger from the right side to the left to detach the white plastic frame from the pink plastic casing.
-
Remove the white frame by pulling it towards yourself.
-
-
-
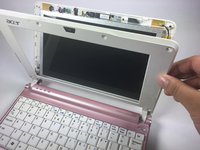
At the top of the display screen, pull the brown connector towards the right with your right hand while holding on to the black piece of electrical tape next to the white connector with your left hand to disconnect the two connectors from each other.
-
-
-
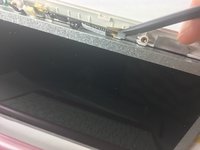
Use the spudger to detach the piece of tape from the camera by sliding it between the camera and tape.
-
Pull the camera towards you to remove it.
-


To reassemble your device, follow these instructions in reverse order.
To reassemble your device, follow these instructions in reverse order.

Team

Baylor, Team 4-3, Williams Fall 2016 Mitglied von Baylor, Team 4-3, Williams Fall 2016
BU-WILLIAMS-F16S4G3
3 Mitglieder
8 Anleitungen geschrieben