Einleitung
A functioning screen is essential for using a laptop effectively but it may become cracked or unresponsive. Replacing a damaged LCD requires the removal of the battery and then the front cover before accessing the LCD screen for removal. The removal of the screen for replacement is detailed in this guide.
Was du brauchst
-
-
Orient the ACER Aspire One to where the bottom of the laptop is facing upward as shown in the picture.
-
-
-
Insert a spudger and slide the tab to the right.
-
Hold the tab in the right-hand position and firmly push or pull the battery upward to remove it from the laptop.
-
-
-
-
Orient the laptop as shown in the picture with the open screen facing toward you.
-
-
-
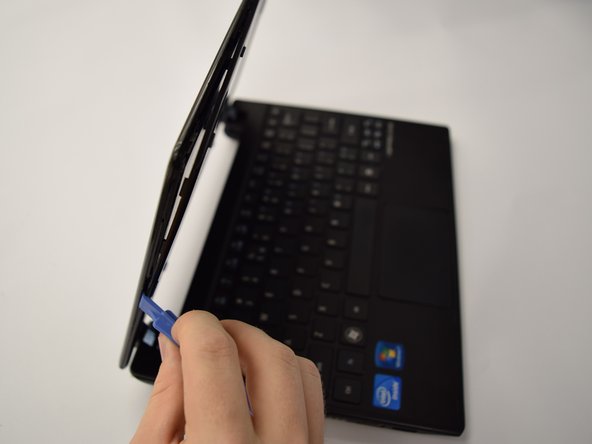
Insert the spudger into the indicated crease.
-
Firmly slide spudger around the edge of the entire laptop to remove the front plate of the screen.
-
-
-
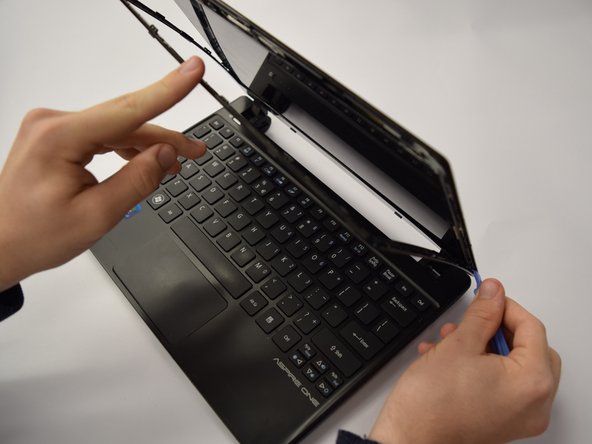
Identify the four 6 mm Phillips screws that are necessary to remove the LCD screen.
-
Remove all four screws using a Phillips #0 Screwdriver.
-
Pull away the LCD screen from the back cover of the laptop without ripping the ribbon cable connecting it to the bottom of the laptop.
-
-
-
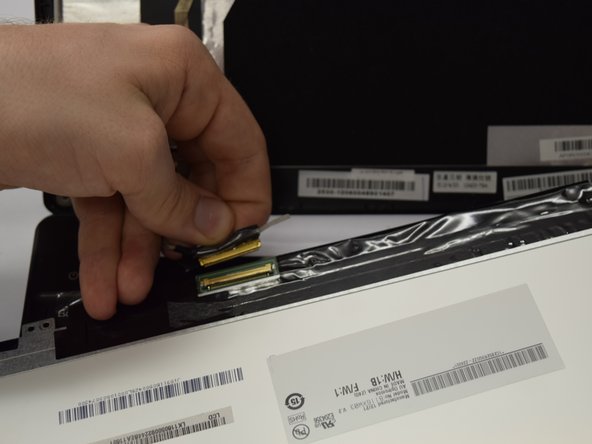
Remove the tape covering the port connecting the screen to the bottom of the laptop.
-
To remove the LCD screen, gently pull the cable straight out of the screen.
-


To reassemble your device, follow these instructions in reverse order.
To reassemble your device, follow these instructions in reverse order.
Rückgängig: Ich habe diese Anleitung nicht absolviert.
3 weitere Nutzer:innen haben diese Anleitung absolviert.
Team

Clemson, Team 7-1, Benson Spring 2016 Mitglied von Clemson, Team 7-1, Benson Spring 2016
CLEM-BENSON-S16S7G1
4 Mitglieder
14 Anleitungen geschrieben