Zum Hauptinhalt wechseln

Acer Aspire S3 MS2346 Keyboard Replacement

Was du brauchst

  1. Acer Aspire S3 MS2346 Keyboard Replacement, Back Cover: Schritt 1, Bild 1 von 3 Acer Aspire S3 MS2346 Keyboard Replacement, Back Cover: Schritt 1, Bild 2 von 3 Acer Aspire S3 MS2346 Keyboard Replacement, Back Cover: Schritt 1, Bild 3 von 3
    • Remove the 12 5mm Phillips #00 screws.

    • Use a plastic opening tool to gently pry open the back panel.

    • Gently lift up the back panel, exposing the internals of the laptop.

  2. Acer Aspire S3 MS2346 Keyboard Replacement, Motherboard: Schritt 2, Bild 1 von 3 Acer Aspire S3 MS2346 Keyboard Replacement, Motherboard: Schritt 2, Bild 2 von 3 Acer Aspire S3 MS2346 Keyboard Replacement, Motherboard: Schritt 2, Bild 3 von 3
    • Remove the motherboard connector cables by gently lifting the black latch that clamps them in place with a spudger or simply pull the connector from the port.

  3. Acer Aspire S3 MS2346 Keyboard Replacement: Schritt 3, Bild 1 von 2 Acer Aspire S3 MS2346 Keyboard Replacement: Schritt 3, Bild 2 von 2
    • Remove the 5 5mm PH0 screws holding the motherboard in place.

    • Gently remove the motherboard from the chassis.

  4. Acer Aspire S3 MS2346 Keyboard Replacement: Schritt 4, Bild 1 von 1
    • Gently remove the motherboard.

  5. Acer Aspire S3 MS2346 Keyboard Replacement, Speakers: Schritt 5, Bild 1 von 2 Acer Aspire S3 MS2346 Keyboard Replacement, Speakers: Schritt 5, Bild 2 von 2
    • Unscrew the 4 1mm PH00 screws attaching the speakers to the frame.

  6. Acer Aspire S3 MS2346 Keyboard Replacement: Schritt 6, Bild 1 von 1
    • Gently remove the speakers. Note that the wire connecting them may be lightly glued down. If so, gently pry up.

  7. Acer Aspire S3 MS2346 Keyboard Replacement, Battery: Schritt 7, Bild 1 von 1
    • Gently lift the battery from the frame.

  8. Acer Aspire S3 MS2346 Keyboard Replacement, Keyboard: Schritt 8, Bild 1 von 3 Acer Aspire S3 MS2346 Keyboard Replacement, Keyboard: Schritt 8, Bild 2 von 3 Acer Aspire S3 MS2346 Keyboard Replacement, Keyboard: Schritt 8, Bild 3 von 3
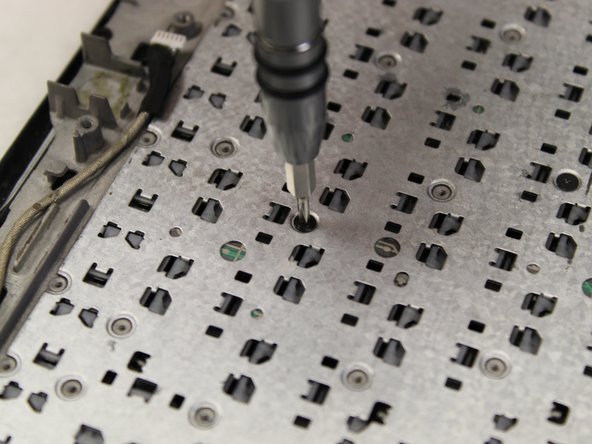
    • The 30 1mm PH000 screws holding the keyboard in place will be distributed all over the back.

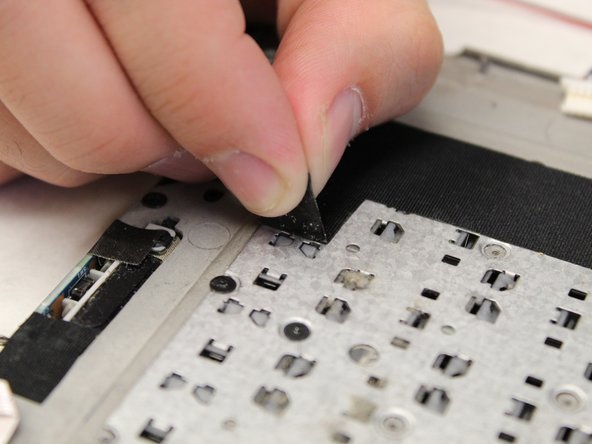
    • You will need to gently pry up the black tape to expose the remaining screws.

  9. Acer Aspire S3 MS2346 Keyboard Replacement: Schritt 9, Bild 1 von 1
    • Gently lift the board exposing the keyboard assembly.

Abschluss

To reassemble your device, follow these instructions in reverse order.

Ein:e weitere:r Nutzer:in hat diese Anleitung absolviert.

Team

Washington State, Team S1-G4, Hope Fall 2018 Mitglied von Washington State, Team S1-G4, Hope Fall 2018

WSU-HOPE-F18S1G4

3 Mitglieder

6 Anleitungen geschrieben

0 Kommentare

Kommentar hinzufügen

Seitenaufrufe:

Letzte 24 Stunden: 0

Letzte 7 Tage: 1

Letzte 30 Tage: 12

Insgesamt: 1,459