Einleitung
This guide will be used when a battery will not charge when connected to a charger. The battery is connected to many wires, so when disconnecting wires be cautious as the wires could become damaged and will also need to be replaced.
Was du brauchst
-
-
-
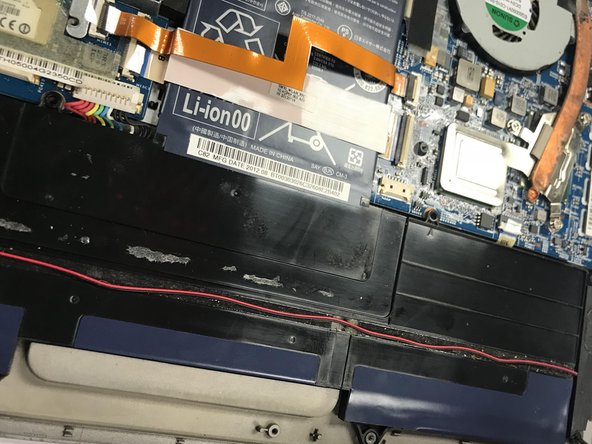
With the Phillips #1 screwdriver, remove the two 5mm screws located on either side of the battery.
-
-
-
Unplug the three white plugs from their sockets using tweezers by pinching the plugs and pulling them outwards.
-
-
-
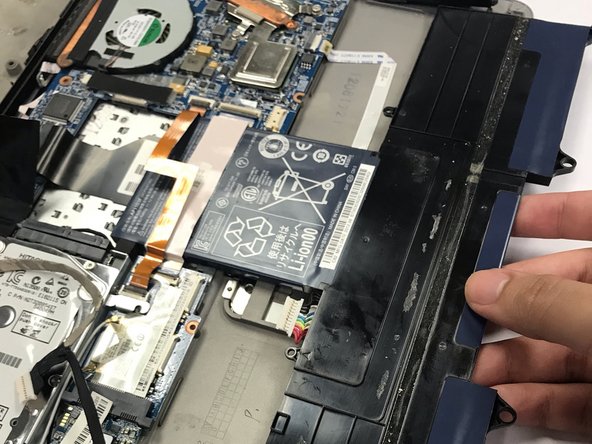
Pull upwards on the plugs located on top of your battery until they have completely come off.
-
-
-
Remove the electrical tape holding down the battery by peeling it upwards.
-
Grab the battery from the bottom and slide it out towards the direction of the bottom of the battery.
-


To reassemble your device, follow these instructions in reverse order.
To reassemble your device, follow these instructions in reverse order.
Rückgängig: Ich habe diese Anleitung nicht absolviert.
2 weitere Nutzer:innen haben diese Anleitung absolviert.
Team

University of North Texas, Team S3-G3, Raign Fall 2018 Mitglied von University of North Texas, Team S3-G3, Raign Fall 2018
UNT-RAIGN-F18S3G3
4 Mitglieder
6 Anleitungen geschrieben