Zum Hauptinhalt wechseln

Acer Aspire V3-551-8469 Hard Drive Replacement

Was du brauchst

  1. Acer Aspire V3-551-8469 Hard Drive Replacement, Hard Drive: Schritt 1, Bild 1 von 2 Acer Aspire V3-551-8469 Hard Drive Replacement, Hard Drive: Schritt 1, Bild 2 von 2
    • To release the battery, slide the orange tab to the right with a spudger.

    • The battery is now released and can be picked up and set to the side.

  2. Acer Aspire V3-551-8469 Hard Drive Replacement: Schritt 2, Bild 1 von 2 Acer Aspire V3-551-8469 Hard Drive Replacement: Schritt 2, Bild 2 von 2
    • Remove the two 5.3 mm Phillips #0 screws.

  3. Acer Aspire V3-551-8469 Hard Drive Replacement: Schritt 3, Bild 1 von 2 Acer Aspire V3-551-8469 Hard Drive Replacement: Schritt 3, Bild 2 von 2
    • Pull off the back panel.

  4. Acer Aspire V3-551-8469 Hard Drive Replacement: Schritt 4, Bild 1 von 1
    • Pull the plastic tab on top of the hard drive.

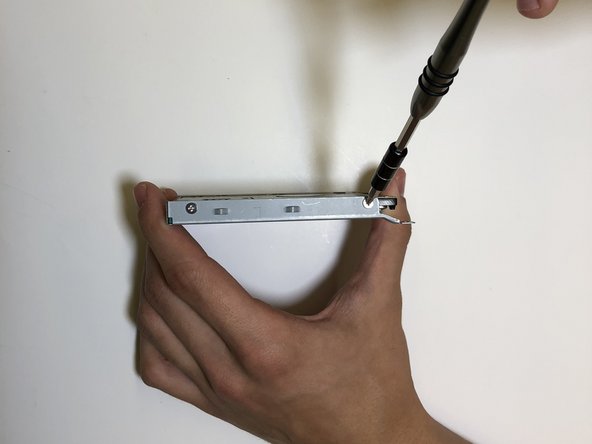
  5. Acer Aspire V3-551-8469 Hard Drive Replacement: Schritt 5, Bild 1 von 2 Acer Aspire V3-551-8469 Hard Drive Replacement: Schritt 5, Bild 2 von 2
    • Remove the four 5.3 mm screws that secure the hard drive in the frame.

Abschluss

After replacing the old hard drive, reassemble your device by following these instructions in reverse order.

2 weitere Nutzer:innen haben diese Anleitung absolviert.

Maritsa Garcia

Mitglied seit: 10/22/18

800 Reputation

5 Anleitungen geschrieben

Team

Baylor, Team S1-G4, Williams Fall 2018 Mitglied von Baylor, Team S1-G4, Williams Fall 2018

BU-WILLIAMS-F18S1G4

3 Mitglieder

5 Anleitungen geschrieben

0 Kommentare

Kommentar hinzufügen

Seitenaufrufe:

Letzte 24 Stunden: 1

Letzte 7 Tage: 3

Letzte 30 Tage: 8

Insgesamt: 565