Zum Hauptinhalt wechseln

Acer Aspire V3-551-8887 Motherboard Replacement

Was du brauchst

  1. Acer Aspire V3-551-8887 Motherboard Replacement, Back Panel: Schritt 1, Bild 1 von 1
    • Locate and remove the two 5.3 mm Phillips #1 screws holding the back panel in place.

  2. Acer Aspire V3-551-8887 Motherboard Replacement: Schritt 2, Bild 1 von 2 Acer Aspire V3-551-8887 Motherboard Replacement: Schritt 2, Bild 2 von 2
    • Use a spudger to pry the panel up from the laptop case and remove it.

    • The laptop should now be open with the RAM and wifi chip now accessible.

  3. Acer Aspire V3-551-8887 Motherboard Replacement, USB Ports: Schritt 3, Bild 1 von 1
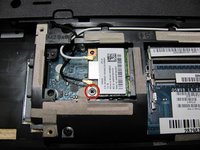
    • Locate the wifi chip.

  4. Acer Aspire V3-551-8887 Motherboard Replacement: Schritt 4, Bild 1 von 2 Acer Aspire V3-551-8887 Motherboard Replacement: Schritt 4, Bild 2 von 2
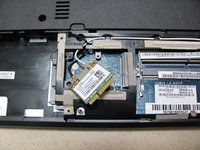
    • Remove the 5 mm Phillips #1 screw holding the wifi chip in place.

    • Carefully remove the wifi chip.

  5. Acer Aspire V3-551-8887 Motherboard Replacement: Schritt 5, Bild 1 von 1
    • Remove the 8, 9 mm Phillips #1 screws holding the panel in place.

  6. Acer Aspire V3-551-8887 Motherboard Replacement: Schritt 6, Bild 1 von 2 Acer Aspire V3-551-8887 Motherboard Replacement: Schritt 6, Bild 2 von 2
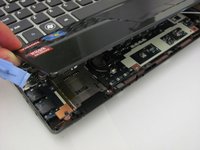
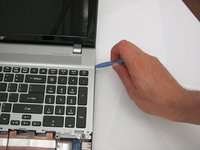
    • Flip the computer over, and with a spudger, remove the black panel directly below the keyboard.

    • Remove the panel and flip it up onto the keyboard

  7. Acer Aspire V3-551-8887 Motherboard Replacement: Schritt 7, Bild 1 von 2 Acer Aspire V3-551-8887 Motherboard Replacement: Schritt 7, Bild 2 von 2
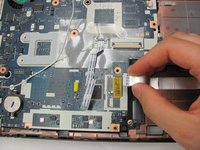
    • With the panel removed, locate the USB port ribbon cable connecting to the motherboard.

    • Carefully disconnect the ribbon cable.

  8. Acer Aspire V3-551-8887 Motherboard Replacement: Schritt 8, Bild 1 von 1
    • Unscrew the 5 mm Phillips #1 screw holding the USB ports in place.

  9. Acer Aspire V3-551-8887 Motherboard Replacement: Schritt 9, Bild 1 von 1
    • The USB ports can now be removed from the laptop.

  10. Acer Aspire V3-551-8887 Motherboard Replacement, Keyboard: Schritt 10, Bild 1 von 1
    • Flip the laptop and remove all 10 of the remaining 9mm screws from the back.

  11. Acer Aspire V3-551-8887 Motherboard Replacement: Schritt 11, Bild 1 von 2 Acer Aspire V3-551-8887 Motherboard Replacement: Schritt 11, Bild 2 von 2
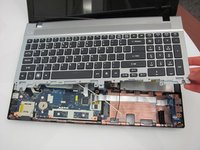
    • Use a spudger to gently lift the keyboard.

  12. Acer Aspire V3-551-8887 Motherboard Replacement, Motherboard: Schritt 12, Bild 1 von 1
    • Remove the two 10 mm Phillips #1 screws connecting the motherboard to the case.

  13. Acer Aspire V3-551-8887 Motherboard Replacement: Schritt 13, Bild 1 von 1
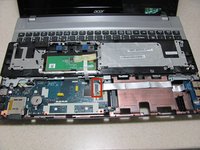
    • Disconnect the 4 ribbon cables connected to the motherboard.

    • Some ribbon cable connections may not be accessible until after beginning to lift.

  14. Acer Aspire V3-551-8887 Motherboard Replacement: Schritt 14, Bild 1 von 1
    • Very carefully lift the motherboard.

    • Do not force the board. If stuck, check that the ports on the left are not stuck, that no wires are still attached, and no screws are still in.

Abschluss

To reassemble your device, follow these instructions in reverse order.

4 weitere Nutzer:innen haben diese Anleitung absolviert.

Team

Cal Poly, Team 8-8, Regan Spring 2014 Mitglied von Cal Poly, Team 8-8, Regan Spring 2014

CPSU-REGAN-S14S8G8

4 Mitglieder

7 Anleitungen geschrieben

0 Kommentare

Kommentar hinzufügen

Seitenaufrufe:

Letzte 24 Stunden: 0

Letzte 7 Tage: 3

Letzte 30 Tage: 5

Insgesamt: 5,292