Einleitung
Your touch pad is not working and you want to replace it in the safest way possible? Are you confused with the steps you need to take in order to replace your touch pad? This guide will teach you how to do so step by step.
Was du brauchst
-
-
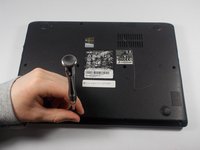
Start the process of removing the bottom cover of the laptop by unscrewing the 8mm screws in the top right and left corners.
-
Remove the remaining 9 visible screws, which are 5mm in length.
-
-
-
Towards the top right corner of the laptop, there is a rubber piece covering the final screw holding the cover on, as well as a set of pins. Use your fingernail to remove this piece of rubber, and then unscrew the hidden 5mm screw.
-
-
-
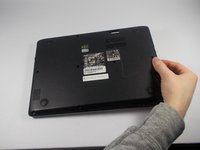
Going around the edges of the laptop, apply light to moderate amounts of pressure away from the laptop to unseat the cover so that it can be removed. Once you have removed the cover, place it face-up in a safe place to avoid getting the inside of the cover dirty.
-
-
-
-
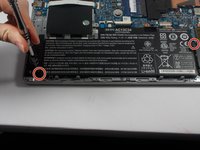
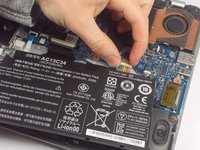
Carefully use light upward pressure to unseat the battery from the case, but do not pull on the cord or try and completely remove the battery from the case.
-
-
-
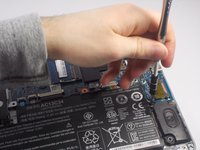
Finally, disconnect the battery from the motherboard by undoing the power connector. To undo the connector, simply apply light to moderate pull on the sides of the connector.
-
-
-
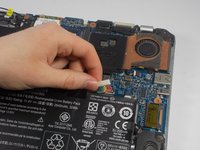
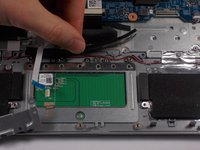
Start by carefully removing the ribbon cable that is plugged into the touch pad.
-
To remove it, gently pull the ribbon cable away from the slot that it is seated in.
-
-
-
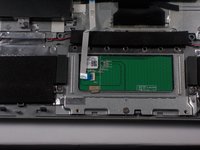
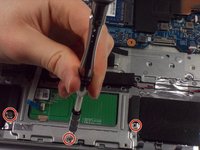
Remove the three visible screws below the touch pad that hold the bracket in place.
-
-
-
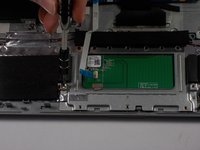
Lift and remove the foam-like piece that is located above the touch pad. Note that it is secured by adhesives, and can be reattached after replacing the touch pad.
-
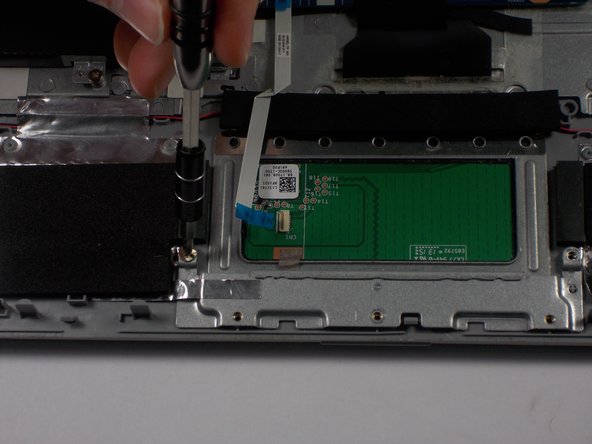
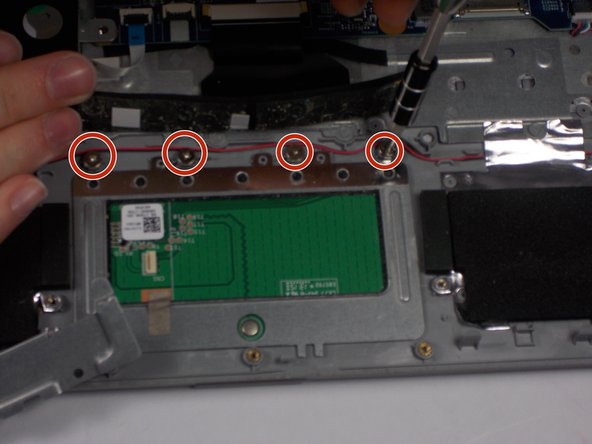
Remove the last four screws that hold the touch pad in place.
-


To reassemble your device, follow these instructions in reverse order.
To reassemble your device, follow these instructions in reverse order.
Rückgängig: Ich habe diese Anleitung nicht absolviert.
Eine weitere Person hat diese Anleitung absolviert.
Team

UMass Dartmouth, Team 5-1, Landers Spring 2016 Mitglied von UMass Dartmouth, Team 5-1, Landers Spring 2016
UMASSD-LANDERS-S16S5G1
3 Mitglieder
10 Anleitungen geschrieben