Einleitung
The following guide summarizes information to replace the wireless adapter in the Acer Aspire V5-131-2629.
If your Acer Aspire does not show an available network or has a frequent failure to connect Wi-Fi, there is a chance that the wireless adapter is in need of replacement.
Be sure to test your wireless adapter and your connection before deciding to go through with the replacement process shown in this guide.
Was du brauchst
-
-
Carefully turn your Acer Aspire V5-131-2629 upside down, so that the battery cell is visible and nearest to you.
-
-
-
Identify the small, oval slide switch on the left hand side of the laptop, directly above the battery.
-
-
-
Insert an opening tool into the hole on the right side of the oval switch. Use the opening tool to slide the switch to the right.
-
-
-
-
With the switch engaged to the right, firmly pull the battery out and towards yourself, parallel to your work surface.
-
-
-
Remove the single Phillips #0 screw from the cover on the underside of the laptop.
-
-
-
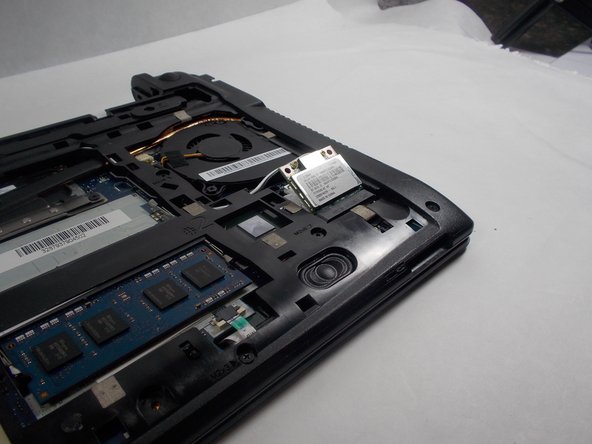
Remove the black and white cables that are attached to the Wi-Fi card.
-


To reassemble your device, follow these instructions in reverse order.
To reassemble your device, follow these instructions in reverse order.
Team

UMass Dartmouth, Team S1-G3, O'Connell Fall 2019 Mitglied von UMass Dartmouth, Team S1-G3, O'Connell Fall 2019
UMASSD-O'CONNELL-F19S1G3
3 Mitglieder
12 Anleitungen geschrieben