Zum Hauptinhalt wechseln

Acer Aspire V5-572 CPU Maintenance and Thermal Compound Replacement

Was du brauchst

Einführungsvideo

  1. Acer Aspire V5-572 CPU Maintenance and Thermal Compound Replacement, Bottom Cover: Schritt 1, Bild 1 von 1
    • Switch-off the Laptop.

    • Remove the seventeen Philips #0 screws.

  2. Acer Aspire V5-572 CPU Maintenance and Thermal Compound Replacement: Schritt 2, Bild 1 von 1
    • If there is a plastic storage tray in the laptop, remove it.

  3. Acer Aspire V5-572 CPU Maintenance and Thermal Compound Replacement: Schritt 3, Bild 1 von 3 Acer Aspire V5-572 CPU Maintenance and Thermal Compound Replacement: Schritt 3, Bild 2 von 3 Acer Aspire V5-572 CPU Maintenance and Thermal Compound Replacement: Schritt 3, Bild 3 von 3
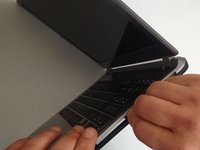
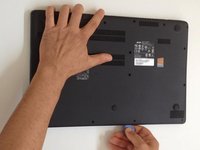
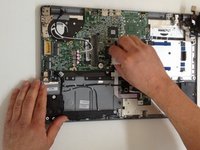
    • Starting from the SD Memory Card hole, start prying between the top and bottom cases.

    • Use plastic tools to avoid damaging the cover.

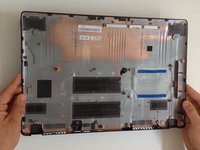
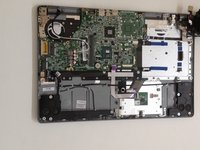
    • Remove the bottom case.

  4. Acer Aspire V5-572 CPU Maintenance and Thermal Compound Replacement: Schritt 4, Bild 1 von 1
    • Disconnect the battery immediately for a safer repair.

    • Pull the battery connector away from the hard drive to disconnect it.

  5. Acer Aspire V5-572 CPU Maintenance and Thermal Compound Replacement, Cooling / Fan System: Schritt 5, Bild 1 von 2 Acer Aspire V5-572 CPU Maintenance and Thermal Compound Replacement, Cooling / Fan System: Schritt 5, Bild 2 von 2
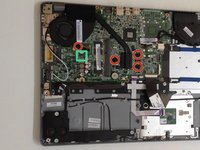
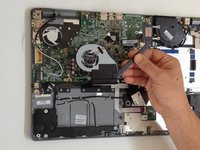
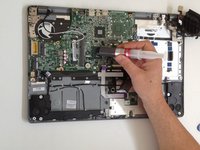
    • Disconnect the Fan cable.

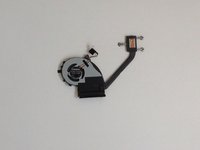
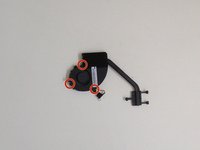
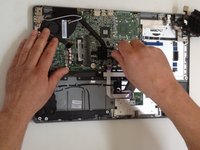
    • Remove the three screws from the CPU cooler and one from the Fan module.

    • When you change the Cooling system, you must clean the processor from old thermal compound and put new.

  6. Acer Aspire V5-572 CPU Maintenance and Thermal Compound Replacement, Acer Aspire V5-572 CPU Maintenance and Thermal Compound Replacement: Schritt 6, Bild 1 von 3 Acer Aspire V5-572 CPU Maintenance and Thermal Compound Replacement, Acer Aspire V5-572 CPU Maintenance and Thermal Compound Replacement: Schritt 6, Bild 2 von 3 Acer Aspire V5-572 CPU Maintenance and Thermal Compound Replacement, Acer Aspire V5-572 CPU Maintenance and Thermal Compound Replacement: Schritt 6, Bild 3 von 3
    • Use a lint-free cloth to clean the old thermal compound.

    • If the thermal compound is solidified, you can use a flat end of any plastic tool to scrape it off.

    • Use again cloth with isopropyl alcohol to clean the Thermal surface.

  7. Acer Aspire V5-572 CPU Maintenance and Thermal Compound Replacement: Schritt 7, Bild 1 von 3 Acer Aspire V5-572 CPU Maintenance and Thermal Compound Replacement: Schritt 7, Bild 2 von 3 Acer Aspire V5-572 CPU Maintenance and Thermal Compound Replacement: Schritt 7, Bild 3 von 3
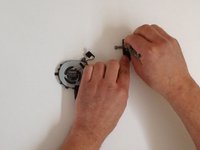
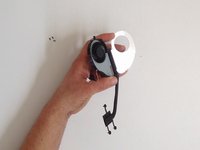
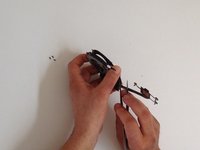
    • Remove the 3x Phillips screws and open the Fan case.

    • Use a soft brush and clean the Fan and the Cooler.

  8. Acer Aspire V5-572 CPU Maintenance and Thermal Compound Replacement: Schritt 8, Bild 1 von 3 Acer Aspire V5-572 CPU Maintenance and Thermal Compound Replacement: Schritt 8, Bild 2 von 3 Acer Aspire V5-572 CPU Maintenance and Thermal Compound Replacement: Schritt 8, Bild 3 von 3
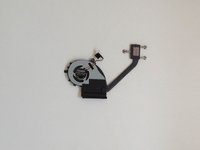
    • Use the same technic to clean the surface of the processor from the old thermal compound

    • Be carefully,if you don't want to break the CPU.

    • Dispense a small amount of thermal compound and gently smear it over the entire processor surface.

  9. Acer Aspire V5-572 CPU Maintenance and Thermal Compound Replacement: Schritt 9, Bild 1 von 2 Acer Aspire V5-572 CPU Maintenance and Thermal Compound Replacement: Schritt 9, Bild 2 von 2
    • Careful install the Cooling system with even pressure from all sides, and the bead that you placed on the surface will spread over the entire contact surface.

Abschluss

To reassemble your device, follow these instructions in reverse order.

ZFix

Mitglied seit: 12/09/13

191.278 Reputation

330 Anleitungen geschrieben

Team

Master Techs Mitglied von Master Techs

Community

322 Mitglieder

2.528 Anleitungen geschrieben

0 Kommentare

Kommentar hinzufügen

Seitenaufrufe:

Letzte 24 Stunden: 1

Letzte 7 Tage: 9

Letzte 30 Tage: 18

Insgesamt: 3,160